How to Install Vinyl Plank Flooring | Our DIY Camper 2.0
This post may contain affiliate links · This blog generates income via ads
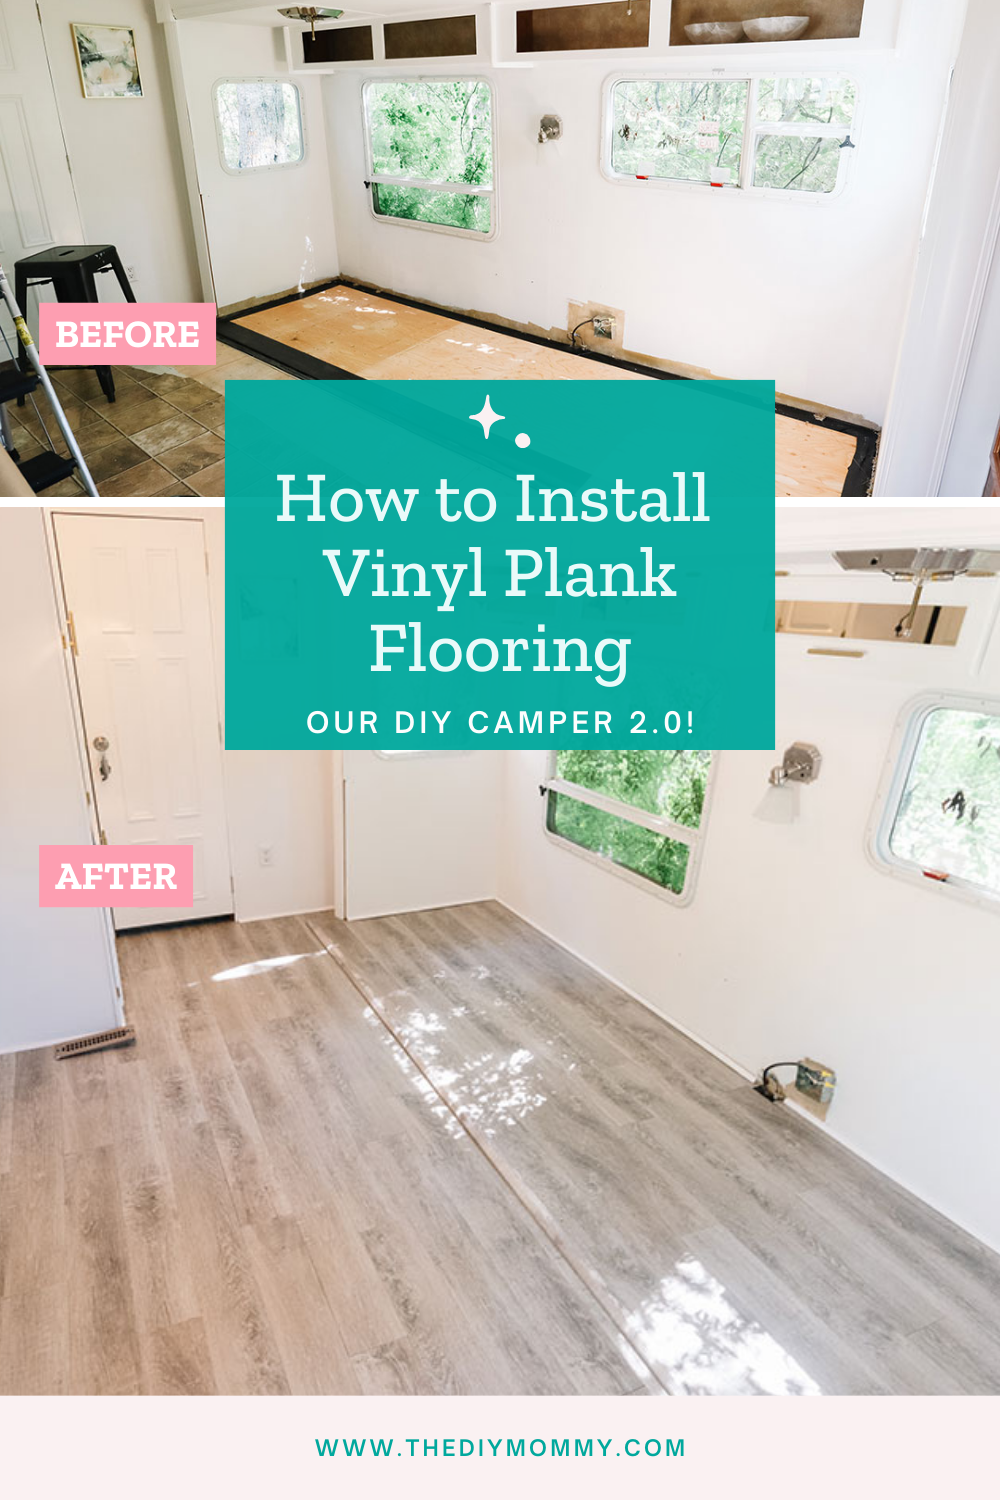
New flooring material can make a HUGE difference in how a camper looks and functions. If you’ve ever thought about installing vinyl plank flooring in an RV with a pull out, this post is for you! This vinyl flooring was easy to work with. I think it is a great option for improving the look of your camper on a budget. Come see how I did it, so you too can enjoy the great outdoors in comfort and style.
Here’s what I’ve done in the camper so far:
- Removed window cornices, wallpaper borders and MORE than I originally planned
- Updated the kitchen with peel & stick backsplash and countertop
- Painted all the walls, trim and kitchen cabinets
Once all this was finished, I could not ignore the flooring in the RV any longer. It was time to remove the gross carpet and install vinyl plank in the main area of the camper. I avoided this task for a while because I knew it was going to be a lot of work, but I’m so glad I finally took the plunge and got it done. The final result is incredible!
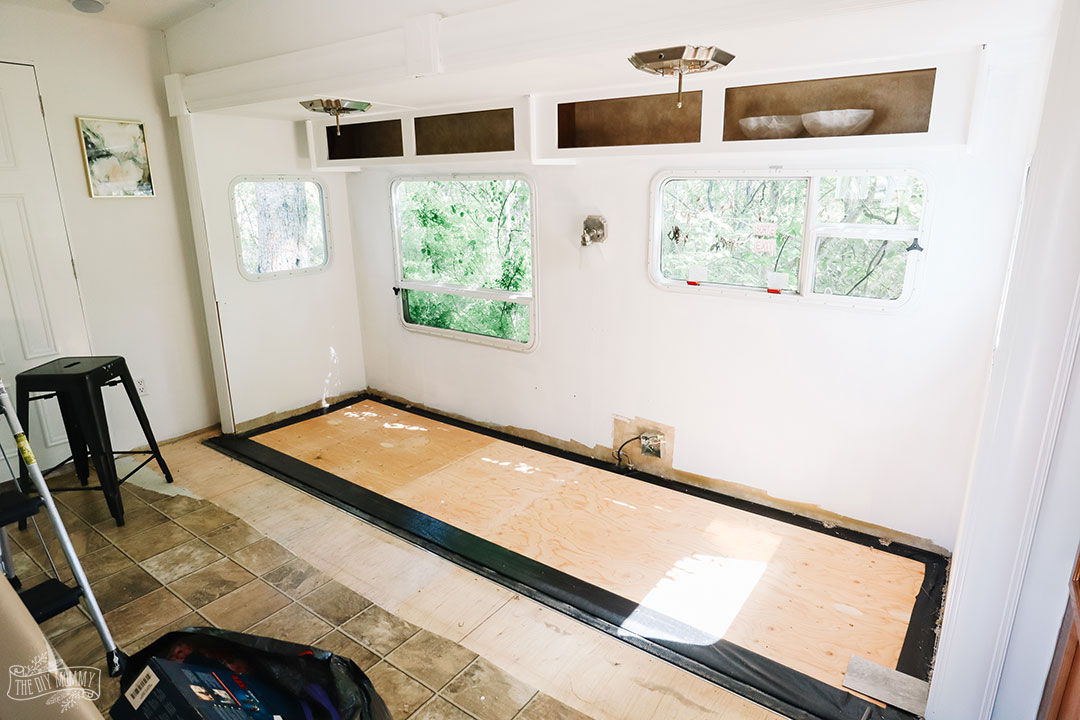
The first thing I did was rip out all of the old shag carpet (yuck!). Seeing how badly the carpet had held up over the years and how dirty the floor underneath it was made me feel very confident about replacing it with a non-carpet flooring option! I did my best to rip up the old linoleum flooring but most of it was stuck onto the sub floor. So, I just left that and floored over top. This works fine as long as you have a flat surface to put your new flooring on, so don’t worry too much if you are in the same boat.
Then I had to decide what the right flooring was for my project. When choosing my new flooring, I knew I wanted something that was easy to clean (hello, camping!), durable, and that would have an easy installation process. I also wanted it to be affordable. I looked at a few replacement flooring options. Because we like to play hard when we are camping, I knew something like carpet tiles, vinyl tiles, or stick tiles would just not cut it and the floor had to stand up to more than normal use.
Luxury vinyl planks felt like an excellent choice for RV flooring because it checked all the boxes on my list. As a bonus it actually looks really nice too! The flooring I chose for our RV is Kairos Duraplank in Sea Salt from Costco. It was the most affordable option in the colour I liked best, and I am still thrilled with my choice!
Watch my YouTube video to see how I installed the vinyl plank flooring in our camper:
If you want to install vinyl plank flooring in an RV, here’s how I did it:
First, let’s talk about how I installed my new vinyl plank floors in the main section of our travel trailer. To cut the flooring, I used a utility knife to score it. Then I gently snapped it apart. You could also use a razor knife or box cutter for this job too. Take a moment to lay out your flooring and make a placement plan for it. You want to stagger the flooring to create a pleasing look, and make sure the patterns for all the boards look nice where you want them. Then you can really get into the nitty-gritty of installation!
1. Cleaning the sub floor
The first step is to clean the sub floor section-by-section with a degreasing cleaner (I used Krud Kutter). This is very important, because your vinyl plank will not stick properly to a dirty surface. Take a bit of time now to clean properly and you will make sure that your new flooring stays in good shape over the long-term. I did not clean the entire floor at one time, because I knew it would just get dirty again as I worked. So I vacuumed and then degreased as I went along, which sounds tedious but actually gave me a nice break from flooring every once in a while! If you clean all at once, you are sure to have to do it again anyway. So I recommend only cleaning a little bit ahead of where you are working.
2. Dry Fit the Vinyl Plank
Dry-fit one piece of the vinyl plank to make sure the pattern works in the location.
3. Glue the Plank in Place
- Apply glue to the back of the plank. I used PL construction glue, but you could use any kind of vinyl glue. I put a wavy line across the entire back of the plank to ensure the piece would stick down properly. This glue does take a little while to dry, so you have a bit of time to make sure it’s exactly where you want it once you apply it to your vinyl plank. As you have guessed by this point, I did not do a floating floor in my camper, but rather stuck every piece down to the sub floor because I decided that would be the most durable way to install it.
- Press the vinyl plank firmly in place once you put the glued side down on the floor. Then step on it to secure it.
- Continue laying the flooring in this manner until the entire surface is covered.
Then, it was time for the pullout!
Here’s how I installed the vinyl plank on the pullout section of our camper:
I was really proud of myself for figuring out how to make the pullout flooring look finished and complete. As you know, the pullout has to slide back and forth. This made re-flooring it so it was both beautiful and functional a bit tricky. Here’s the process I came up with.
- First, I had to decide how I was going to handle the transition area from the pull out to the main floor of the camper. Under the old carpet flooring there was a black plastic edging material and I decided to leave it around the edge of the pull out, since I think it helps protect the pull out edge and makes the entire thing slide in and out nicely. I didn’t want to mess with that! After all, how your pull out works should be a major factor helping you decide how to floor it.
- Then I decided to overlap the vinyl planks about 1″ off the edge of the pull out toward the main camper. This meant that the flooring was a bit higher on that side, but hear me out! I found a way to make it work.
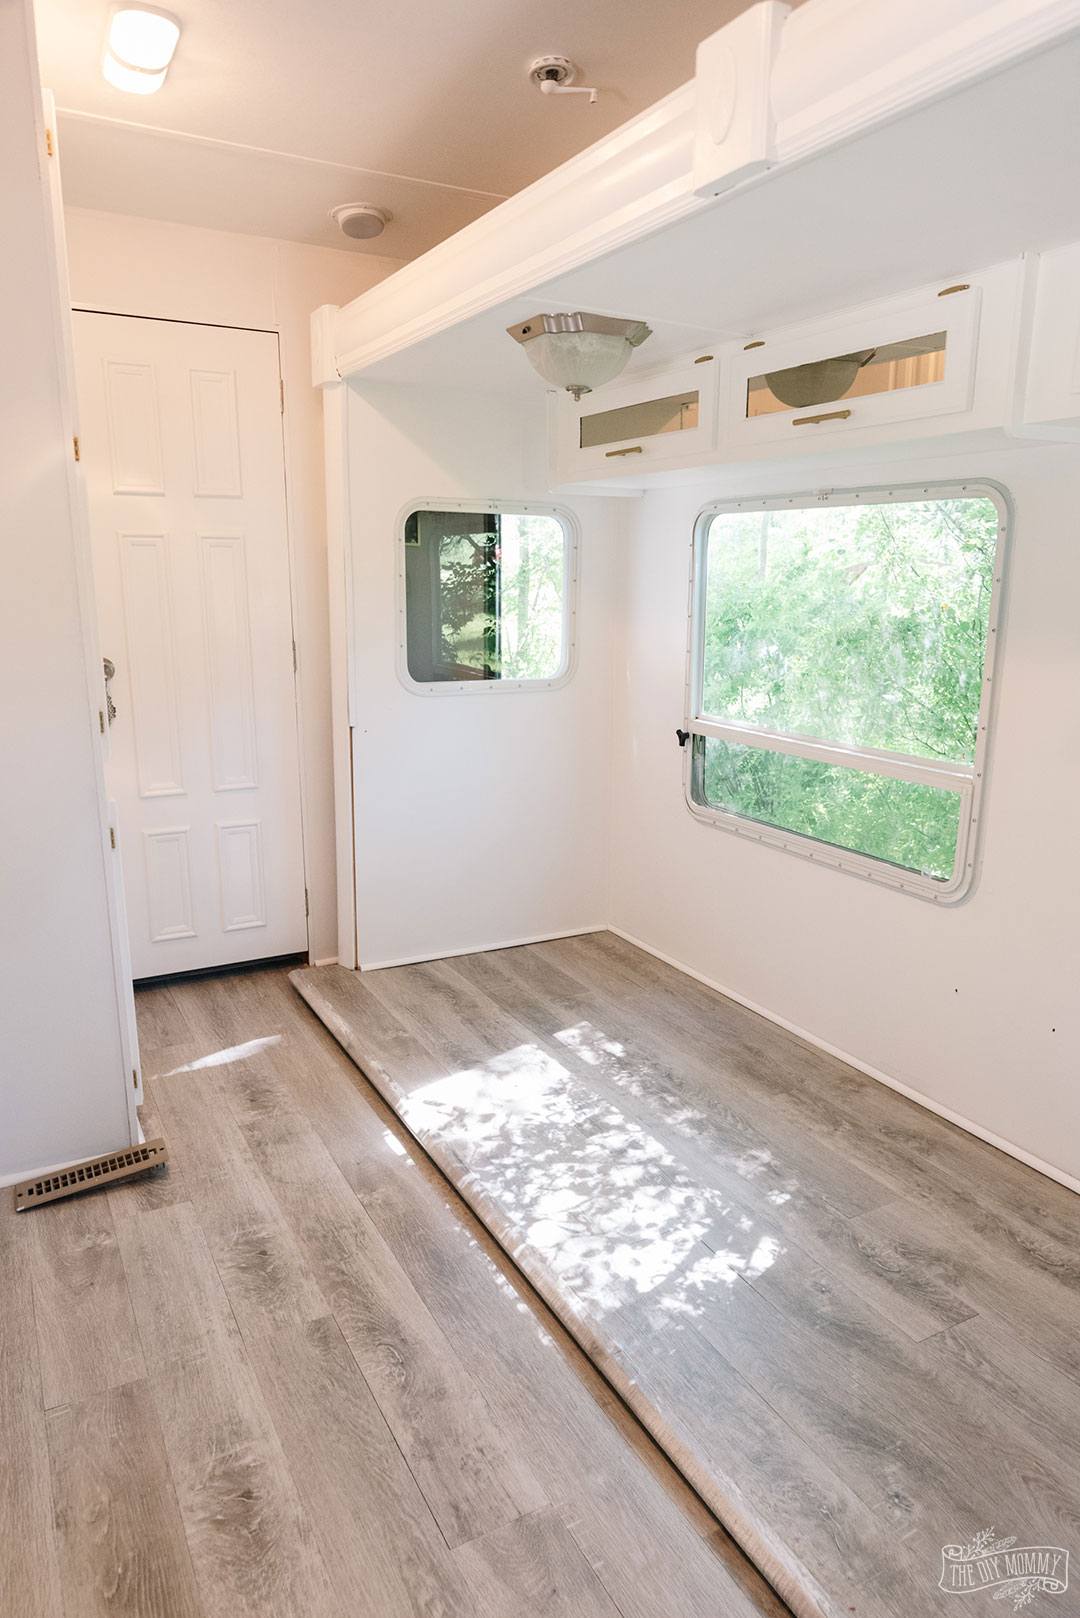
- Then once those overlapped pieces were in place, I worked my way toward the outside wall of the pull out, putting down planks on the bare plywood flooring until I was finished. This meant going around weird corners and making tiny strips to go along the final row under the window. You will just have to deal with these challenges as they come. Remember it is easy to score and snap your flooring! One of the most helpful tips I could give you at this point would be making a paper template for really funky corners so that you can cut the planks a bit more confidently. I found this method really helped me make accurate cuts the first time.
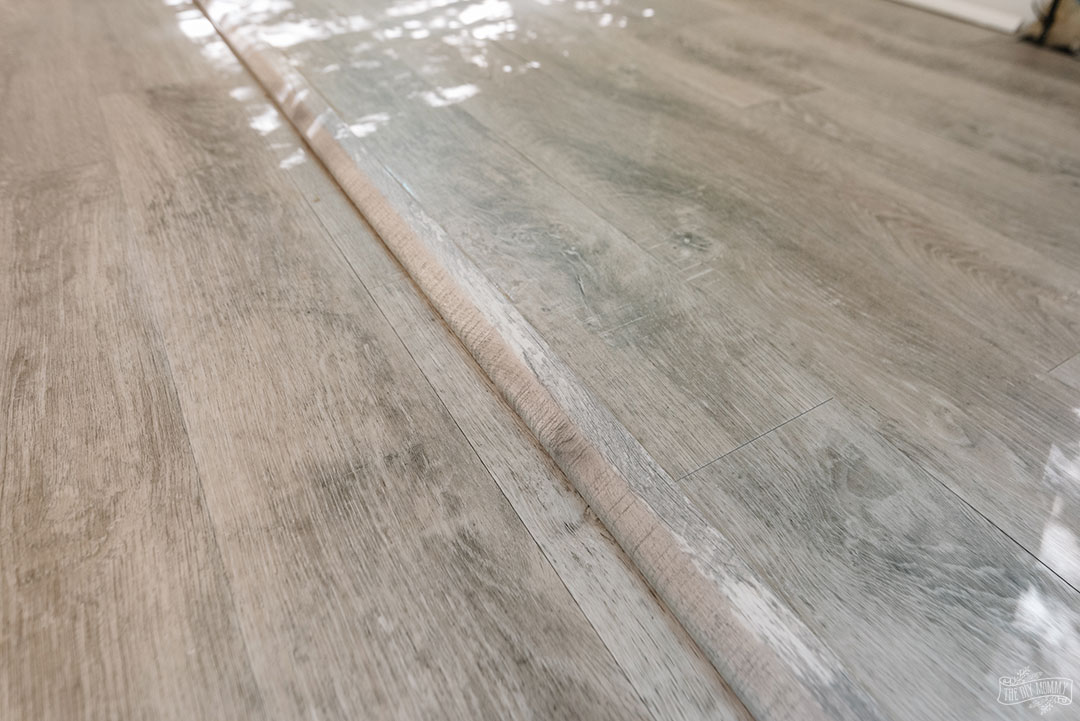
- This next step is where planning and good luck came together to help me with my transition edge! I found this reducer trim at Home Depot that miraculously matches the vinyl plank from Costco. I found it online and eyeballed the colour, and it worked. This is a great product for reducing the look of seam placements in the middle of your floor where the pull out meets the rest of the trailer. If you can’t find it at the original retailer where you bought your vinyl planks, check another home improvement store until you find what you are looking for!
- I applied PL construction glue to the trim, and pressed it down onto the edge of the pull out. This trim gave the pull out edge a nice, finished look and covered the plastic edging underneath nicely. Take a look at how the pull out looks as it’s being retracted!
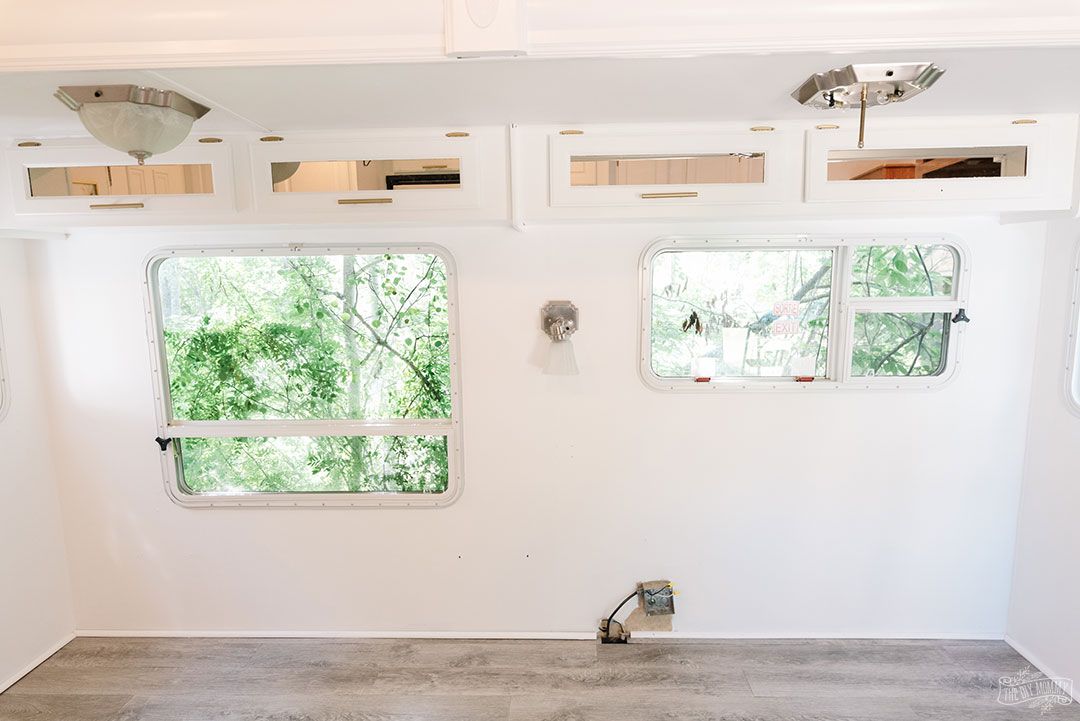
And here’s how the sides of the pull out look:

I need to put some wood filler in the little hole by the trim at one corner, but otherwise I’m very pleased with how this looks! It functions perfectly, too. And this is a good time to remind you that you are putting flooring in a trailer. The standards of perfectionism don’t apply the same way they do elsewhere. I would have been very unhappy with a corner like this in my regular house, but in the trailer small flaws are totally acceptable! This is a great project to practice your skills on before you move on to a more unforgiving project like the main living areas in your own home.

What about the baseboards?
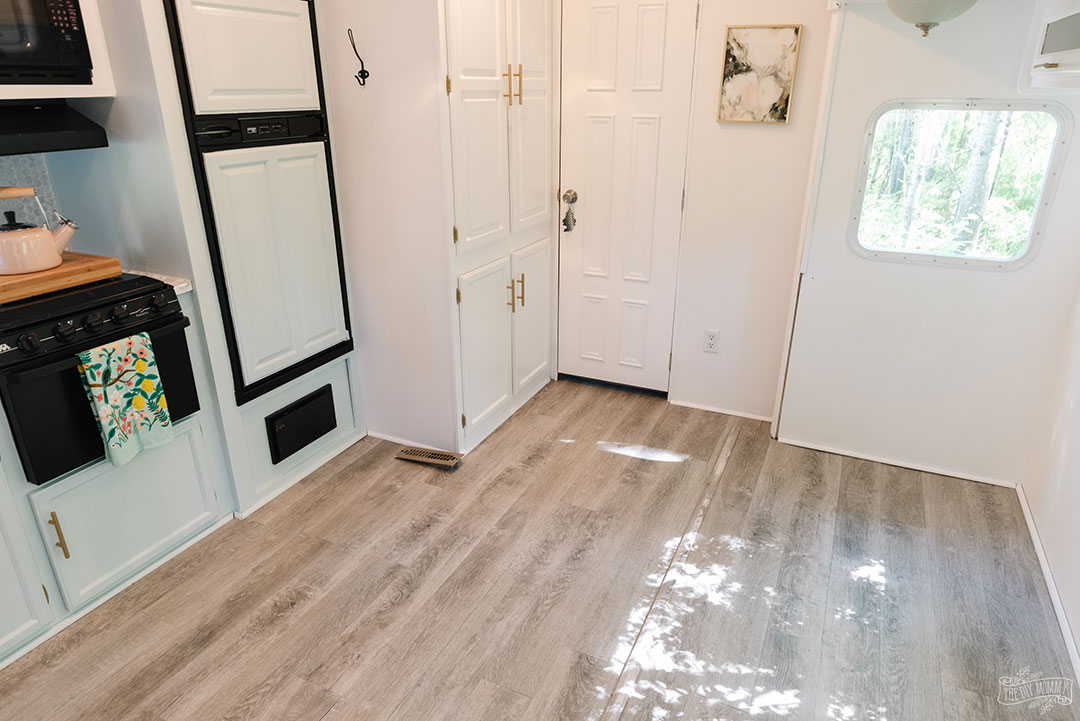
To finish off the flooring project, I added some quarter round trim all the way around the base of the walls and cabinets, mitering it in the corners to make a clean edge. This trim serves as a baseboard of sorts, and does a great job transitioning from the flooring to the wall. I used my 7″ miter saw to make these cuts, since the trim is small. I nailed the trim in place with my finishing nailer. This project didn’t require heavy duty tools, which is just another reason that an RV is a nice place to practice flooring before you tackle bigger areas.
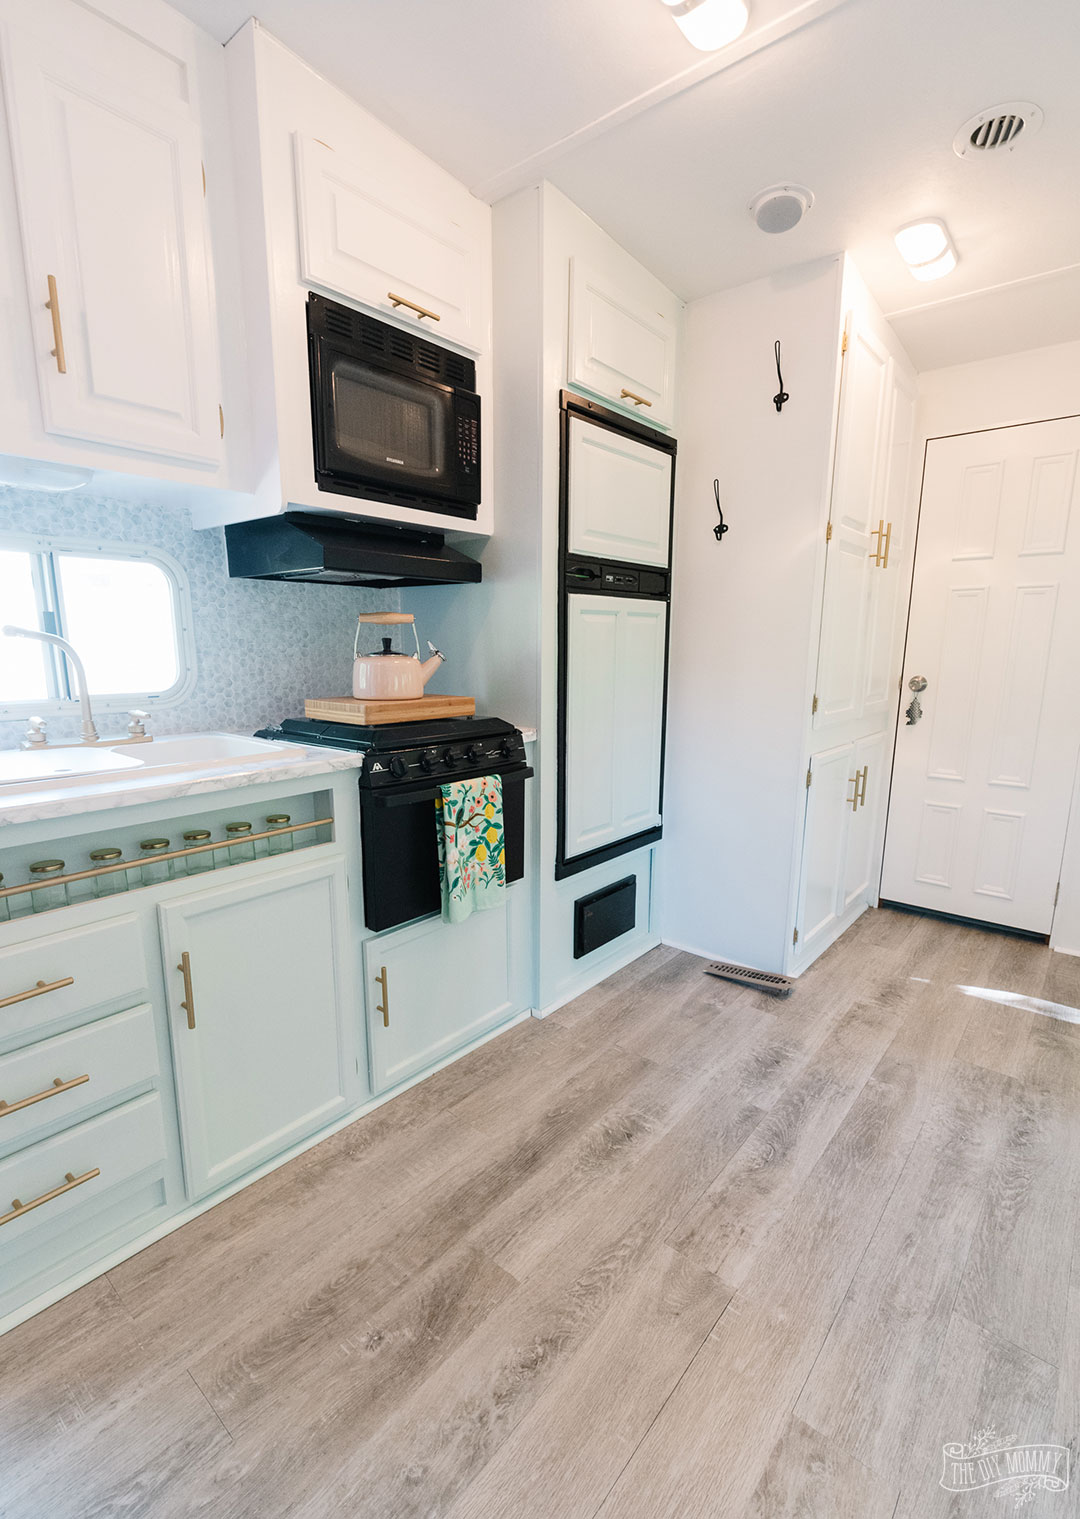
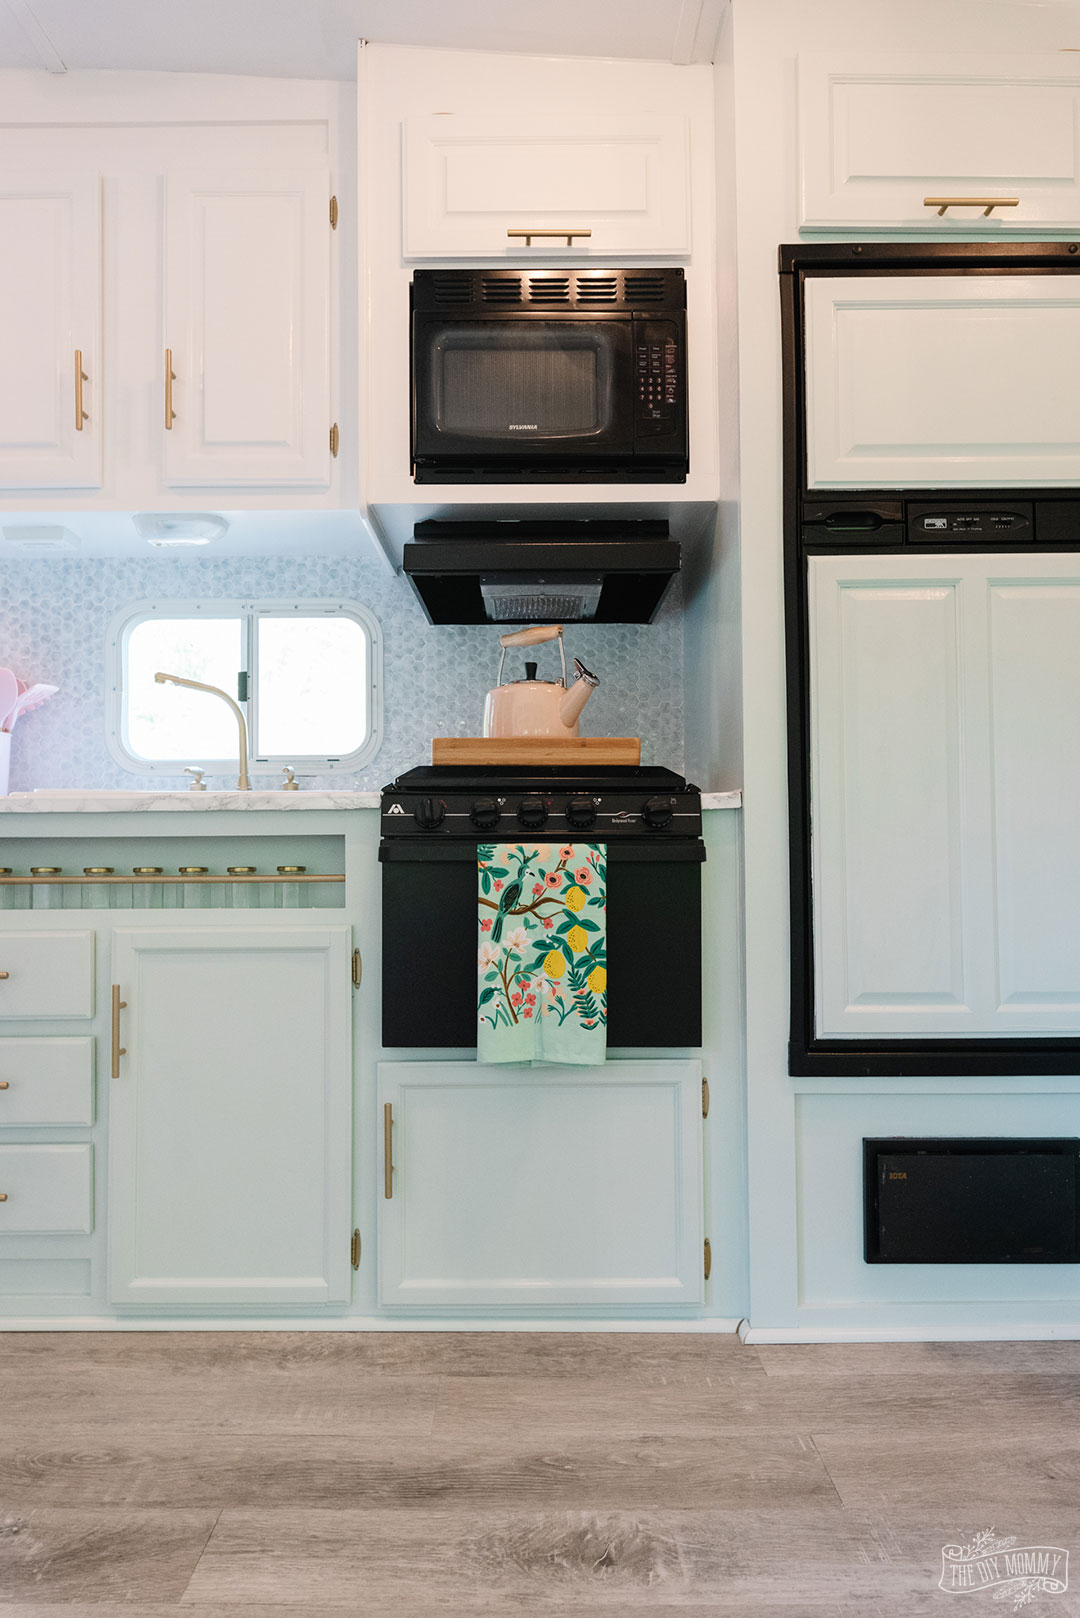
I love how the RV kitchen area looks finished off with the quarter round trim and new flooring! The kitchen and living room areas all have the same flooring now, and I think that putting the planks down on the entire floor gives a coherence to the space that was lacking when it was both carpet and linoleum. I really think continuous flooring was a great choice for our trailer.
As I’m sure you noticed, I’ll also have to create some sort of finished box to hide the electrical in the pull out, and do a DIY treatment to the lights to give them an update. And don’t worry, I didn’t forget about the L-shaped dining bench I’m hoping to get done in the near future! I just set the trim down there so you could really see how it looks all finished. When I’m ready to start working on that space, I can just move the trim out of the way.
Up next? A fun makeover for this entertainment unit:
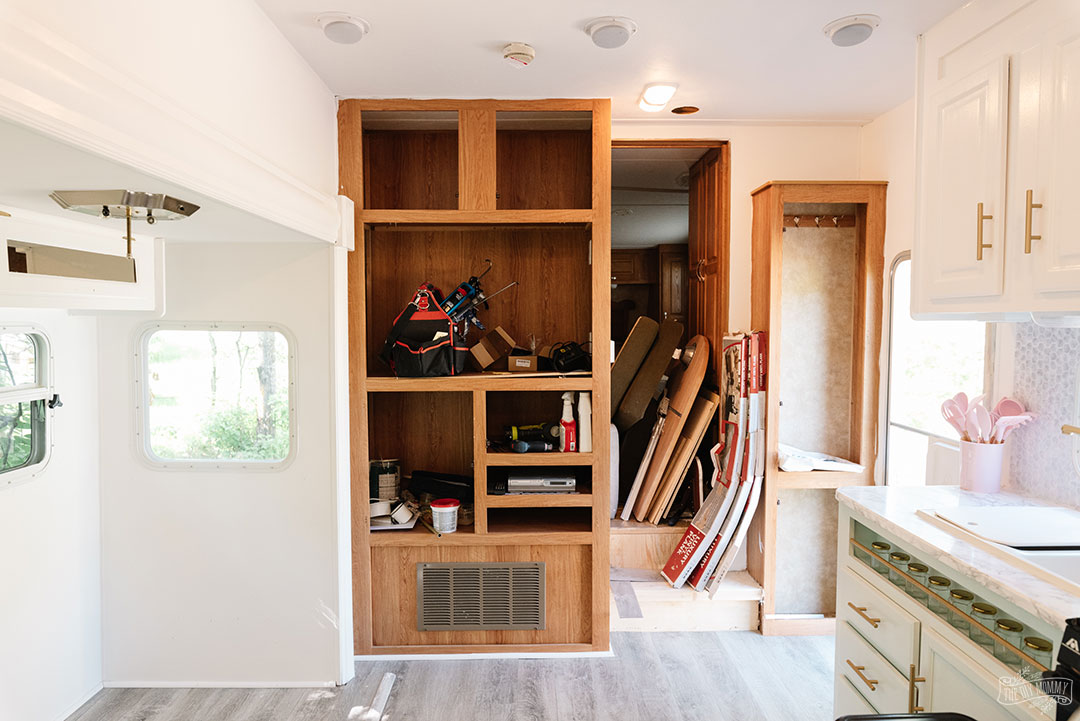
Stay tuned!
Pin Me!
See more DIY RV ideas →
I am in love with this wreath! I better add this to my to-do list for the Fall!! 🙂 Thanks for the awesome ideas 🙂
Where did you buy the fold out couch for this project? I believe in the video you thought it was approx. $200.
Hi Amy! It’s from Structube – you can find links to everything over here: https://thediymommy.com/shop-our-home/
Hello,
Can you tell me the thickness of the vinyl flooring? I really love your remodel.
Thanks Lisa
Hi,
Does that flooring have any light brown tones or beige? Or is it more grey? Also, can this vinyl floor withstand our -30 weather in the winter without cracking?
Looks great!! Thanks
The vinyl floor will expand and contract with temp swings an cause gaps .. install floor in summer have gaps in cold weather I even glued my floor
Christina had no issues so far, we went below -30 and above 30 in the past year 🙂
Vinyl doesn’t expand the way wood or laminate does. You do not have to acclimate vinyl like you do wood or laminate.
great info, nice article
thanks for the info and keep ongoing
I love your new RV floors! I want to redo a RV someday and this is giving me a ton of great ideas! Thanks so much for sharing this at Farmhouse Friday – I’m featuring you at tomorrow’s party!
Awesome!! Thank you so much!
How did you handle leveling the uneven torn area at the edge of the old linoleum? Thanks!
hi ,
when i did my flooring, i used a belt sander to level off the edge…
How thick is the planks? I want to do my trailer floors but not sure how thick I have to be considering I have 3 slide out.
Hi! Here’s a link the flooring Christina purchased: https://www.costco.ca/kairos-duraplank-16.5-cm-(6.5-in.)-embossed-vinyl-plank-flooring.product.100432810.html
We just did the same, replaced the old, gross carpet with vinyl plank. Before laying the flooring, we put an underlay of 1/4 inch thick insulation called Reflectec. (My husband’s idea. He’s been a general contractor for over 40 years.) It comes in rolls, about $25 per roll. We used about 3 3/4 rolls to do all but the bedroom. (When we recarpet the bedroom, we will use it there also.) So much warmer and cut the humidity by about 10%. Just some info for anyone considering replacing the carpet. A little more $ and a little more work but well worth it.
Hey Rebecca – Saw your post on the floor insulation suggestion. Great idea! We’re getting ready to start a reno on our own RV. Flooring is carpeting that’s apparently glued down. What would you suggest for a “simple” method to remove without destroying the subfloor? Any hint or tip would be greatly appreciated. Thanks, Judith
Can you please tell us about how you installed this? I found the product at Lowe’s. Did you just glue it down? Then glue vinyl plank on top?
Hi, Christina linked a video in the post above, in case you’re not seeing it, it’s here: https://youtu.be/vdM2Clc1ADI
Odd question but how strong/weak is the flooring transition at the edge of the slide out? Specifically when the slide out is in. We’re doing a full remodel on a camper and my husband is nervous about that part.
We have been researching how to replace our carpet and lino with vinyl plank for quite awhile. One thing that comes up is how the slide moves over the new flooring. Did you do anything to to the slide to aid it gliding? I have read stories about scrapes and gouges.
Looks awesome! Any problems with wear on the flooring from the slide coming in and out?
The flooring has held up great.
How did the flooring hold up during the winter months? Is that why you glued it down? I bought the planks with the adhesive on the back. Do I need to add more glue so they stay down in the winter? I’m new at this DIY stuff. I need all the help I can get. Thanks.
It’s held up perfectly! Yes, I’d recommend gluing it down for staying power.