• Skip to primary navigation
  • Skip to main content
  • Skip to primary sidebar
The DIY Mommy
  • Home Decor
  • DIY Crafts
  • Organize
  • Printables
  • Recipes
  • Life
  • Shop My Home
  • Lake House
  • About
  • Contact
    • Facebook
    • Instagram
    • Pinterest
    • Twitter
    • YouTube
menu icon
go to homepage
search icon
Homepage link
  • Home Decor
  • DIY Crafts
  • Clean & Organize
  • Recipes
  • Free Printables
  • Life
  • Our Little Lake House
  • Shop Our Home
  • About
  • Contact
    • Facebook
    • Instagram
    • Pinterest
    • Twitter
    • YouTube
  • ×

    Home » DIY Crafts » Upcycling Ideas

    Make a Message Centre from an Old Door

    Published: Jan 21, 2016 · Modified: Dec 26, 2022 by Christina Dennis · This post may contain affiliate links · This blog generates income via ads · Leave a Comment

    Next Friday is the start of the Edmonton Renovation Show and I'm excited to be a part of it this year! I created something for the Ultimate Upcycle Challenge Unhinged! presented by Rust-Oleum in support of Habitat for Humanity Northern Alberta. We were asked to make something from an old door we found at the HFH Restore, and I created a DIY message centre. Today, I wanted to share how I made it so that you could make one too, how you can bid on my door creation (with the proceeds going to Habitat for Humanity) and how you could win 4 tickets to the Edmonton Renovation Show next weekend PLUS front row seats to hear Bryan Baeumler speak next Friday night!
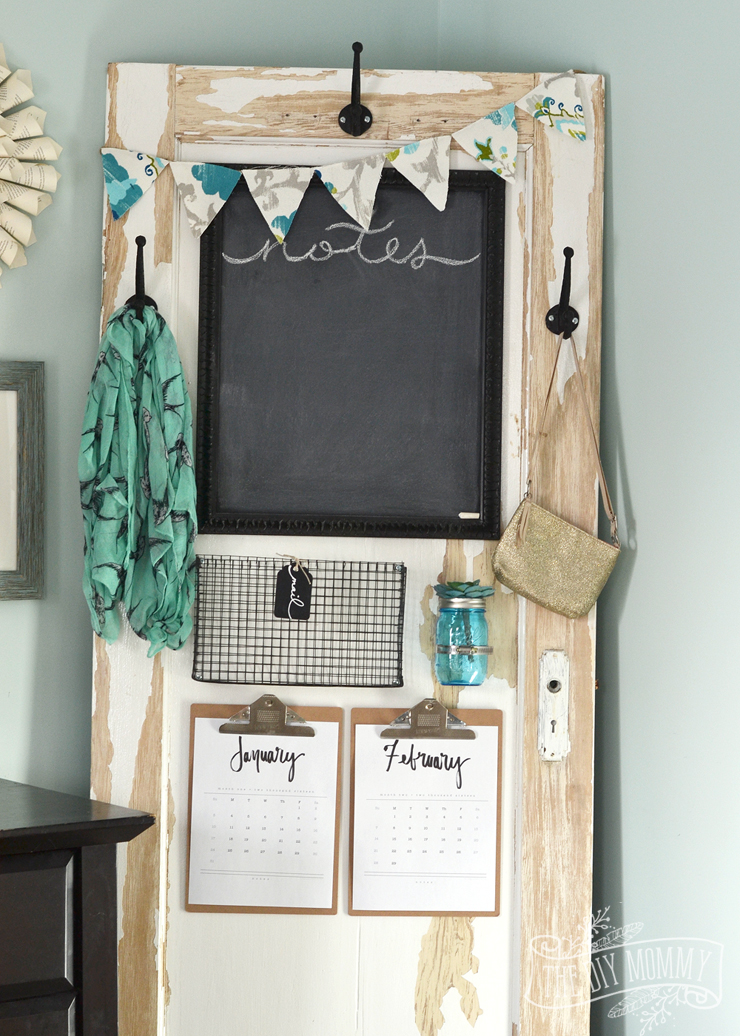
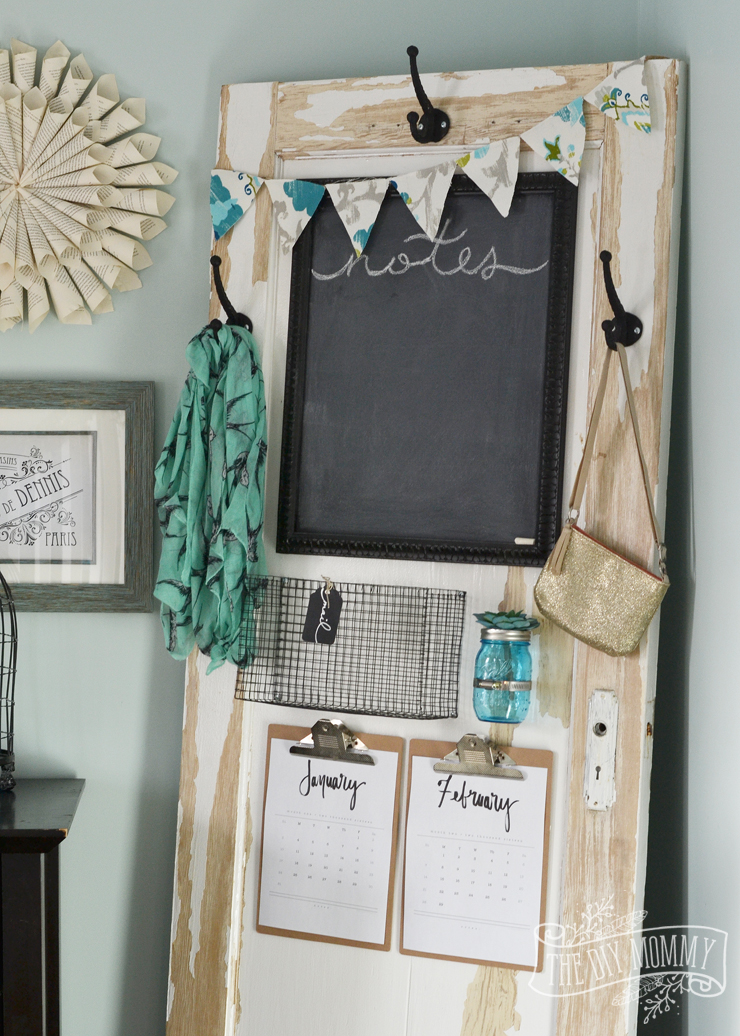
    A shabby chic message centre from a chippy old door - read the instructions here on thediymommy.com.

    It's no secret that I love sticking stuff on doors and walls to help with the organization and cuteness of my home. This antique-door-turned-message-centre is such a fun way to keep your family organized!

    Here's how I made it.

    A shabby chic message centre from a chippy old door - read the instructions here on thediymommy.com.

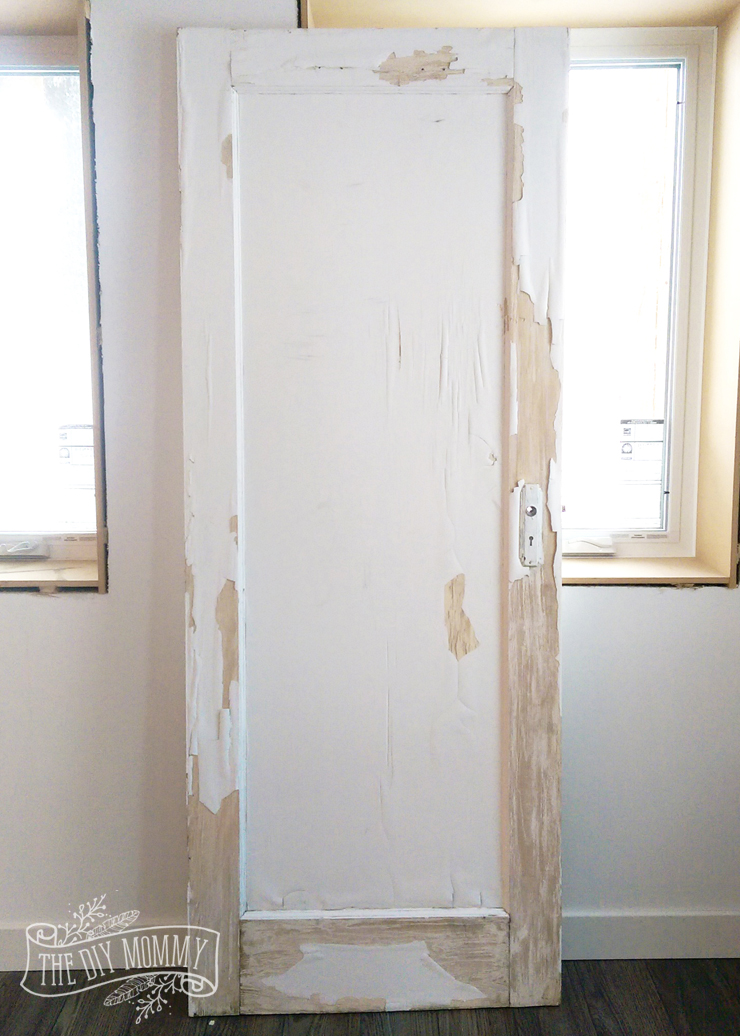
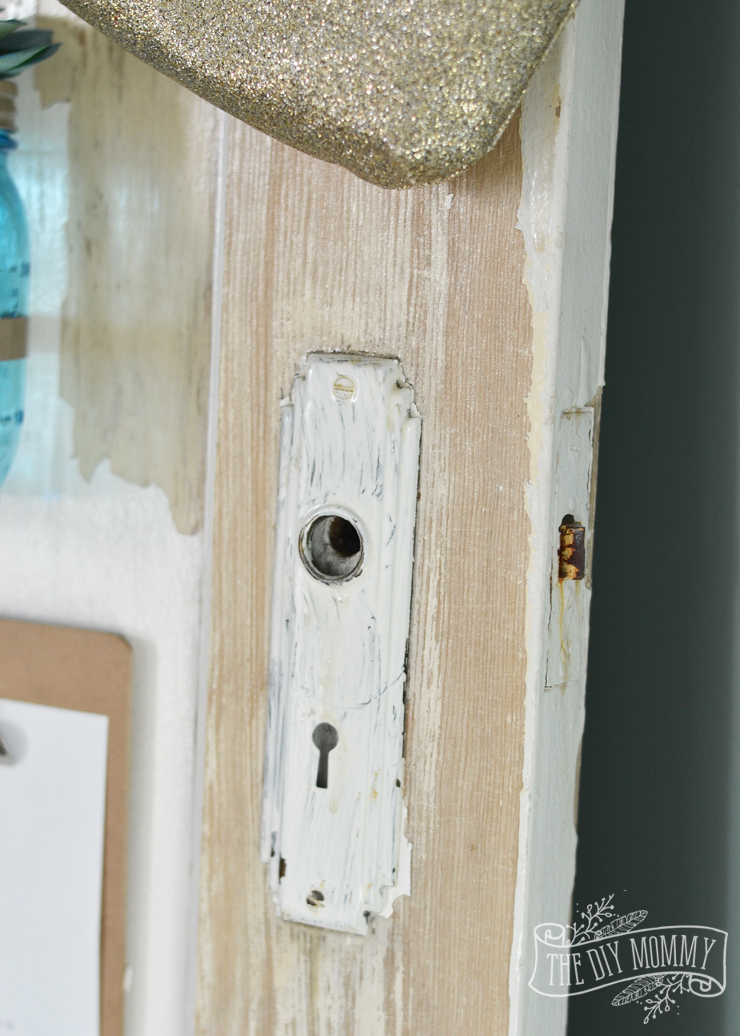
    First, I found a beautiful, chippy old door at the Habitat for Humanity ReStore. Doesn't it look so romantic and shabby chic?! I LOVE old stuff.

    A shabby chic message centre from a chippy old door - read the instructions here on thediymommy.com.

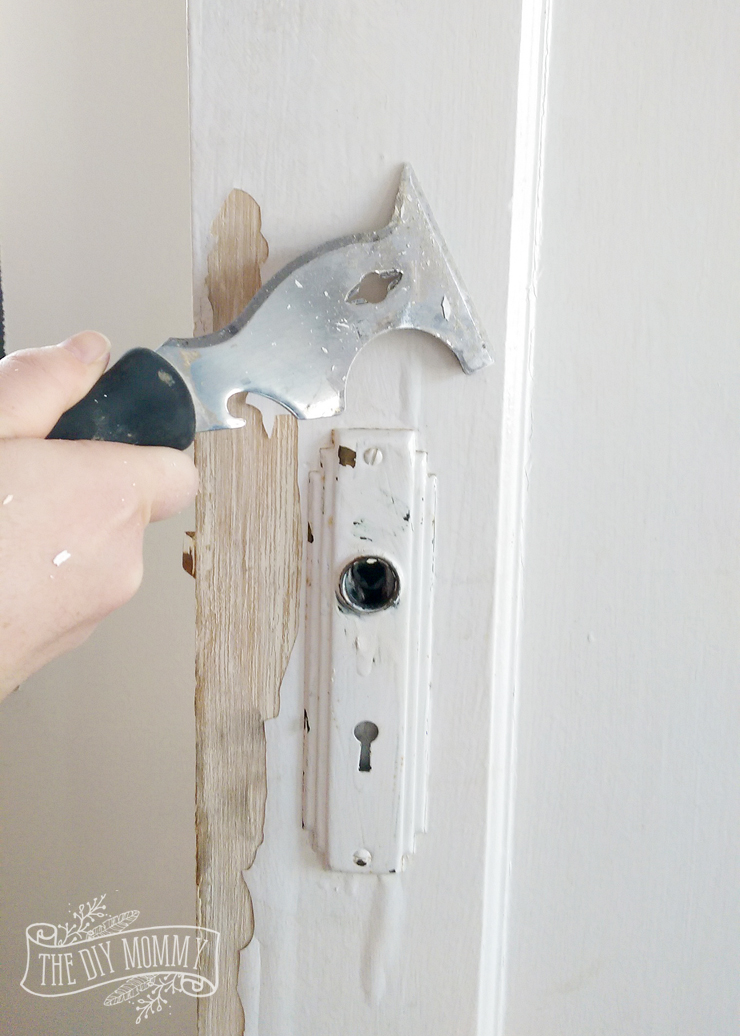
    I wanted to keep the chippy look of this door, but I didn't know if this was lead paint or not. I carefully wet scraped the flaking parts of the paint off the door. Then I cleaned the door with a de-greaser (I usually use a cleaner like Windex for de-greasing old furniture).

    A shabby chic message centre from a chippy old door - read the instructions here on thediymommy.com.

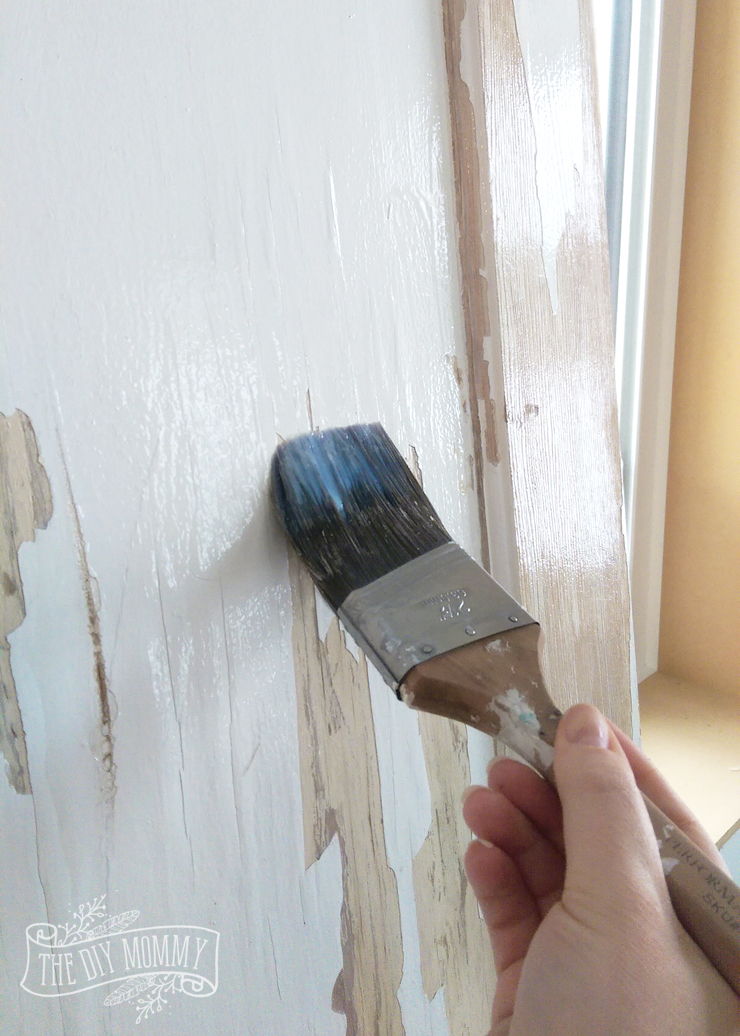
    Next, I painted 2 coats of clear poly over the entire door to encapsulate the original finish.

    A shabby chic message centre from a chippy old door - read the instructions here on thediymommy.com.

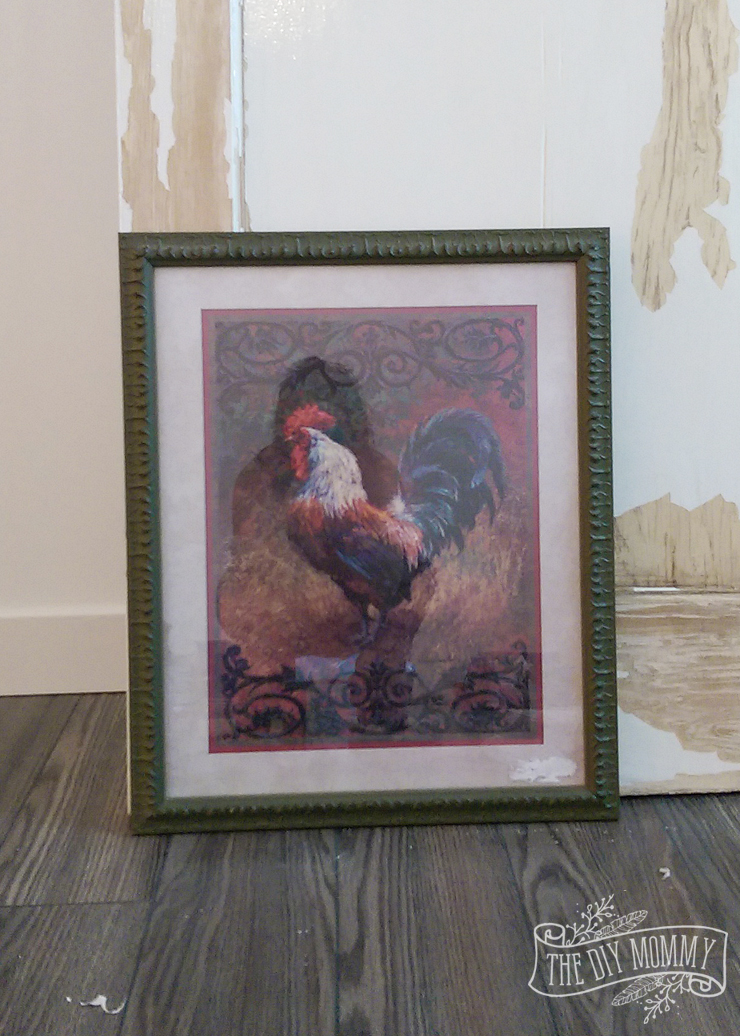
    I found a nicely textured picture frame with a glass insert at my local second hand store and I made sure that it fit inside the trim of my door.

    A shabby chic message centre from a chippy old door - read the instructions here on thediymommy.com.

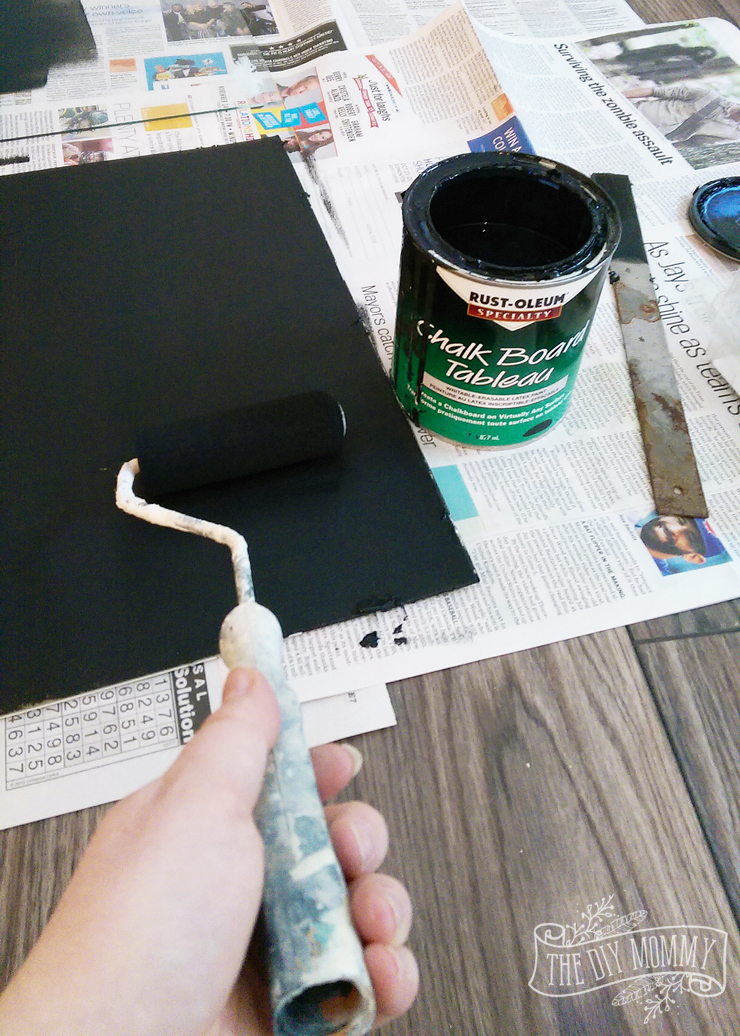
    I popped out the glass, and painted it with chalkboard paint using my trusty foam roller. 2 coats did the trick!

    A shabby chic message centre from a chippy old door - read the instructions here on thediymommy.com.      

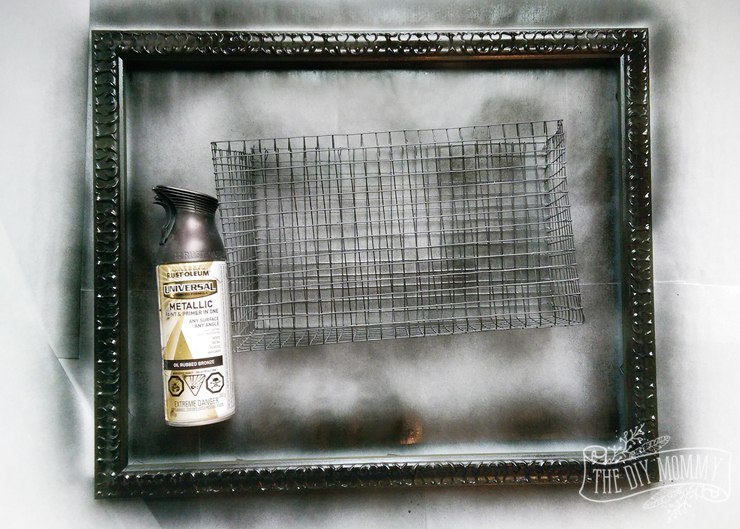
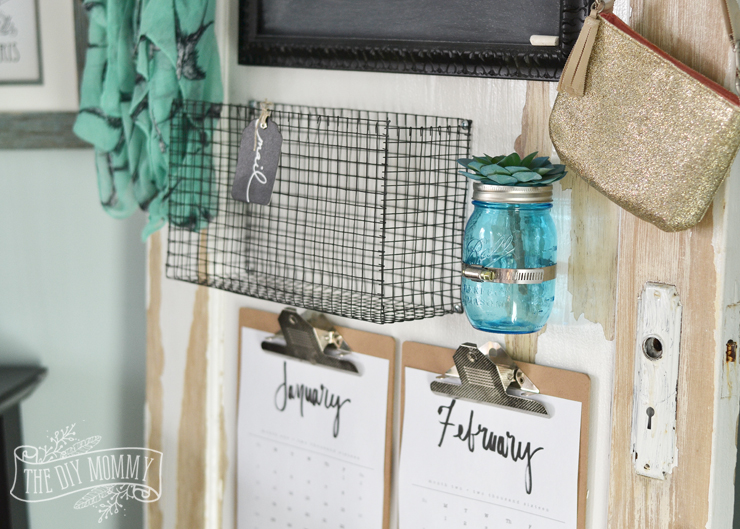
    Next, I made a wire basket from hardware cloth that was a nice size to fit mail and letter-sized paper. You can find my video on how to make wire mesh baskets here. I spray painted both the basket and my picture fraim with oil rubbed bronze metallic spray paint.

    A shabby chic message centre from a chippy old door - read the instructions here on thediymommy.com.

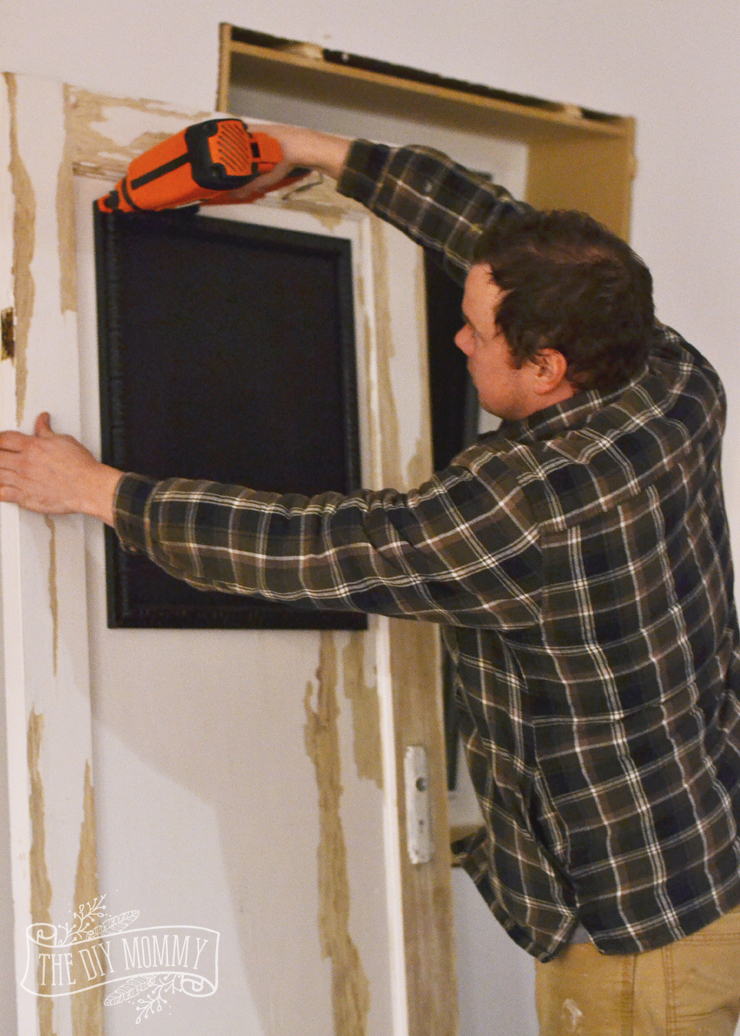
    I popped my glass insert painted with chalkboard paint into my frame once everything was dry, and my oh-so-handy-hubby nailed the new chalkboard to the top of the door.

    A shabby chic message centre from a chippy old door - read the instructions here on thediymommy.com.

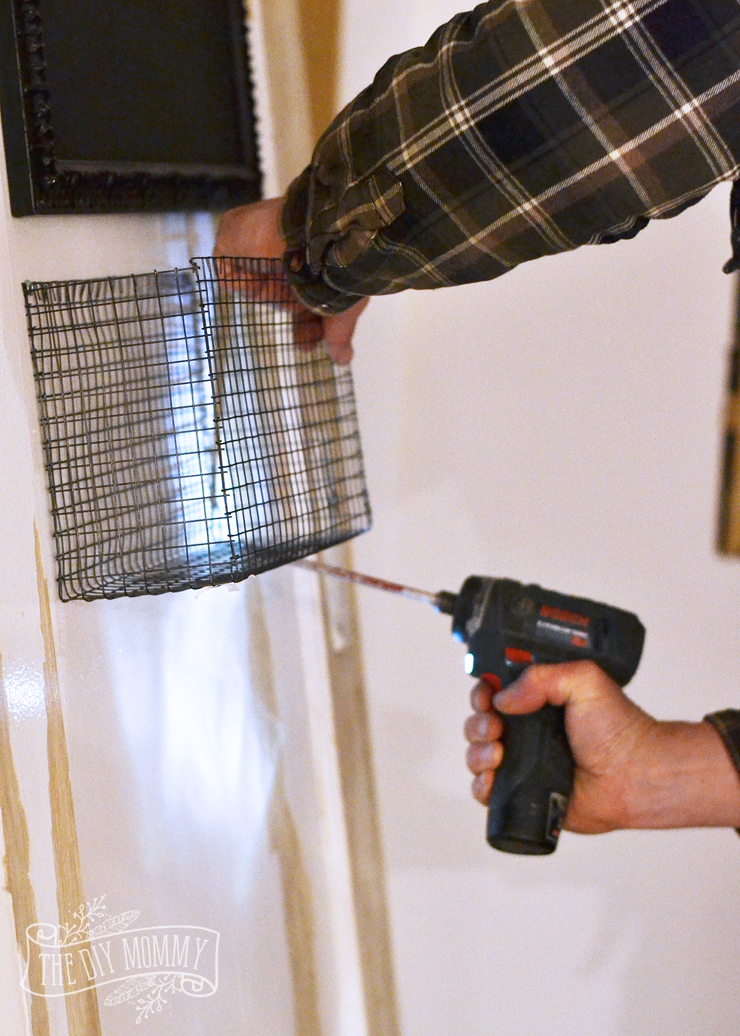
    He also screwed the wire mesh basket onto the lower left side of the door.

    A shabby chic message centre from a chippy old door - read the instructions here on thediymommy.com.

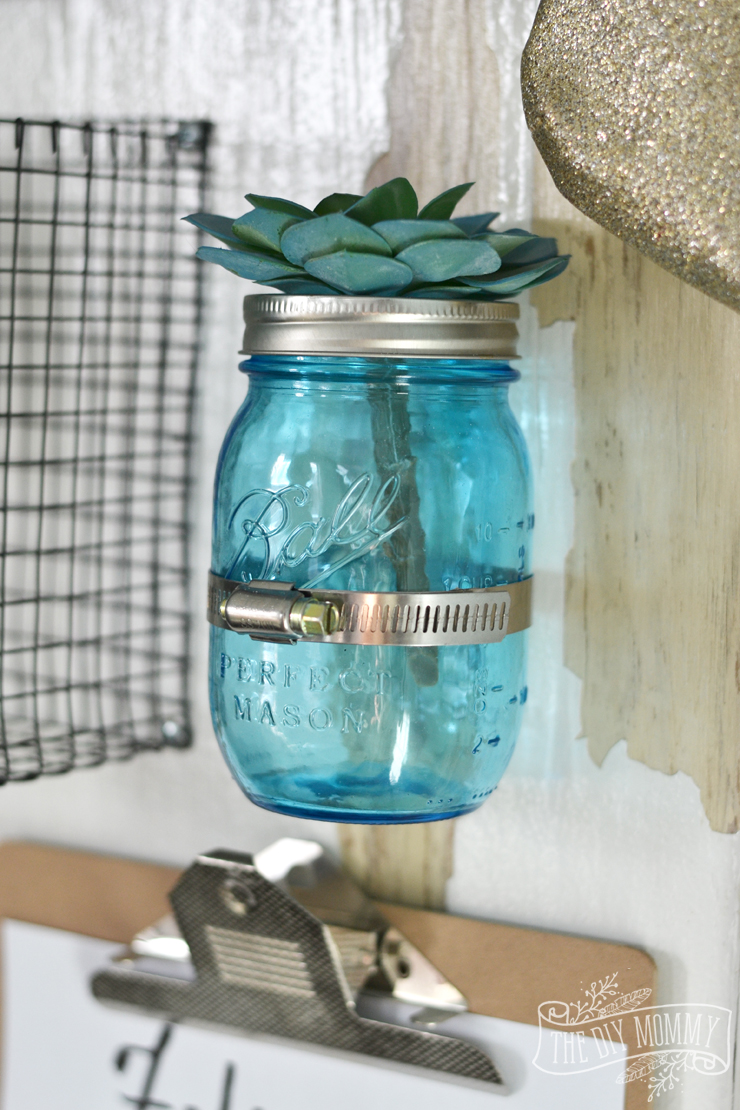
    Beside the basket, we mounted a sweet little blue mason jar using the same technique that I shared in yesterday's hanging mason jar storage post.  This would be a great spot to store chalk, pens, or display a flower!

    A shabby chic message centre from a chippy old door - read the instructions here on thediymommy.com.  

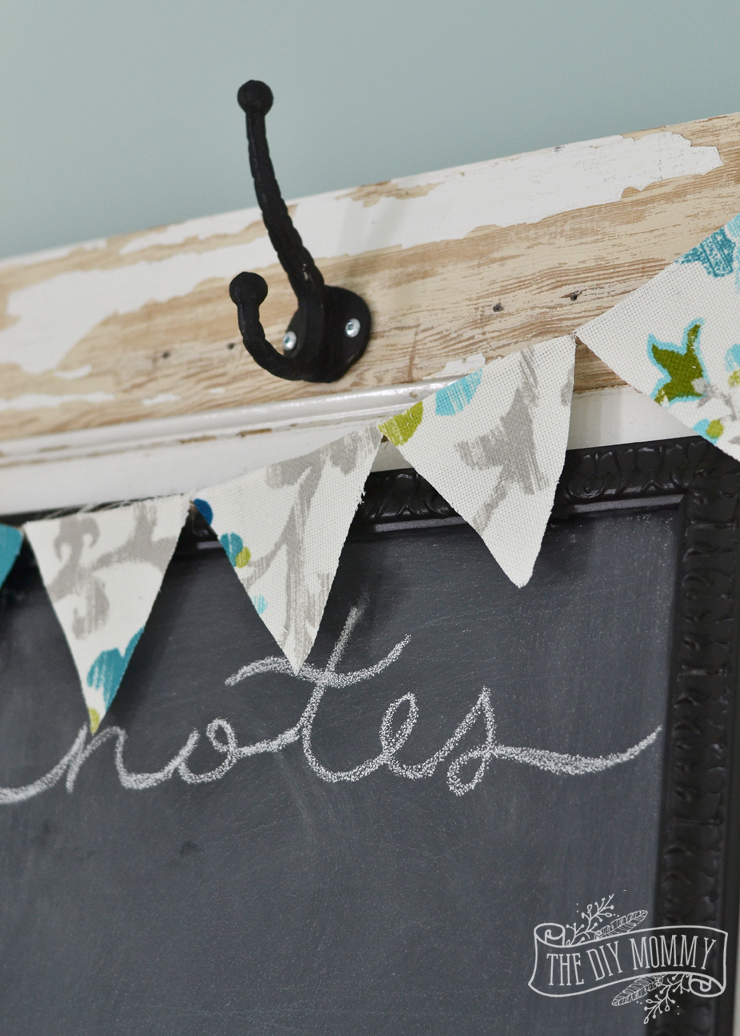
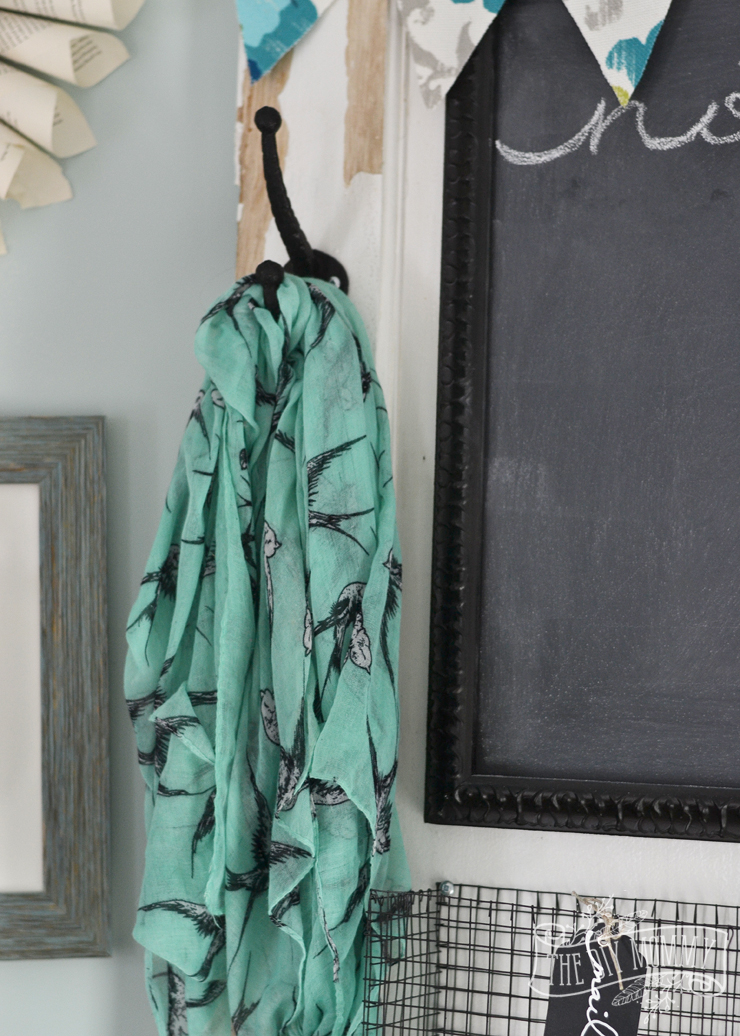
    We installed some hooks onto each side of the door and onto the top center of the door. These could be for accessories, keys... anything you'd want to keep in a central location that's easy to find! A handmade bunting banner finishes the door off nicely and adds a splash of colour.

    A shabby chic message centre from a chippy old door - read the instructions here on thediymommy.com.

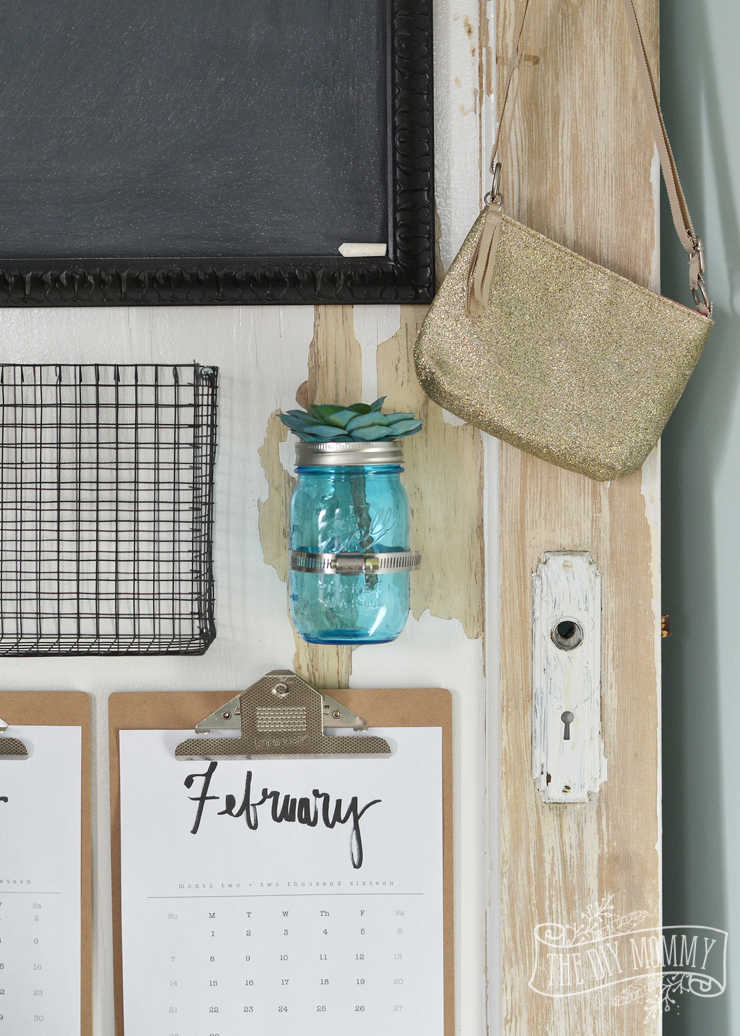
    Beneath the mail basket and the mason jar, I attached 2 clipboards. They could hold anything from calendars to chore charts. I found these beautiful free printable calendars here.

    A shabby chic message centre from a chippy old door - read the instructions here on thediymommy.com.   A shabby chic message centre from a chippy old door - read the instructions here on thediymommy.com. A shabby chic message centre from a chippy old door - read the instructions here on thediymommy.com.

    I'm totally thrilled with how this project turned out. Though I'm admittedly sad that I'm not keeping it, I'm also happy that it will be sold for a good cause! You can find this door at the Edmonton Renovation Show this weekend as part of the Ultimate Upcycle Challenge Unhinged! presented by Rust-Oleum in support of Habitat for Humanity Northern Alberta. Please check it out and bid on it if you like it! (I'd love to see pics of you there with the door - if you spot it, don't forget to tag me on Instagram so that I can say HI!)

    A shabby chic message centre from a chippy old door - read the instructions here on thediymommy.com.

    Want a chance to win FOUR tickets to the Edmonton Renovation Show next weekend (January 29-31, 2016) PLUS front row seats to hear Bryan Baeumler speak on Friday night?!

    Use the widget below to enter to win. The contest is open to Canadian residents and ends Wednesday, January 27th at 11:59 MST. Good luck!

    a Rafflecopter giveaway

    More Inspiration

    • 10 Best IKEA Organization Products under $20
    • Quick And Easy Kitchen Organization Ideas, Including Some Simple DIY!
    • Small Spaces: 6 Entryway Ideas To Make A Statement
    • My Best Tips for Hosting Overnight Guests (After Hosting 100 Stays!)

    Reader Interactions

    What do you think? Cancel reply

    Your email address will not be published. Required fields are marked *

    This site uses Akismet to reduce spam. Learn how your comment data is processed.

    Primary Sidebar

    Welcome!

    Christina Dennis, The DIY Mommy

    I'm Christina and I'm sharing budget-friendly DIY & decor ideas to create a cozy home and life you love!

    Read more about me

    Latest Posts

    • Creative And Unique DIY Wall Art Ideas
    • DIY Dollar Tree Heart Shaped Wreath
    • 10 Best IKEA Organization Products under $20

    What's my home decor style?

    Discover the home decor style that best fits your personality and lifestyle. This two-minute quiz is going to give you the direction you need to start the big, bold room makeovers that you've always wanted to try!

    Find out now!

    Archives

    Footer

    ↑ back to top

    About

    • About The DIY Mommy
    • Privacy Policy
    • Disclosure Policy
    • Terms of Service

    Newsletter

    • Sign Up! for emails and updates

    Contact

    • Contact

    As an Amazon Associate I earn from qualifying purchases.

    Copyright © 2009 - 2023 The DIY Mommy. "The DIY Mommy" is a registered trademark.