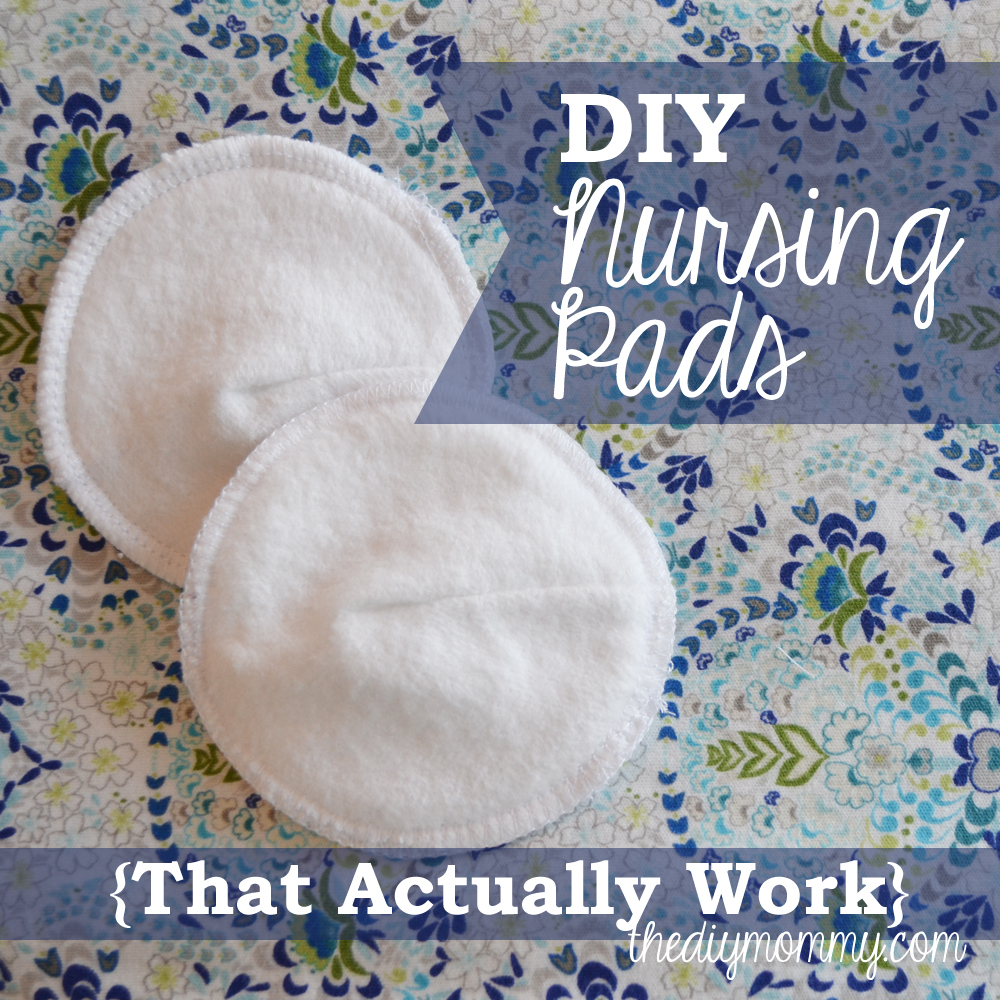
Sew Super Absorbent Nursing Pads
This post may contain affiliate links · This blog generates income via ads
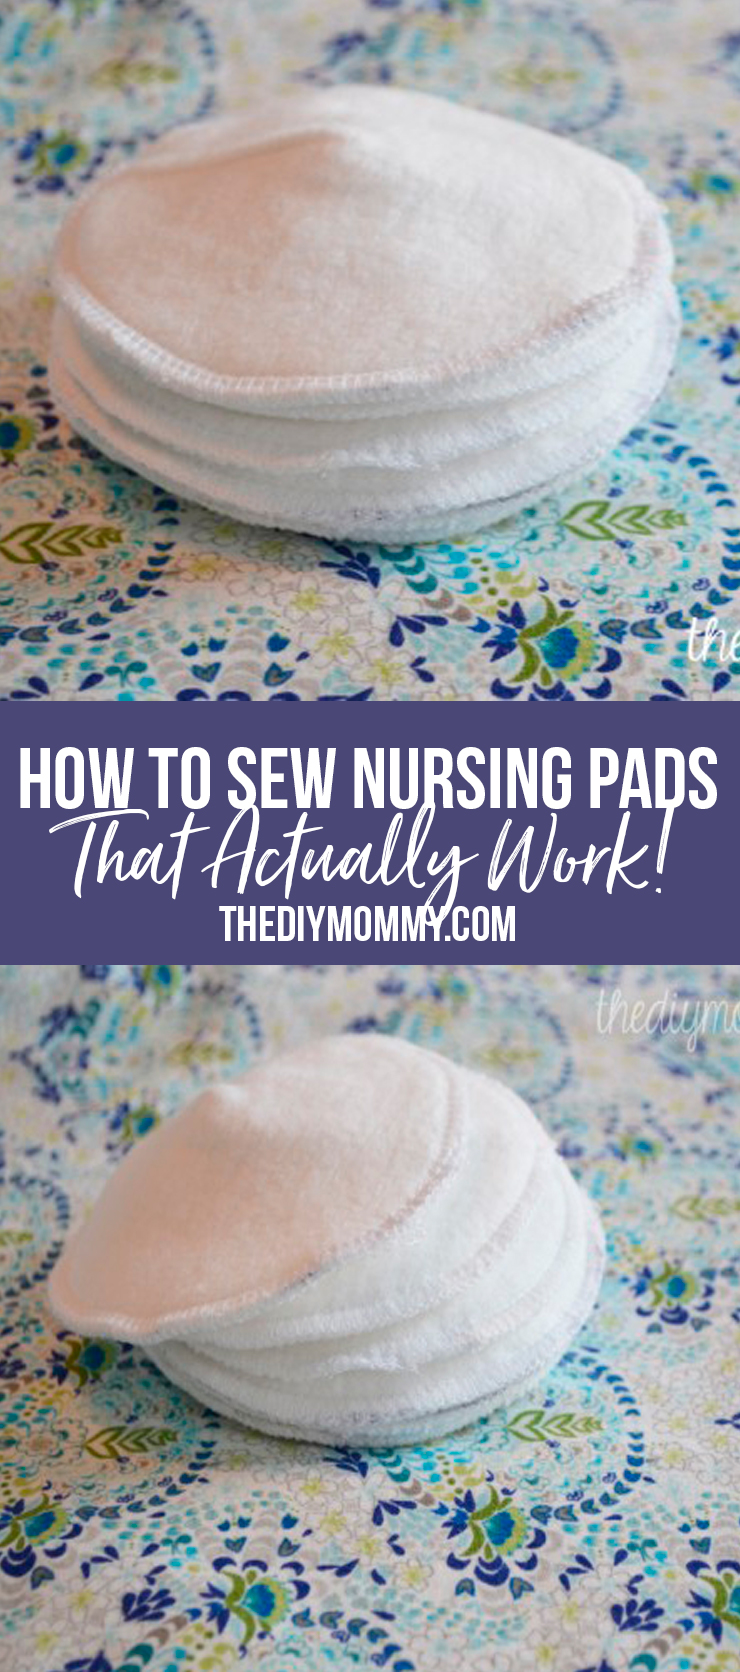
One of my favourite new mama essentials? Handmade, reusable nursing pads that are SUPER absorbent! I’ve used many kinds of nursing pads in the past from disposable to purchased cotton flannel ones, but I wanted to make some that were the best combination of the ones I’ve tried. These nursing pads are fantastic, and I’m showing you how to make them today.
I’ve found that disposable nursing pads absorb really well, but they can be itchy and scratchy on the skin. Washable, flannel nursing pads are more comfortable, but all the ones I’ve tried don’t absorb well.
These DIY nursing pads are soft and washable, PLUS they absorb liquid so well! I poured 1/4 cup of water on them to give them a test run, and the water was instantly sucked into the middle layer of the pads. I couldn’t even feel it on the outer layer. Success!
The secret to nursing pads that actually work
The secret to the wonderful absorbency of these DIY nursing pads is the middle layer of fabric. It’s actually microfiber diaper soaker fabric! This type of fabric wicks moisture away so quickly that it’s not recommended to be put directly next to the skin. However, placing it between a couple of layers of natural fibered fabric (like bamboo or cotton), is an excellent way to make nursing pads work so much better. Ready to make some for yourself?
DIY Nursing Pads Instructions
Materials:
- scraps of cotton flannel, cotton fleece or bamboo fleece (I used organic cotton fleece for mine)
- scraps of microfiber terry soaker fabric (I found mine at Fabric.com – search for “microfiber terry soaker”)
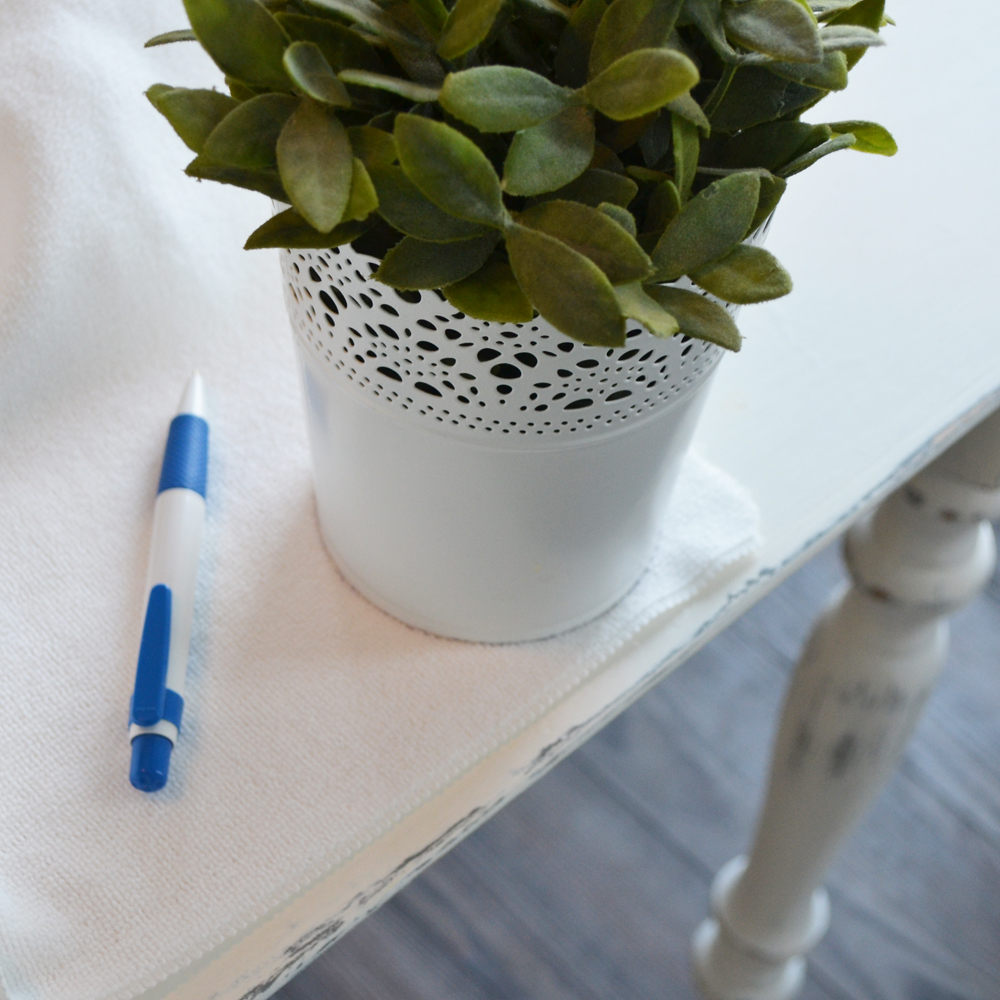
- something round and your preferred pad size to use as a pattern (I used an Ikea plant pot that’s about 3 1/2″ in diameter)
Instructions
Make sure to pre-wash your fabrics since cotton/bamboo and microfiber will shrink differently.
First, trace a circle using your template onto one your fabrics. My circle is about 3 1/2″ in diameter.
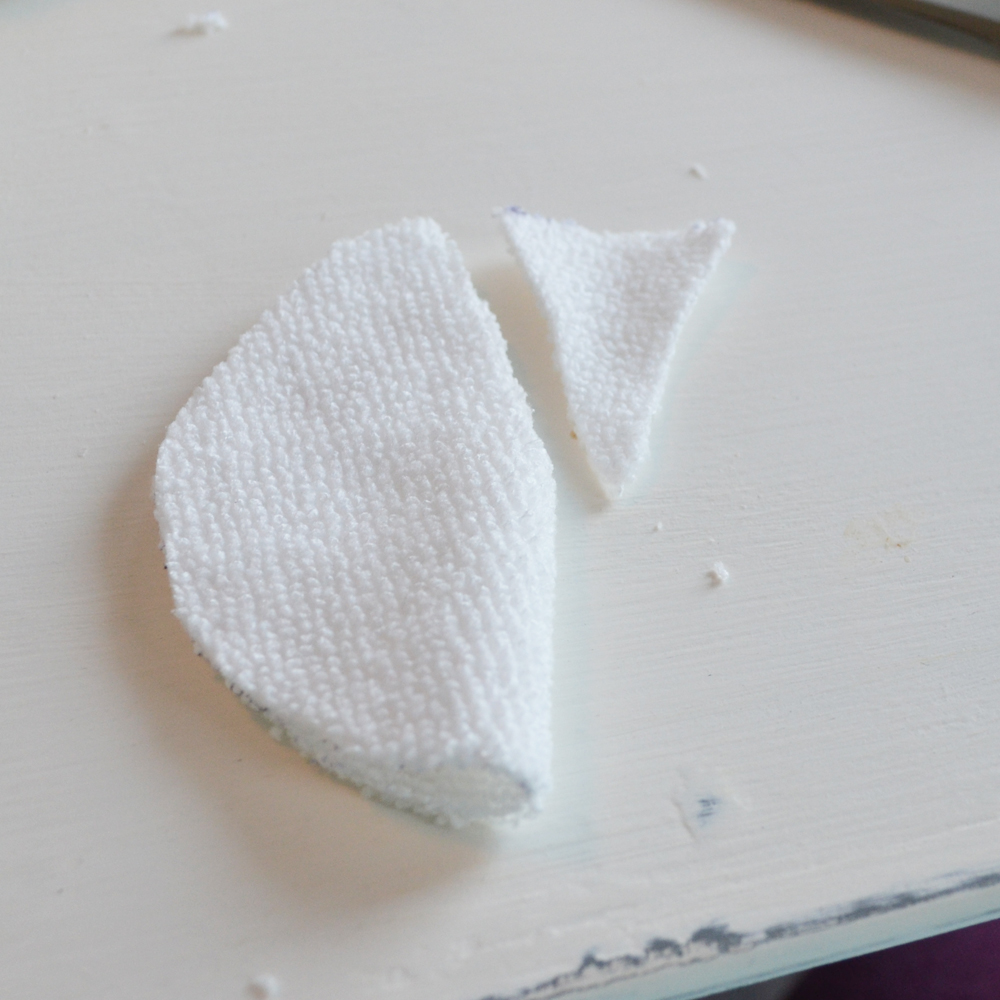
Next, fold the circle in half, and then cut a notch out of one side as shown. The top should be about 1 inch wide (so, 1/2″ when the pad’s folded), and the bottom of the notch should end at the center of the circle:
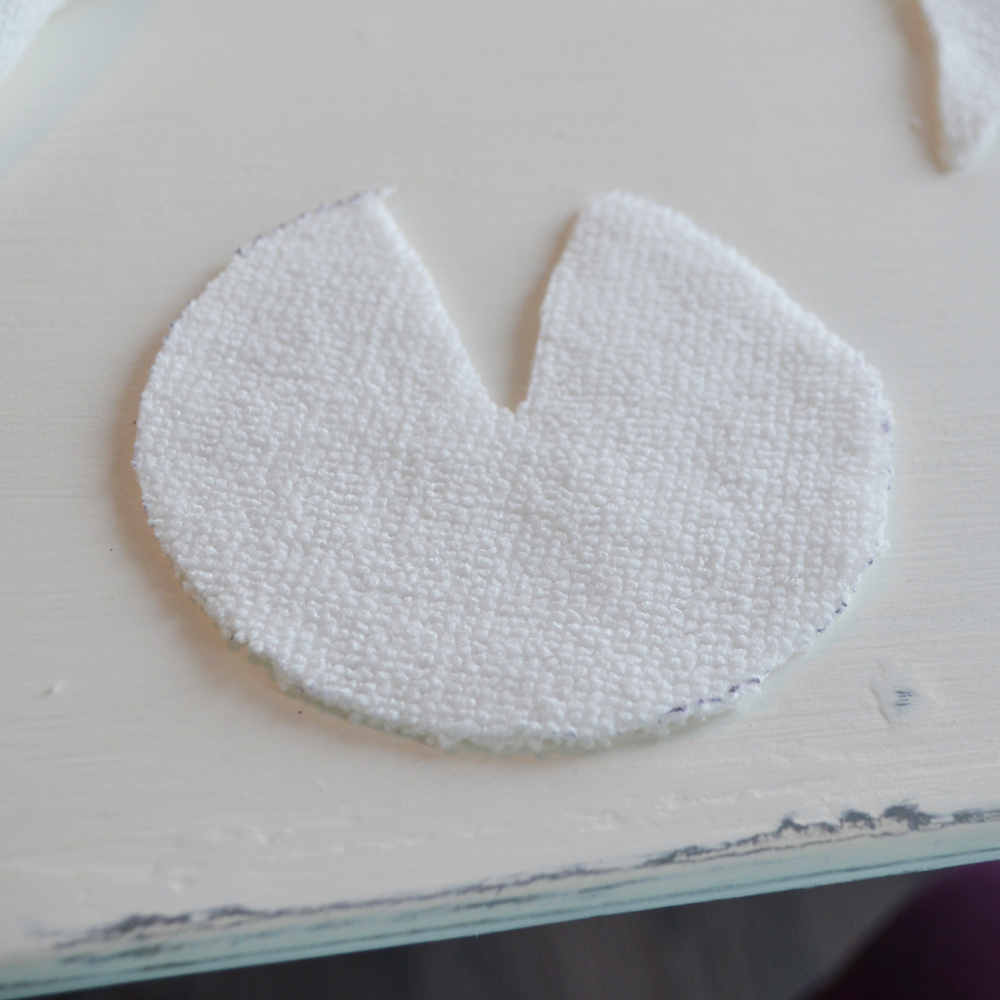
Then, use your first notched circle as a pattern to cut the rest of the circles.

For each pair of nursing pads, you will need 4 circles of cotton/bamboo and 2 circles of microfiber terry.
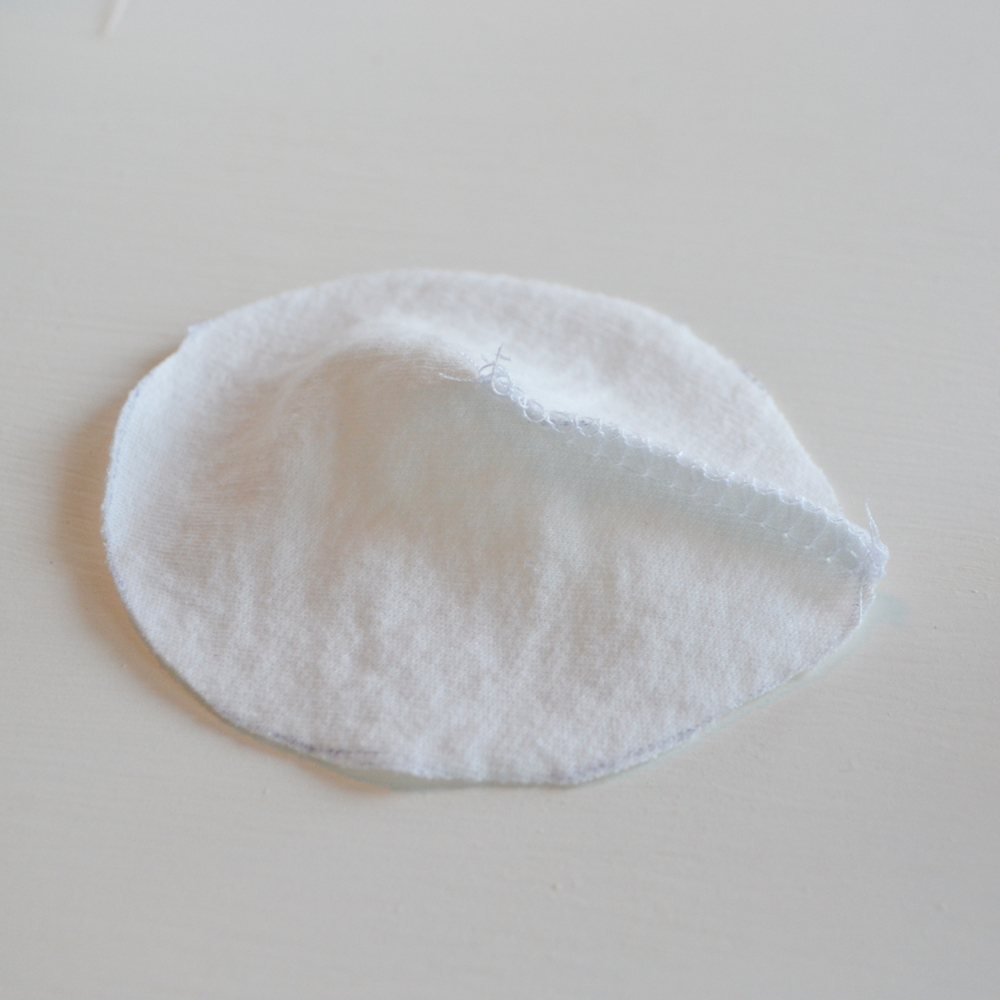
Using a serger or a regular machine, sew the notch together (like a dart) using a 1/4″ seam allowance. Repeat with all of the circles.
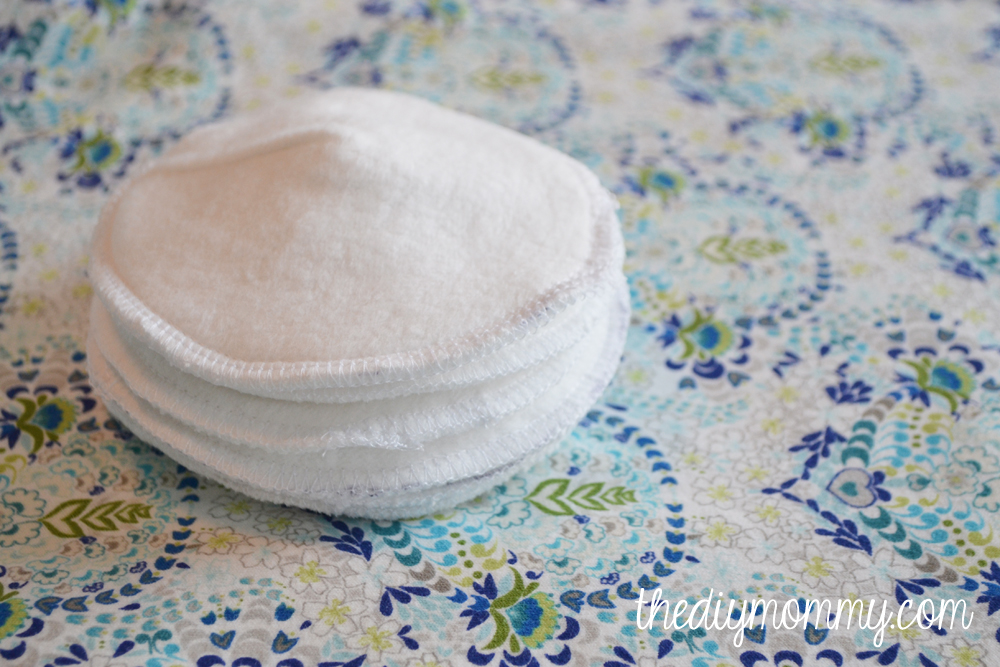
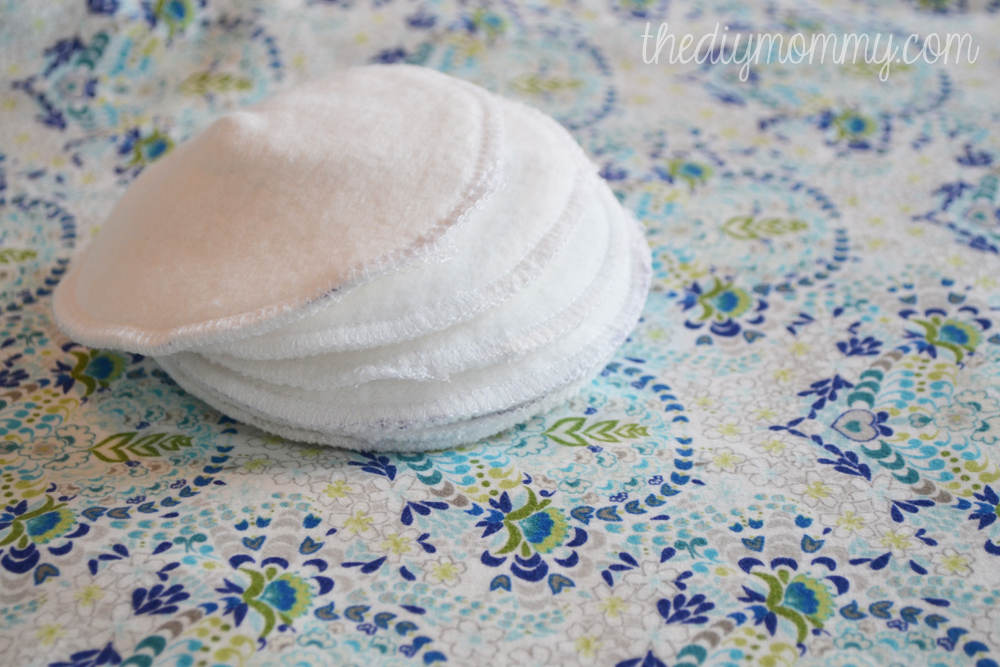
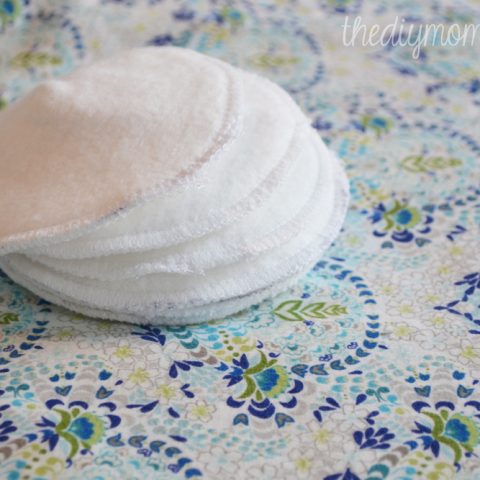
Finally, stack the fabrics together in this order: cotton/bamboo (with the wrong side up), microfiber, and then cotton/bamboo (with the wrong side down). Place the notch seams in different spots as you layer the circles to lessen bumps.
Finish by serging or zig-zag stitching around the entire perimeter of the pad ensuring you catch all layers. Repeat with the second pad.
You’re done!
I love the fact that I can wash these, but that they work a lot better than the reusable ones I’ve had in the past.
(Disclosure: This post contains affiliate links. If you decide to purchase products via these links, a small percentage of the sale will be given to me at no extra cost to you. It’s a win-win – thanks for helping support thediymommy.wpsc.dev!)
Sew Super Absorbent Nursing Pads
The secret to the wonderful absorbency of these DIY nursing pads is the middle layer of fabric – it’s actually microfiber diaper soaker fabric! This type of fabric wicks moisture away so quickly that it’s not recommended to be put directly next to the skin. However, if it’s sandwiched between a couple of layers of natural fibered fabric (like bamboo or cotton), it’s an excellent way to make nursing pads work so much better. Ready to make some for yourself?
Materials
- scraps of cotton flannel, cotton fleece or bamboo fleece (I used organic cotton fleece for mine)
- scraps of microfiber terry soaker fabric (I found mine at Fabric.com – search for “microfiber terry soaker”)
- something round and your preferred pad size to use as a pattern (I used an IKEA plant pot)
Instructions
- First, trace circles using your template (or the free pattern from DIY Maternity.com) onto your fabrics. For each pair of nursing pads, you will need 4 circles of cotton/bamboo and 2 circles of microfiber terry. (If you’re using your desired size of template rather than the pattern for your circles, start by tracing just one and then do the next step. Then, trace the rest using your first circle with the notch cut out.)
- Fold the circle in half, and then cut a notch out of one side as shown. The top should be about an inch wide (so, 1/2″ when the pad’s folded), and the bottom of the notch should end at the center of the circle: (Use your first notched circle as a pattern to cut the rest of the circles if you’re not using the printable.)
- For each PAIR of nursing pads you need 4 cotton/bamboo circles and 2 microfiber terry circles.
- Using a serger or a regular machine, sew the notch together (like a dart) using a 1/4″ seam allowance. Repeat with all of the circles.
- Finally, stack the fabrics together in this order: cotton/bamboo (with the wrong side up), microfiber, and then cotton/bamboo (with the wrong side down). Place the notch seams in different spots as you layer the circles to lessen bumps.
- Serge or zig-zag around the entire perimeter of the pad ensuring you catch all layers. Repeat with the second pad.
Notes
Make sure to pre-wash your fabrics since cotton/bamboo and microfiber will shrink differently.
Pin Me:
More Great DIY Sewing Projects for Mom and Baby
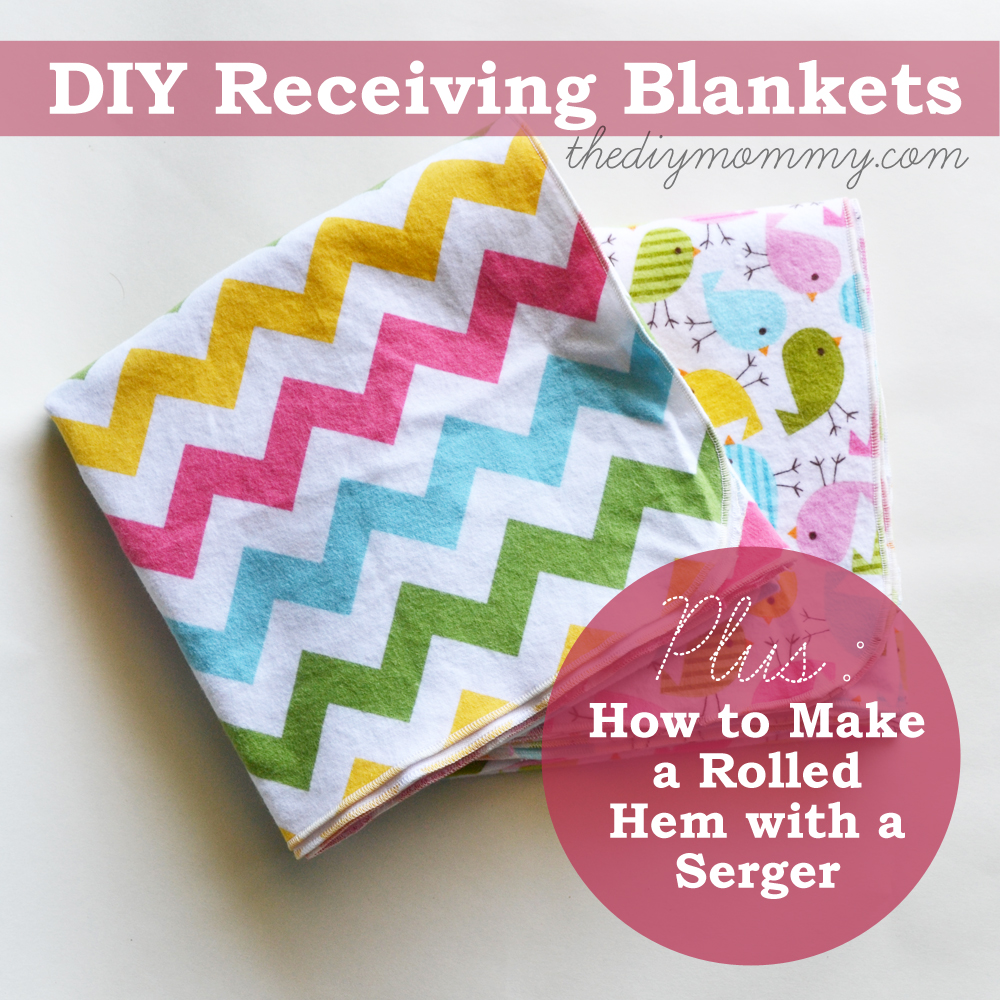
How to Make Baby Receiving Blankets with a Serger
One of my most favourite and practical baby gifts to give and receive are flannel receiving blankets. And not just regular old baby blankets – extra large receiving blankets that are perfect for swaddling newborns. They’re hard to find in stores, but they’re so easy to make! Learn how I used the rolled hem function on my serger to make my own extra large receiving blankets.
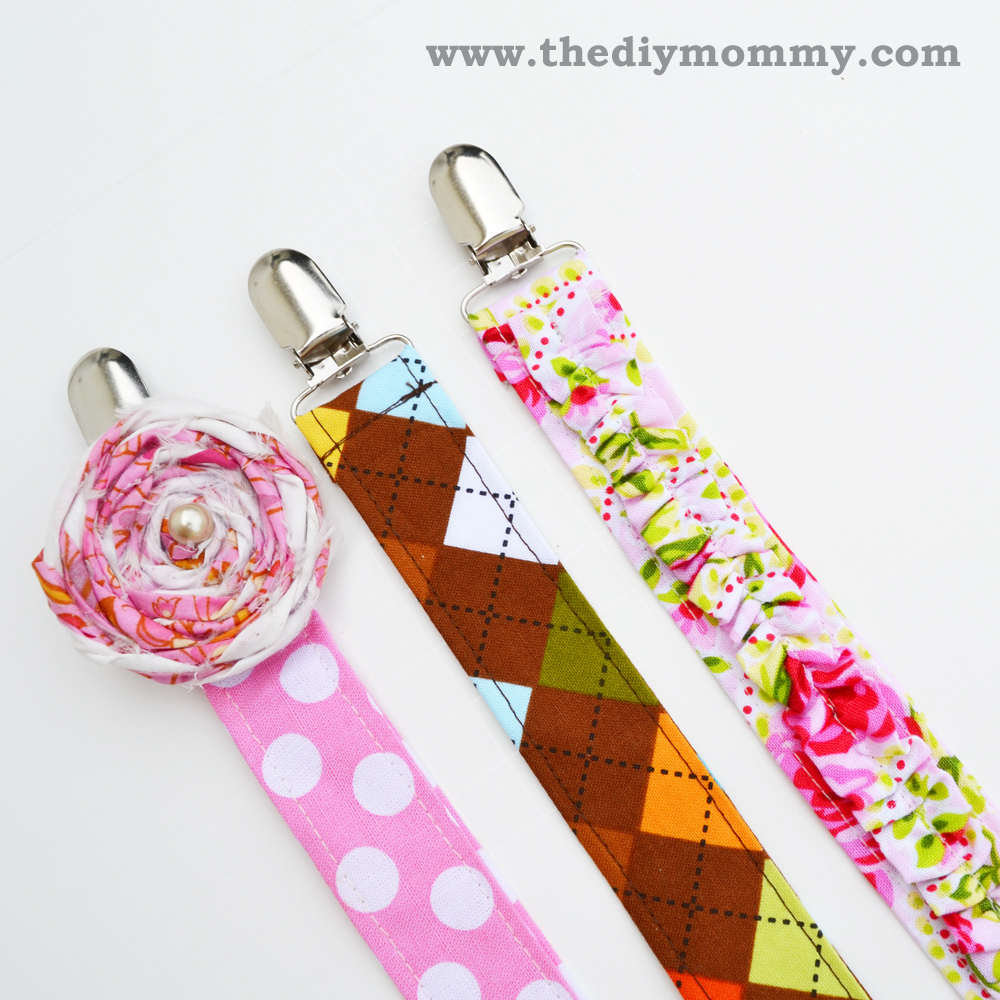
Sew Boutique Soother Clips
If your baby is anything like mine was, soothers pop out of her mouth constantly and they are always hitting the floor. When I had my first baby, it was hard to find cute-looking soother clips to keep soothers from dropping, so I decided to make my own! Here’s my original fabric soother clip design and I’ve updated it with some adorable ruffles and/or a flower brooch embellishment. Here’s how to make one for your baby (they also make great baby shower gifts)!
Sew a Wet Bag
I’ve always thought that wet bags were only handy for cloth diapering mommies (which they are), but now I’ve gained an entirely new appreciation for them! They’re a great addition to Baby’s diaper bag. I put food, dirty clothes, wet clothes, spoons, bibs…. you name it – in my wet bag.

This is great–I’m a first time mom due at the end of March. I’m gonna add this to my list of things to make! 🙂
Wonderful! Best wishes for the last stretch of your pregnancy! I’m due at the end of February, so our babies will be very close in age. 🙂
Why do you keep the wrong side out on the 5th step? Is there a point where you turn the right side out?
Just wondering how thick these are and if they show through clothes? I made some with pul, bamboo velour, and an athletic wicking material but i didnt like the wicking material. I dont think they stayed as dry as i would like.
They don’t show through mine, but I wear padded nursing bras. They stay really dry, in my opinion!
A CD makes a good pattern & easier to trace around
Great idea, Kathy. Thank you!
Thank you for this!
I’m expecting my first in a few months and I’m trying to DIY as much I can before she comes to save money.
I know everyone is different, but how many of these do you think I should make? I know this must sound really clueless but how many would an exclusively breast feeding (hopefully!) mum go through in a day?
I usually only went through a couple of pairs in a day (if that… usually it was only one), but every mom is different. Hope that helps at least a little! Congrats on Baby coming soon!
I’m a new mama to be (due in end of May) and plan to see some reusable pad for Eco and $$
Is the Microfiber terry soaker are same or similar to those quick dry micro fiber towel? Will I able to replace with those quick dry towel?
Thanks
I’m wondering the same thing! Did you try it? How did it work?
I’m excited to hear about the results. 🙂
Yes, Id give that a try! They should work the same.
No such fabric at fabric.com are the terry microfiber towels working?
Hey. I’m trying to make nursing pads as well cuz I’m soaking my pillows at night and not with drool! and I saw this and I read the last part but it doesn’t add up. U said u needed four cotton parts and two microfiber parts. But what u explained for the finishing touches, there’s only three cotton parts and two microfiber parts. So where does the fourth cotton part come in?
My understanding is that the layers are: flannel – terry cloth – flannel. For a SET of 2 (one for each breast) you need 4 flannel and 2 terry cloth. I’m not sure where you read 3 cotton parts, unless you mean the 3 layers that make up a single pad. Hope that helps.
That’s correct. Thanks, Robin!
6 pieces of fabric decided by 2 = 2 boobs
Nice! So much better for the environment than the disposable ones for sure.
I pinned your post on absorbent nursing pads. Is there a way to print this?
I made something similar 2 years ago, and now I need to make more for #2! I use those flannel receiving blankets (8 Layers) that I never really used long for baby. This way (without the terrycloth layer), they do leak, but once you’re in that money spot of not leaking everywhere, all the time, they’re great (a few months in)! I’ve made some for friends, and they have said it feels like their nipples are on clouds!
“nipples on clouds” oh Meghan, you made us laugh. This is so awesome! Thanks so much for sharing!
I tried looking for the microfiber terry soaker on Fiber.com; is it not there anymore? 🙁
It’s fabric.com
Have you tried putting a PUL backing on these to avoid “spillage” out the back? I’m hoping I can avoid soaking/staining my nursing bras and I’m wondering if a layer of PUL on the back side would help avoid any leaking into my bra? Thoughts?!
Thanks for this fantastic tutorial! I’m looking forward to making these soon as I’m due in 10 weeks! 🙂
Congrats on your baby!!
Hi there! Thanks for the fabulous tutorial! I’m curious, have you tried putting PUL on the back side of these to avoid moisture wicking to the outside? I’m hoping to prevent leakage onto my bras and was wondering if that extra moisture barrier might help avoid soaking/staining the inside of my bras?!
Thank you!
Hey! Christina hasn’t tried putting an extra barrier to help prevent leakage.
Let us know if you try it out
Hi Thank you for your tutorial! Would you say that these with two layer of absorbant would qualify as day or night nursing pads? I’m doing my calculations to go buy some fabric!
Thank you!
Christina found it worked well for both 🙂
Wondering how much fabric to buy. How many circles can you cut from 1 yrd of fabric?
It’s going to depend on the size of pad you make. Calculate the fabric you need based on the size of your circle (Christina used about 1/2 yard of scrap fabric to make a few nursing pads).
Awesome DIY! Exactly what I was looking for. Thanks for the tutorial, Christina. I already have the fabric and will try now. Hope it works well. 🙂
Awesome! Let us know how they turn out for you!
The link to the pattern takes me to a page that is no longer available. I’m planning to make these for my daughter in law….I have no idea what size to make these. Can you give me a suggestion for the diameter? Thank you for the directions!