DIY Rustic Textured Christmas Ball Ornaments
This post may contain affiliate links · This blog generates income via ads
Looking for DIY Christmas ball ornaments ideas? Let me show you how easy it is to create gorgeous, rustic Christmas ornaments with Dollar Tree supplies. This is a simple DIY project that looks beautifully high-end!
If you’re looking for a stunning addition to your Christmas decor this year, I think you’re going to love these DIY ornaments! I was inspired by these textured Christmas ball ornaments from Crate & Barrel to make my own easy DIY version for a lot less money. Follow this easy tutorial using dollar store supplies to make your own this Holiday season!
You will need
- clear Christmas ball ornaments from Dollar Tree (I used plastic, but you could also use clear glass ornaments)
- 1-3 colours of acrylic paint (I used a green, beige and brown colour)
- 2 colours of metallic acrylic paint (I used a champagne gold and a bronze)
- baking soda
- cocoa powder
- foam brush
- floral foam
- long wooden skewers
How to make the rustic Christmas ball ornaments
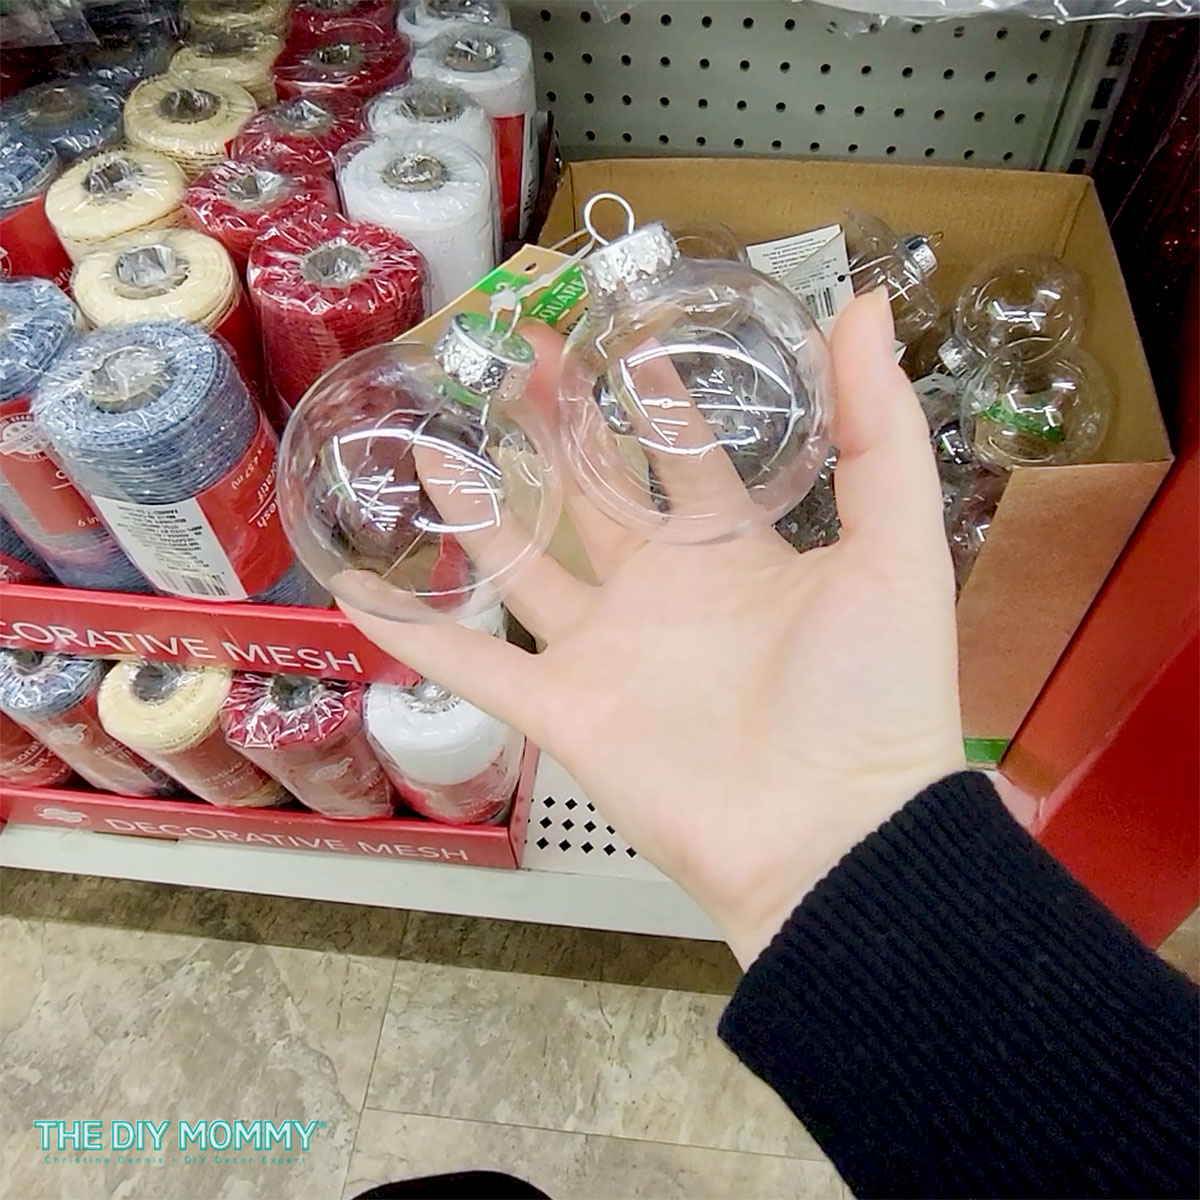
Start with these plastic clear ball ornaments from Dollar Tree. You can get large ones or small ones, or a mixture of both. You could also use any old ball ornaments you have on hand for a budget-friendly upcycle!
Painting the ornaments the base colours
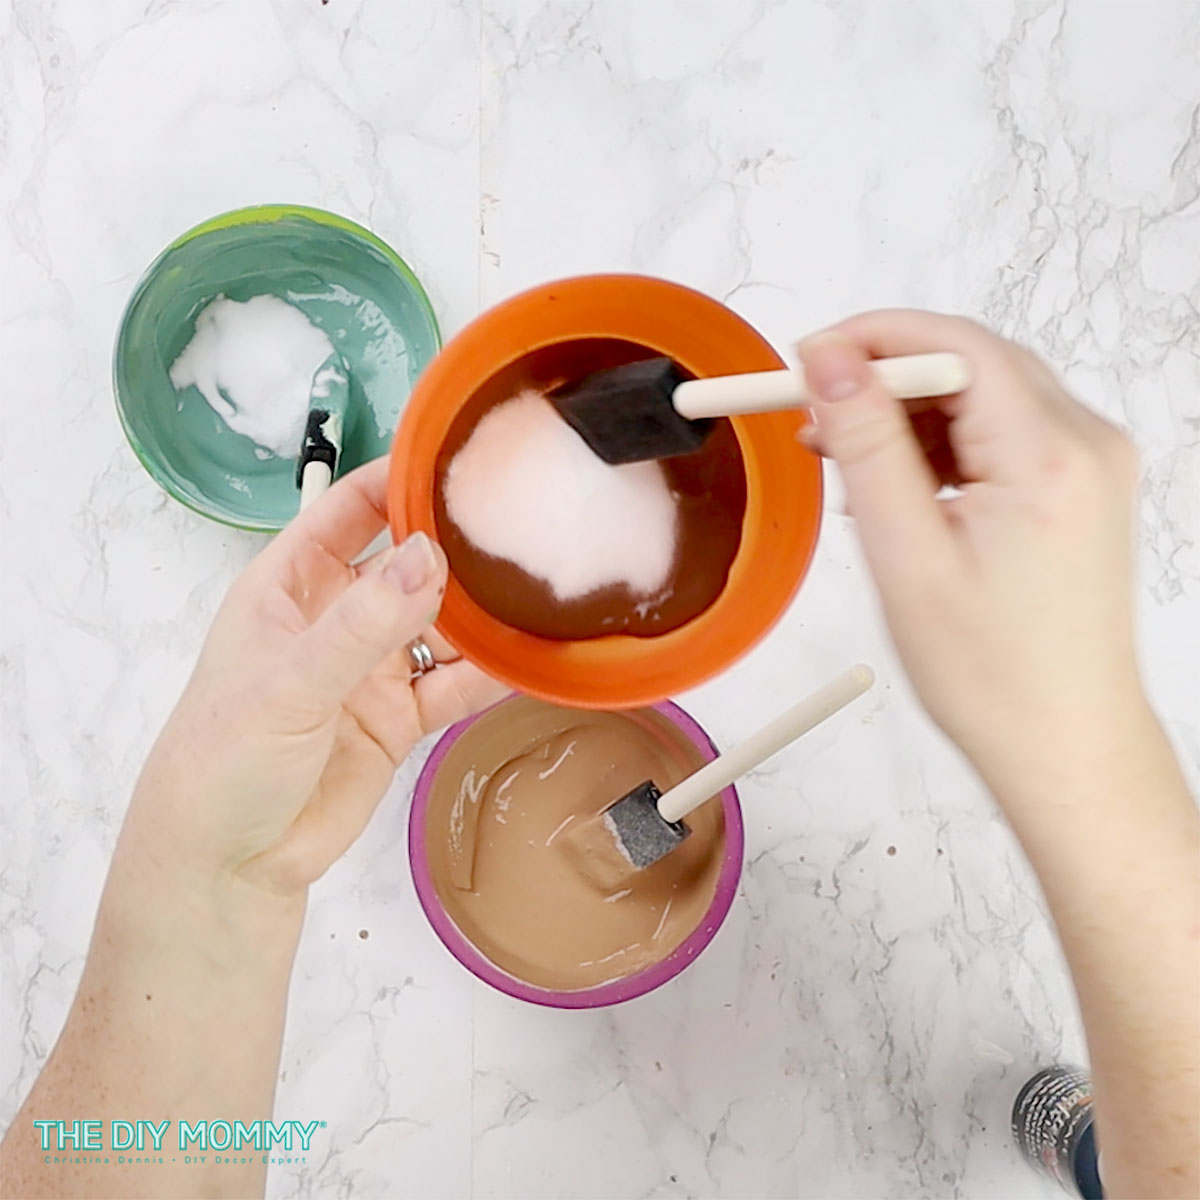
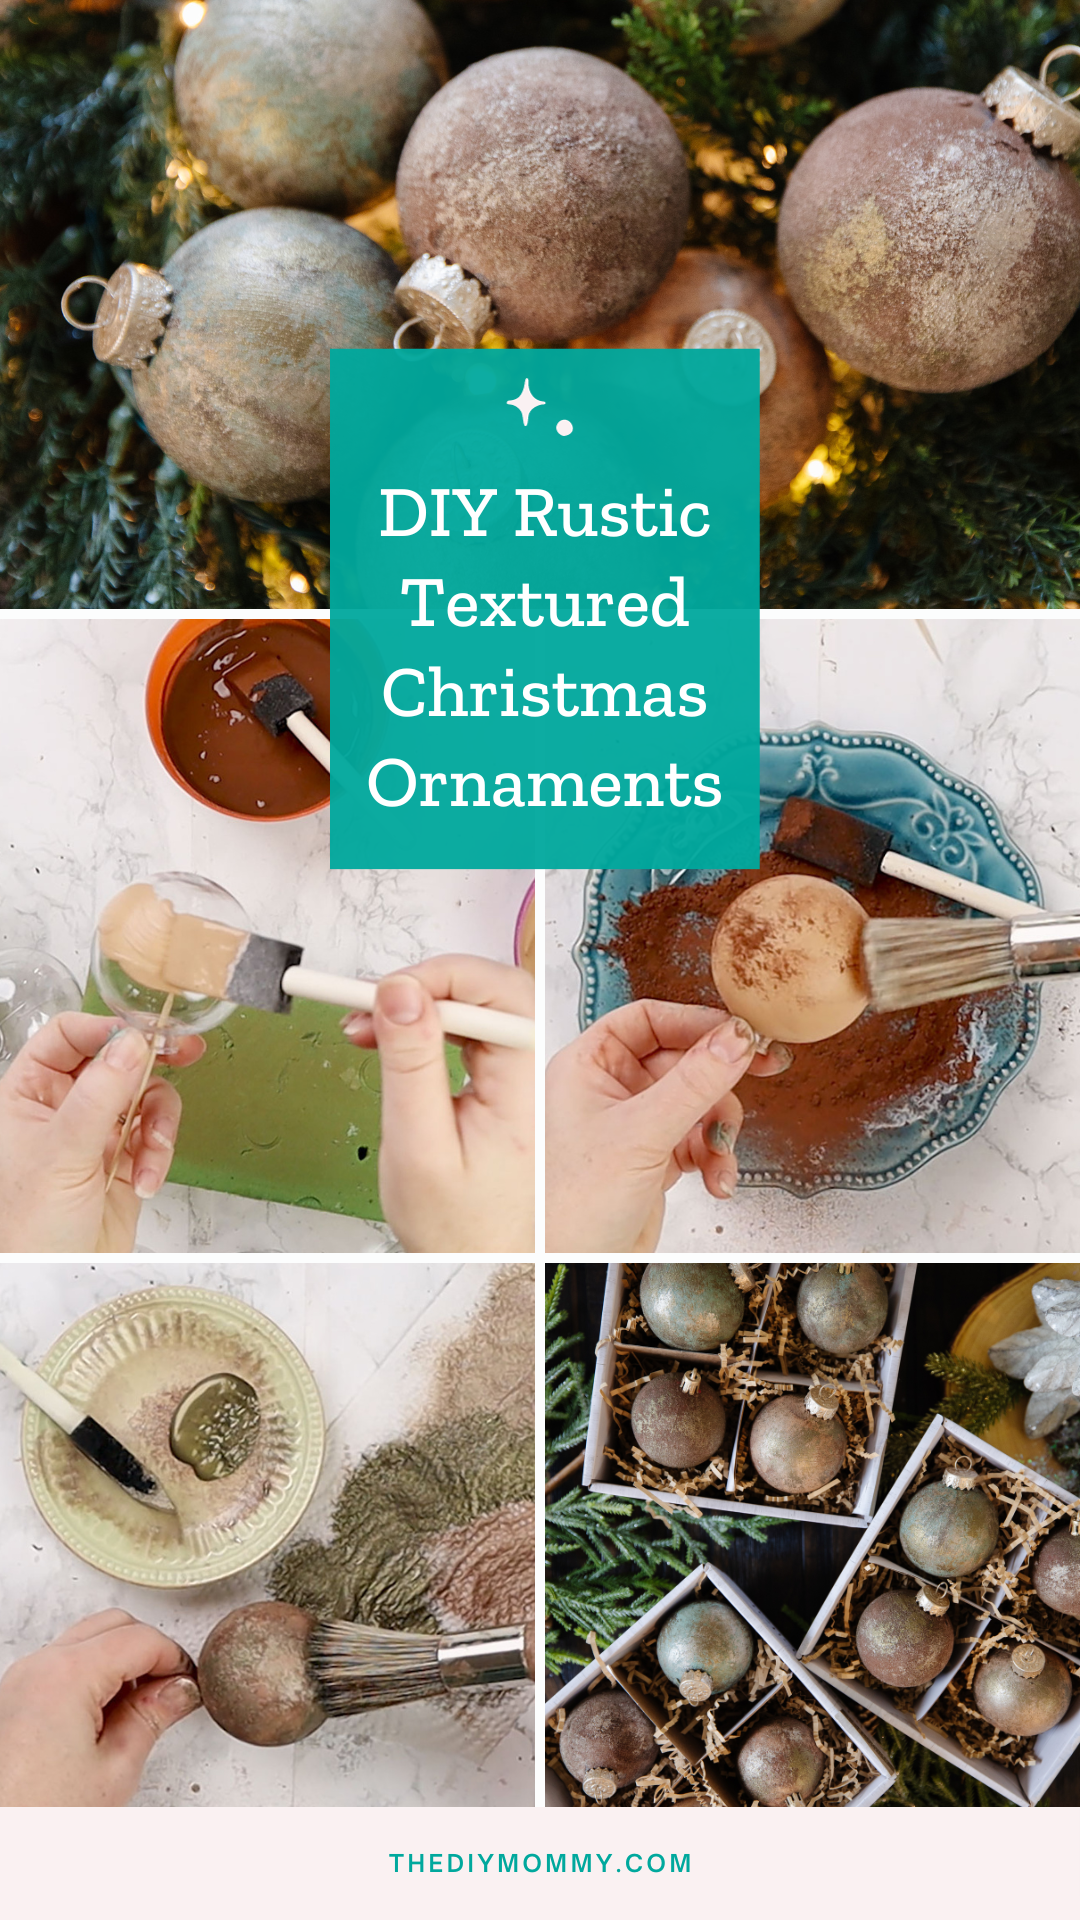
Into some small bowls, add about one part baking soda to one part acrylic paint. Stir the paint mixture with a foam brush to create a thick baking soda paint.
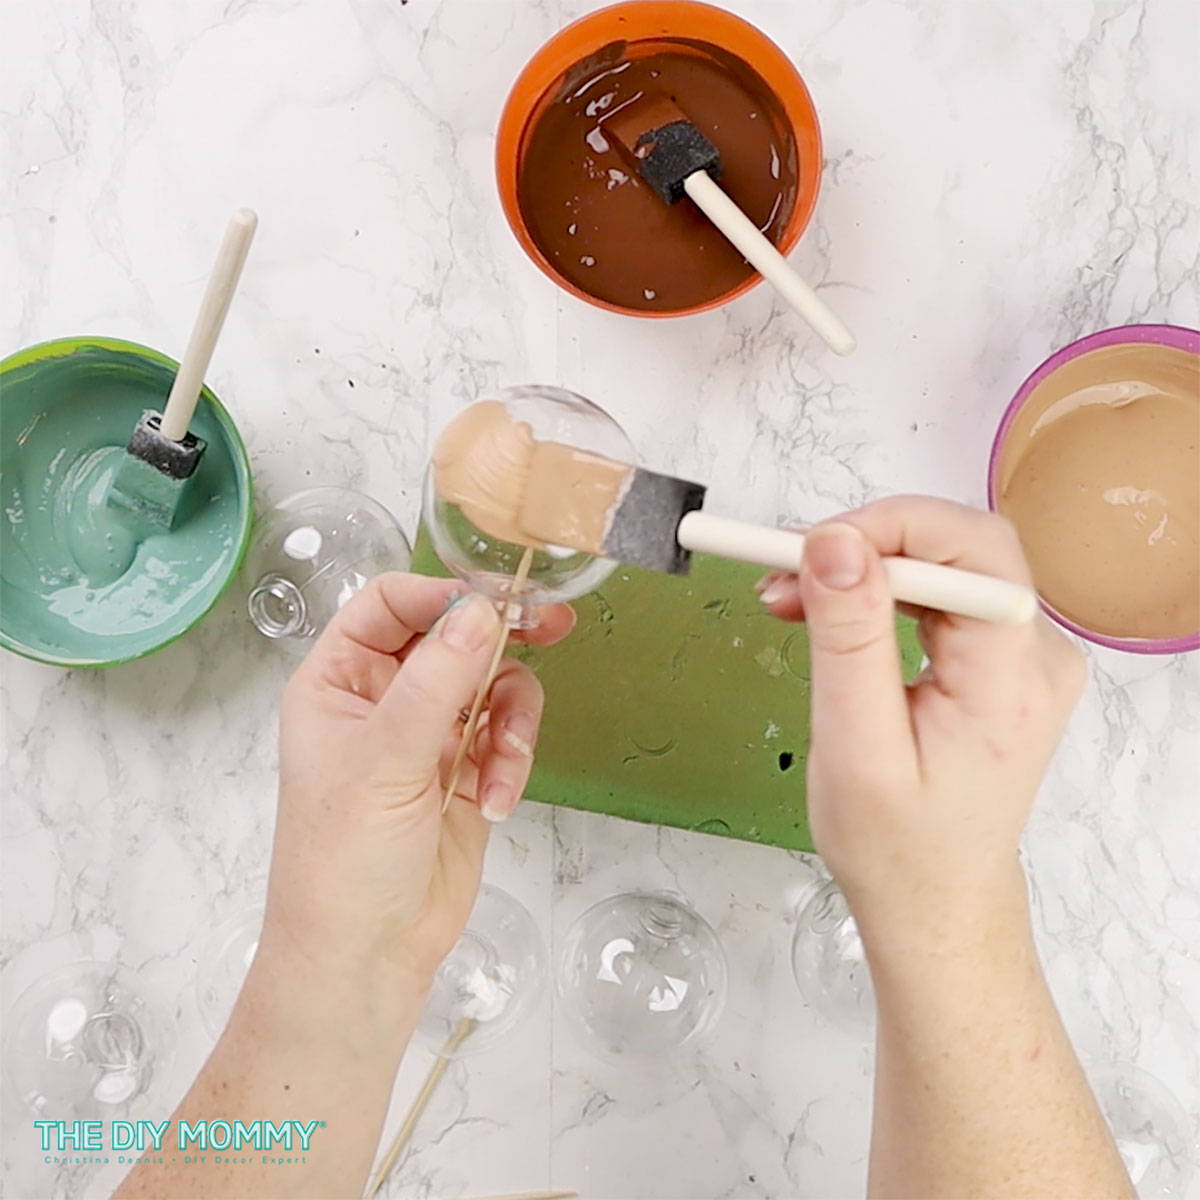
Remove the ornament cap toppers from the ornaments and set them aside. Take some wooden skewers and put one inside a ball. Have a block of floral foam on hand so that you can stick the skewers into it and let the ornaments dry.
Using a foam brush, paint the baking soda paint all over the balls. You’ll need 2 to 3 coats of paint, and wait for the previous coat to dry before you paint the next one.
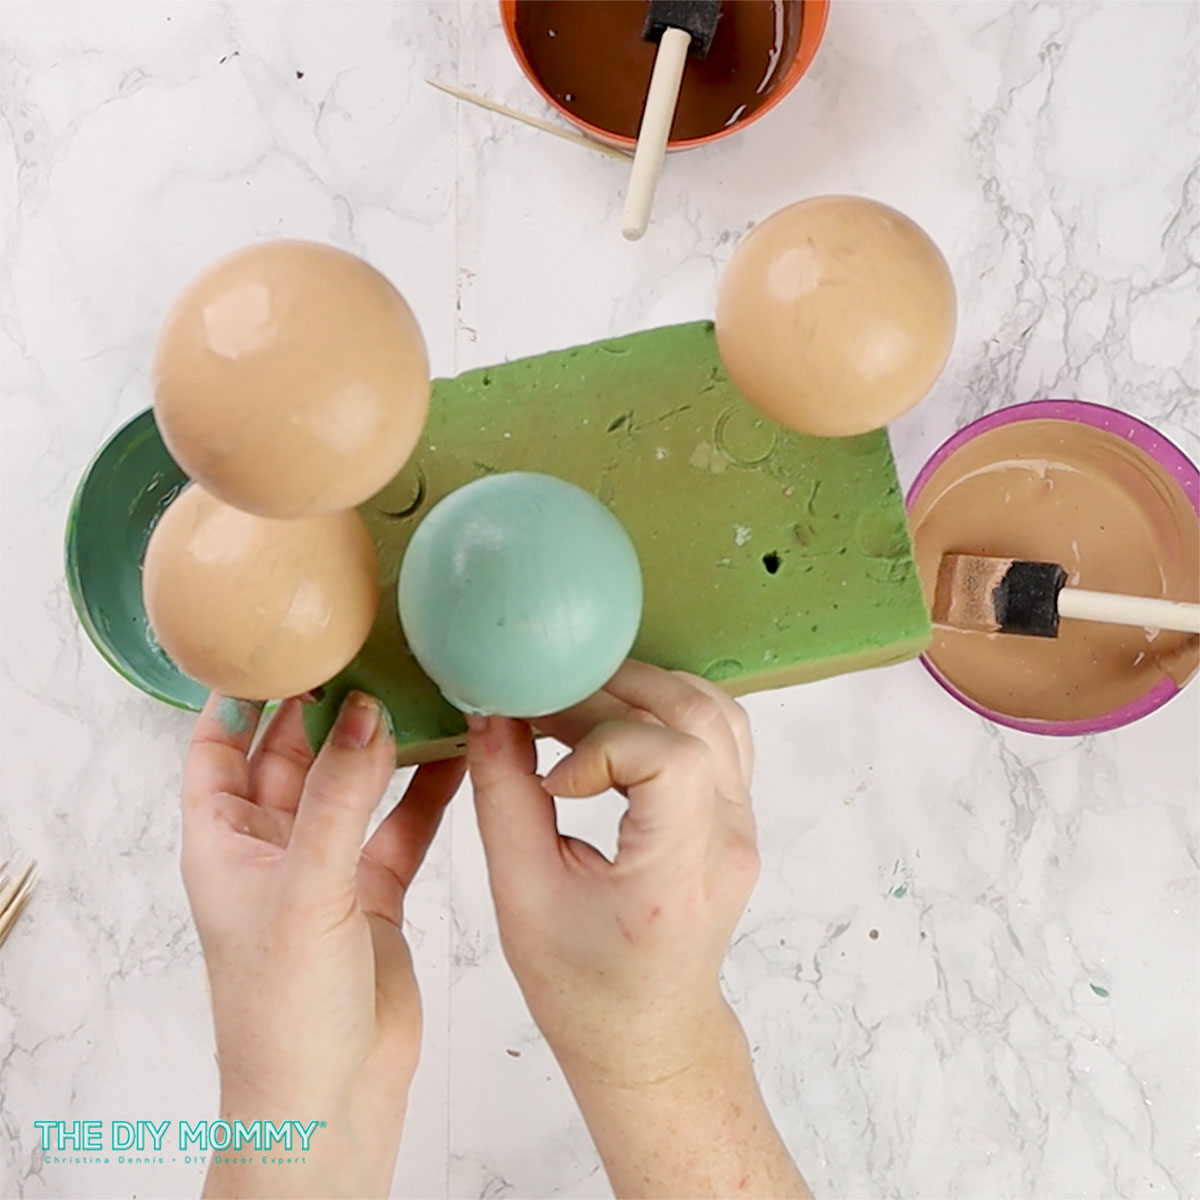
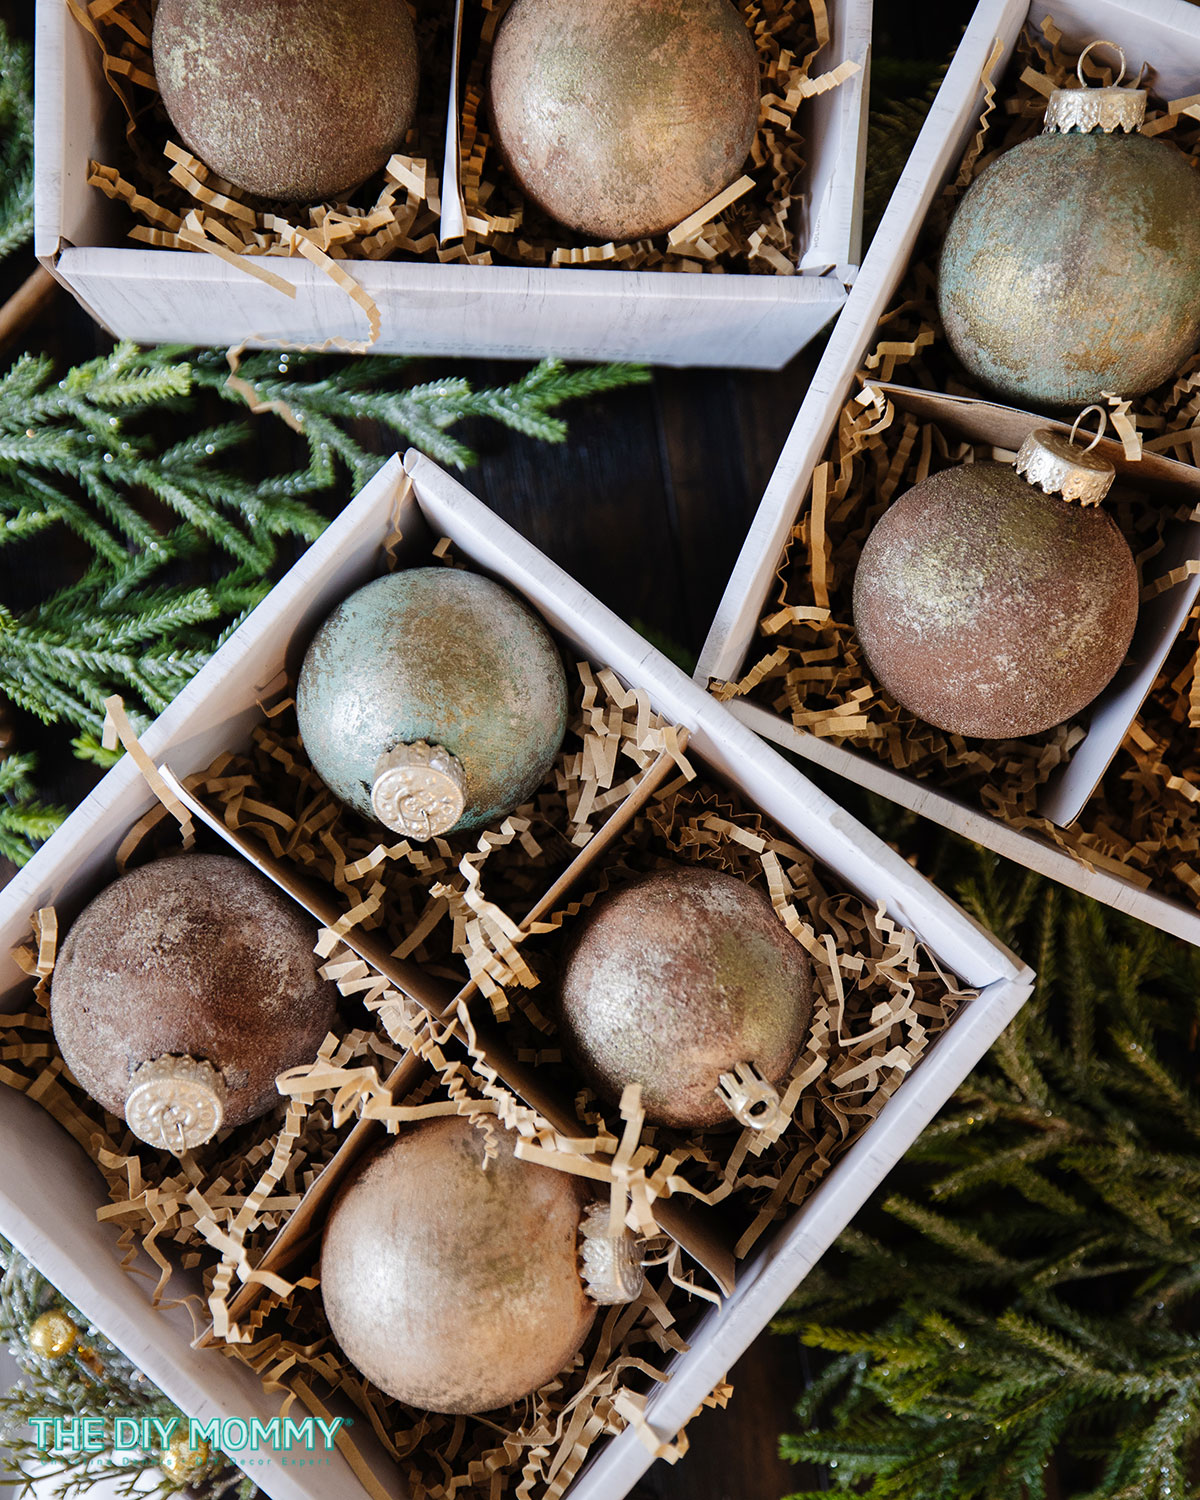
I’m doing three different base colors, but you can experiment with one, two, three or more. Once you’ve painted each ball ornament, place it on the skewer and into the floral foam to dry.
Adding texture to the ornaments
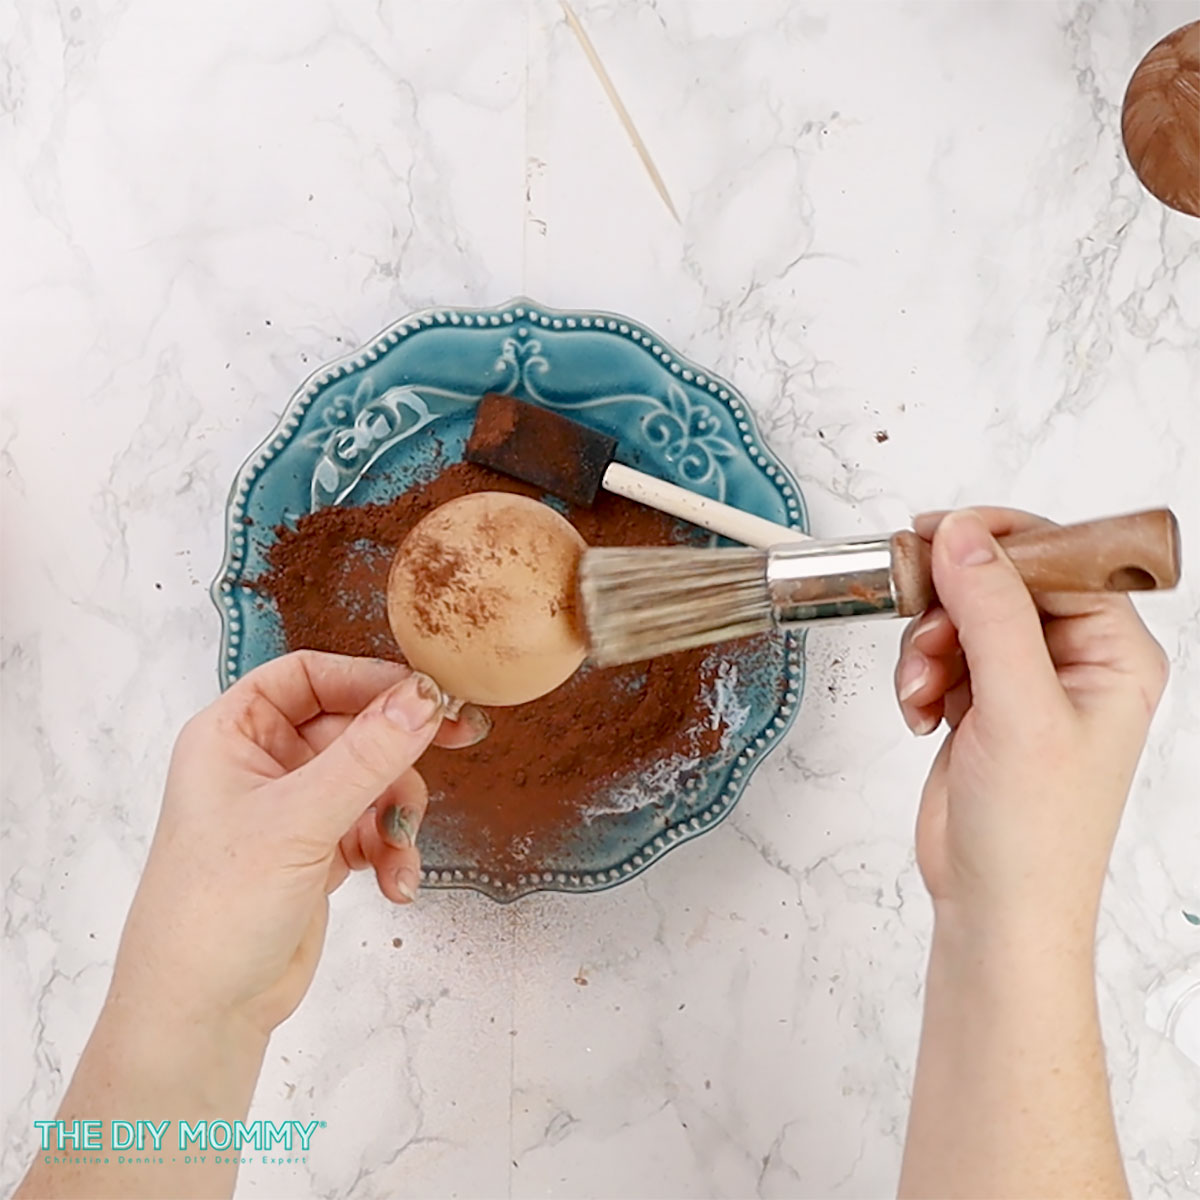
Now, before the balls are completely dry, take some cocoa powder and dab it on the ornaments with a nice firm brush. And then if you want, on the darker colored ornaments, you can also sprinkle some baking soda on top.
Painting the ornament tops
While those are drying, you can take the tops off of the ornaments and use some metallic paint. This one of the champagne gold color and brush that on to give them a little bit more of a glam look.
Adding metallic paint effects
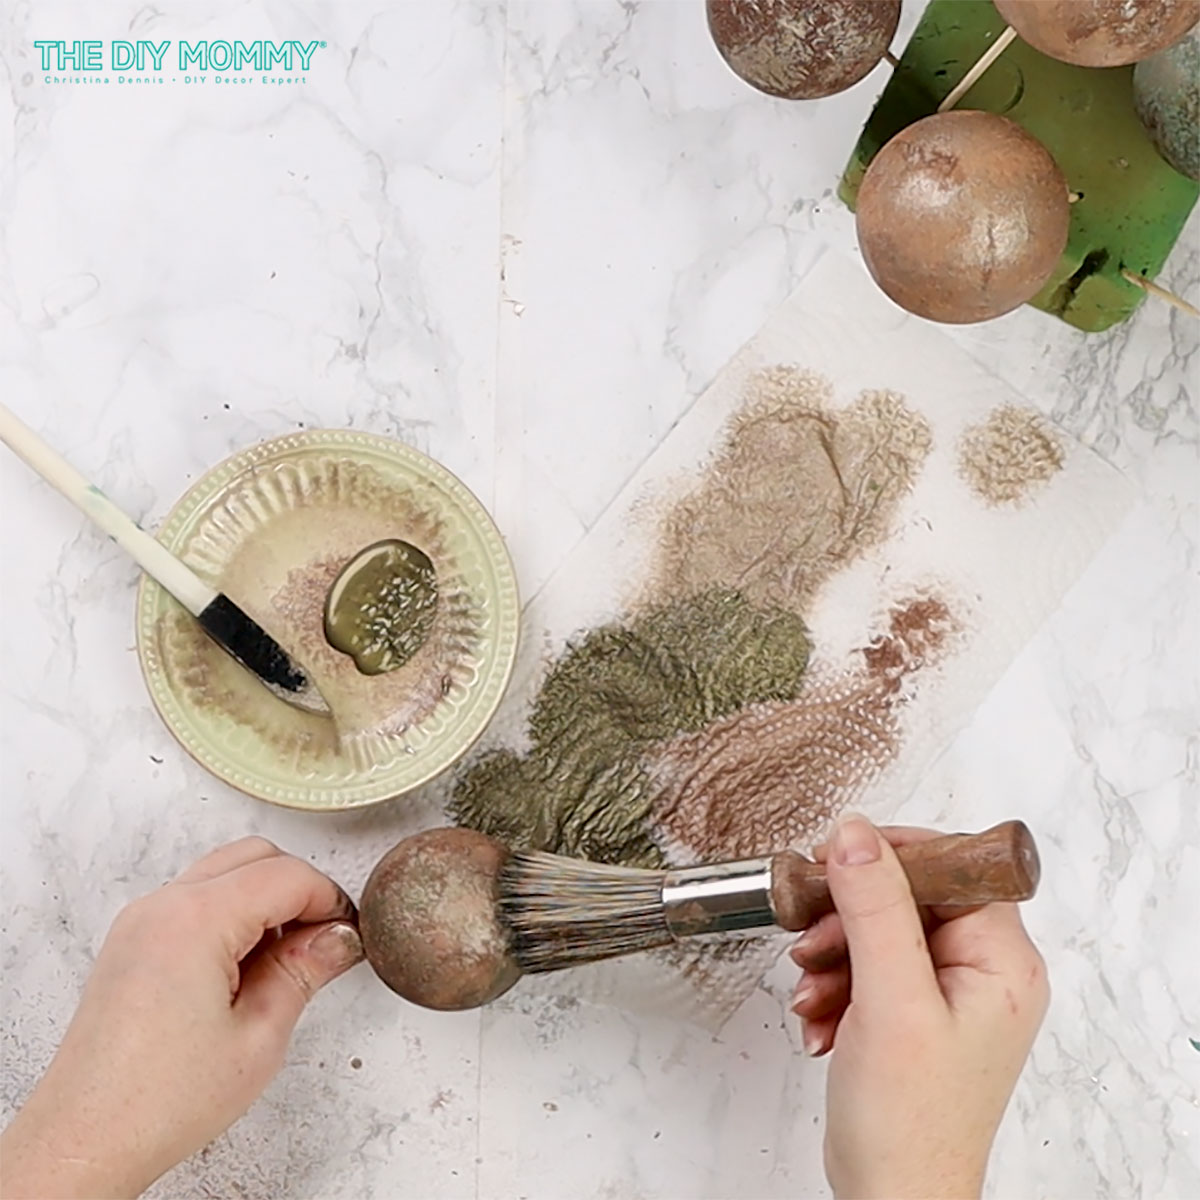
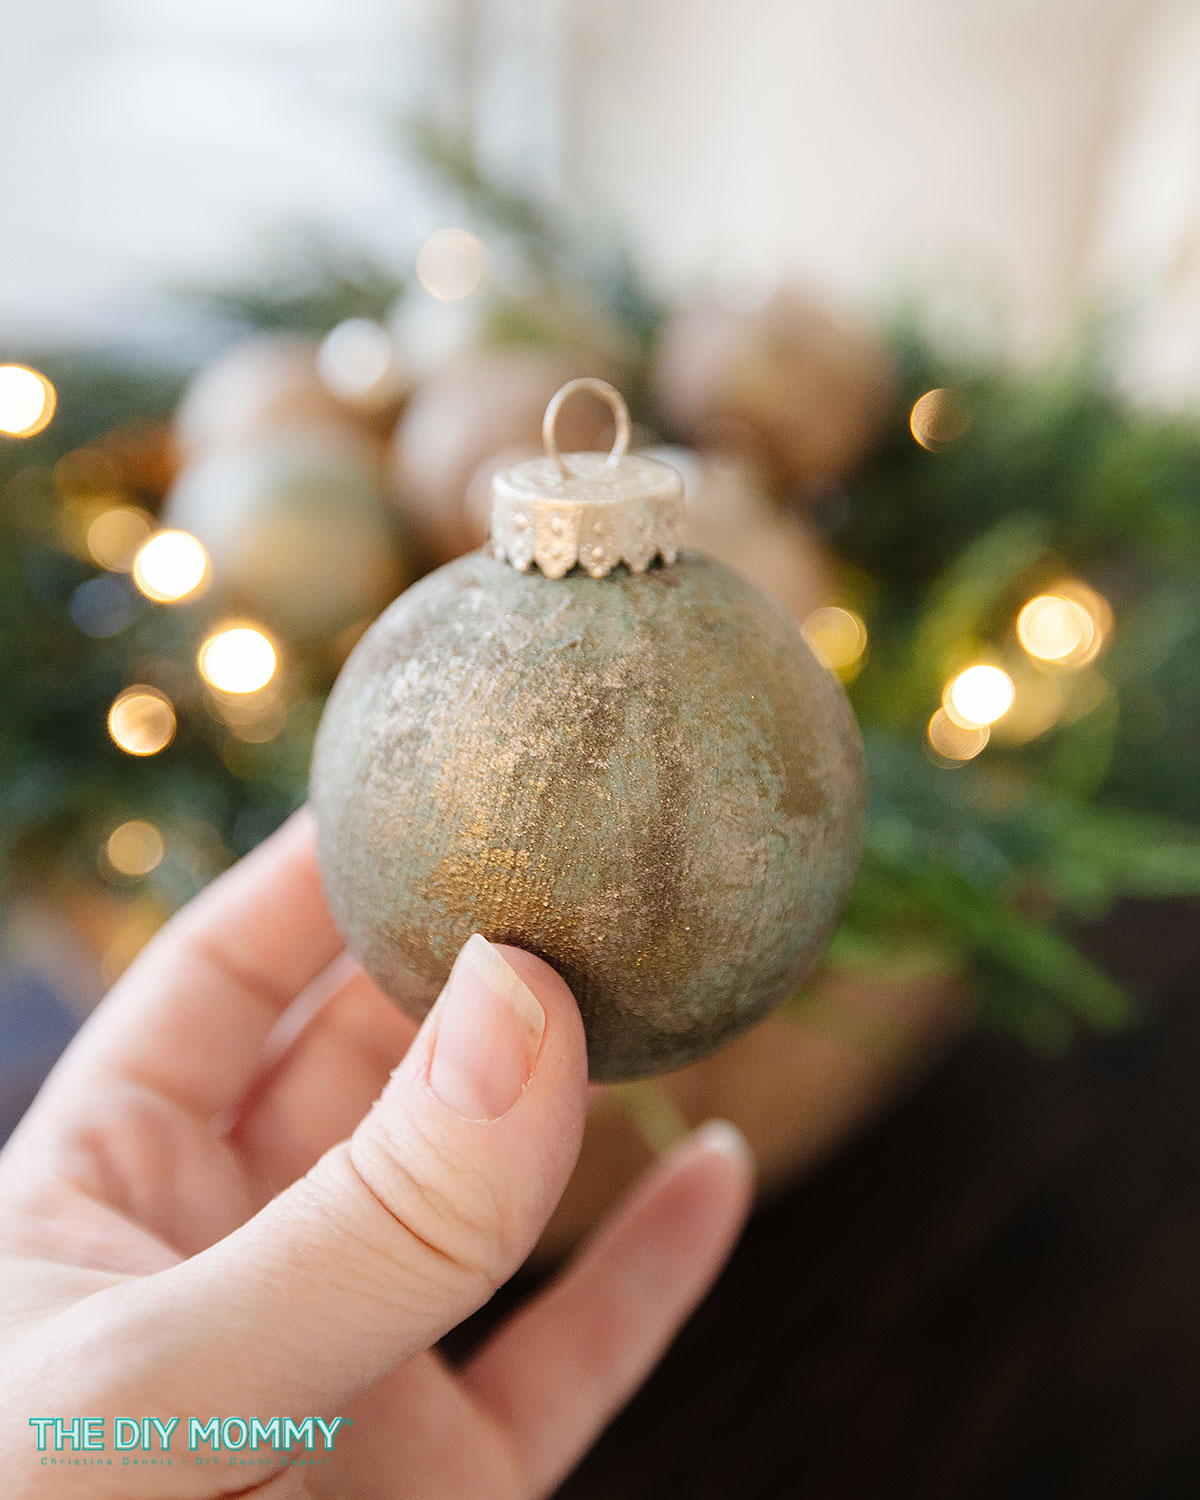
Once your ornaments are completely dry, take a nice stiff brush and brush any of the excess cocoa powder and baking soda off of them. Then, take some in metallic paint and dry brush that all over the ball. Do this by taking some of the paint, putting it on the brush, and then dabbing the excess off on a paper towel. Then, gently dab that metallic paint all over the ball.
Two different colors of metallic paint work really well for this to give these some dimension. After you’re done dry-brushing the first metallic paint on, dry brush the second colour on the ornament.
Finishing touches
Once all the paint has dried on the DIY Christmas ornaments, place the toppers back on. At this point you can tie some ribbons or twine around the tops, however I’ve left them plain.
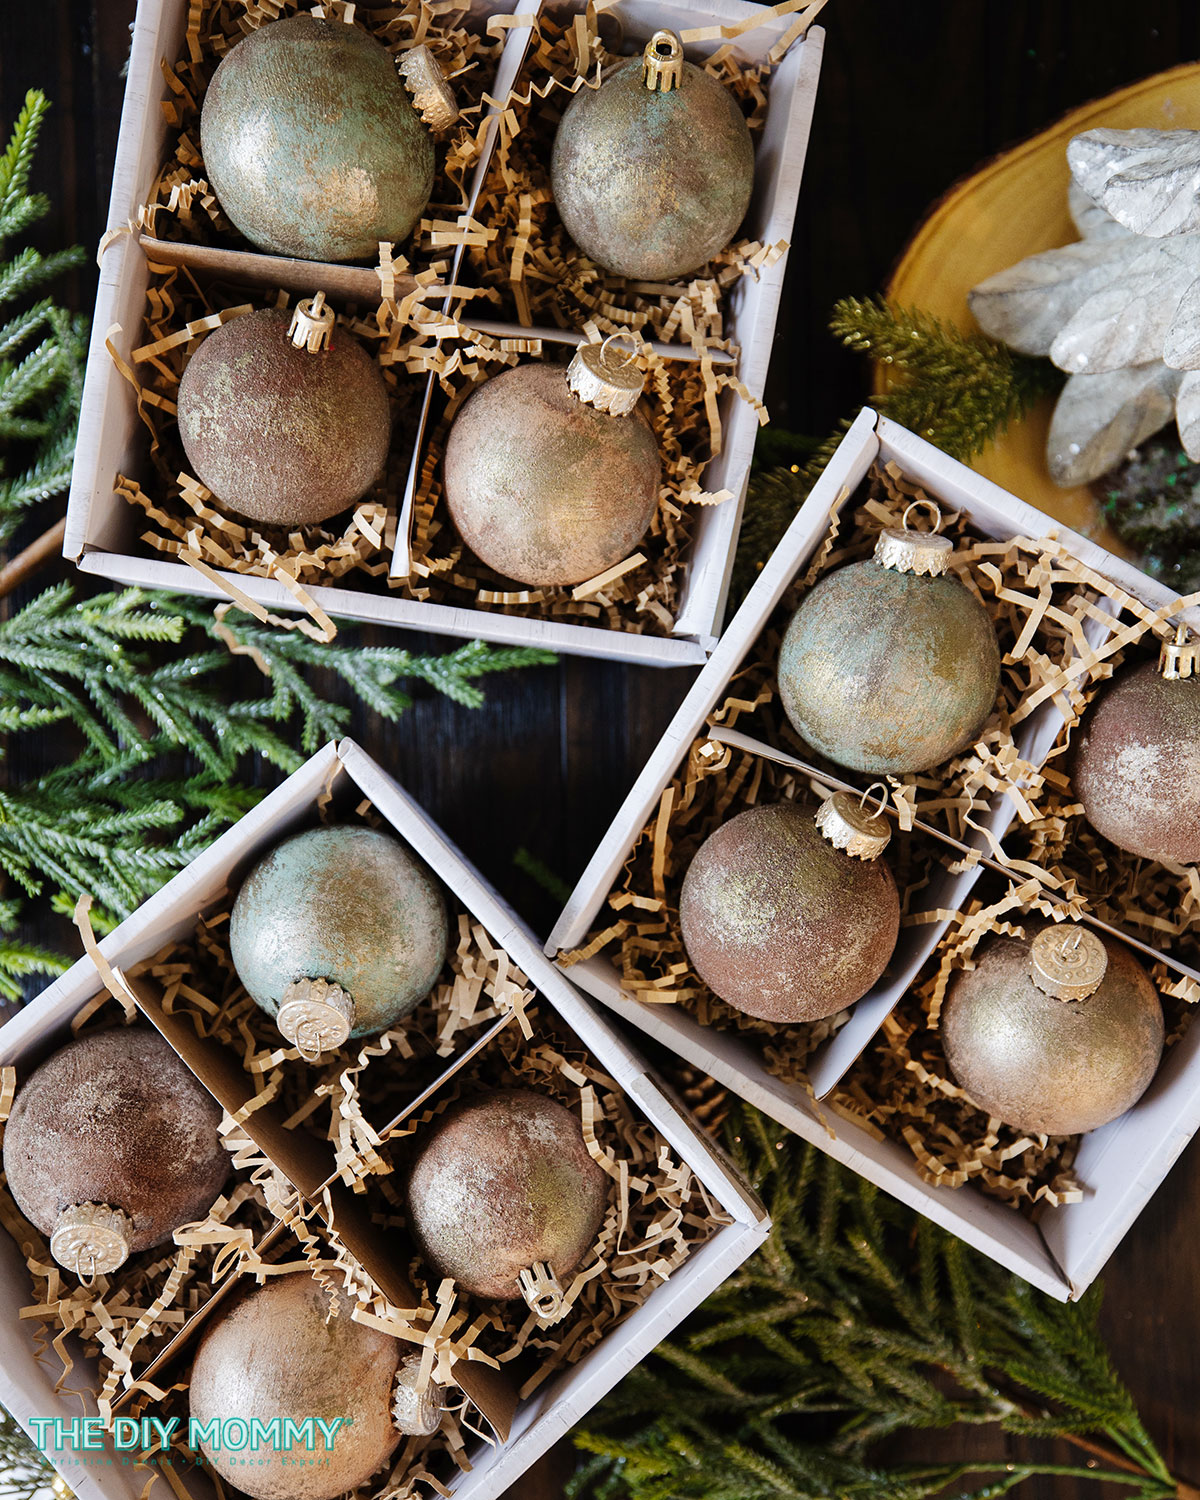
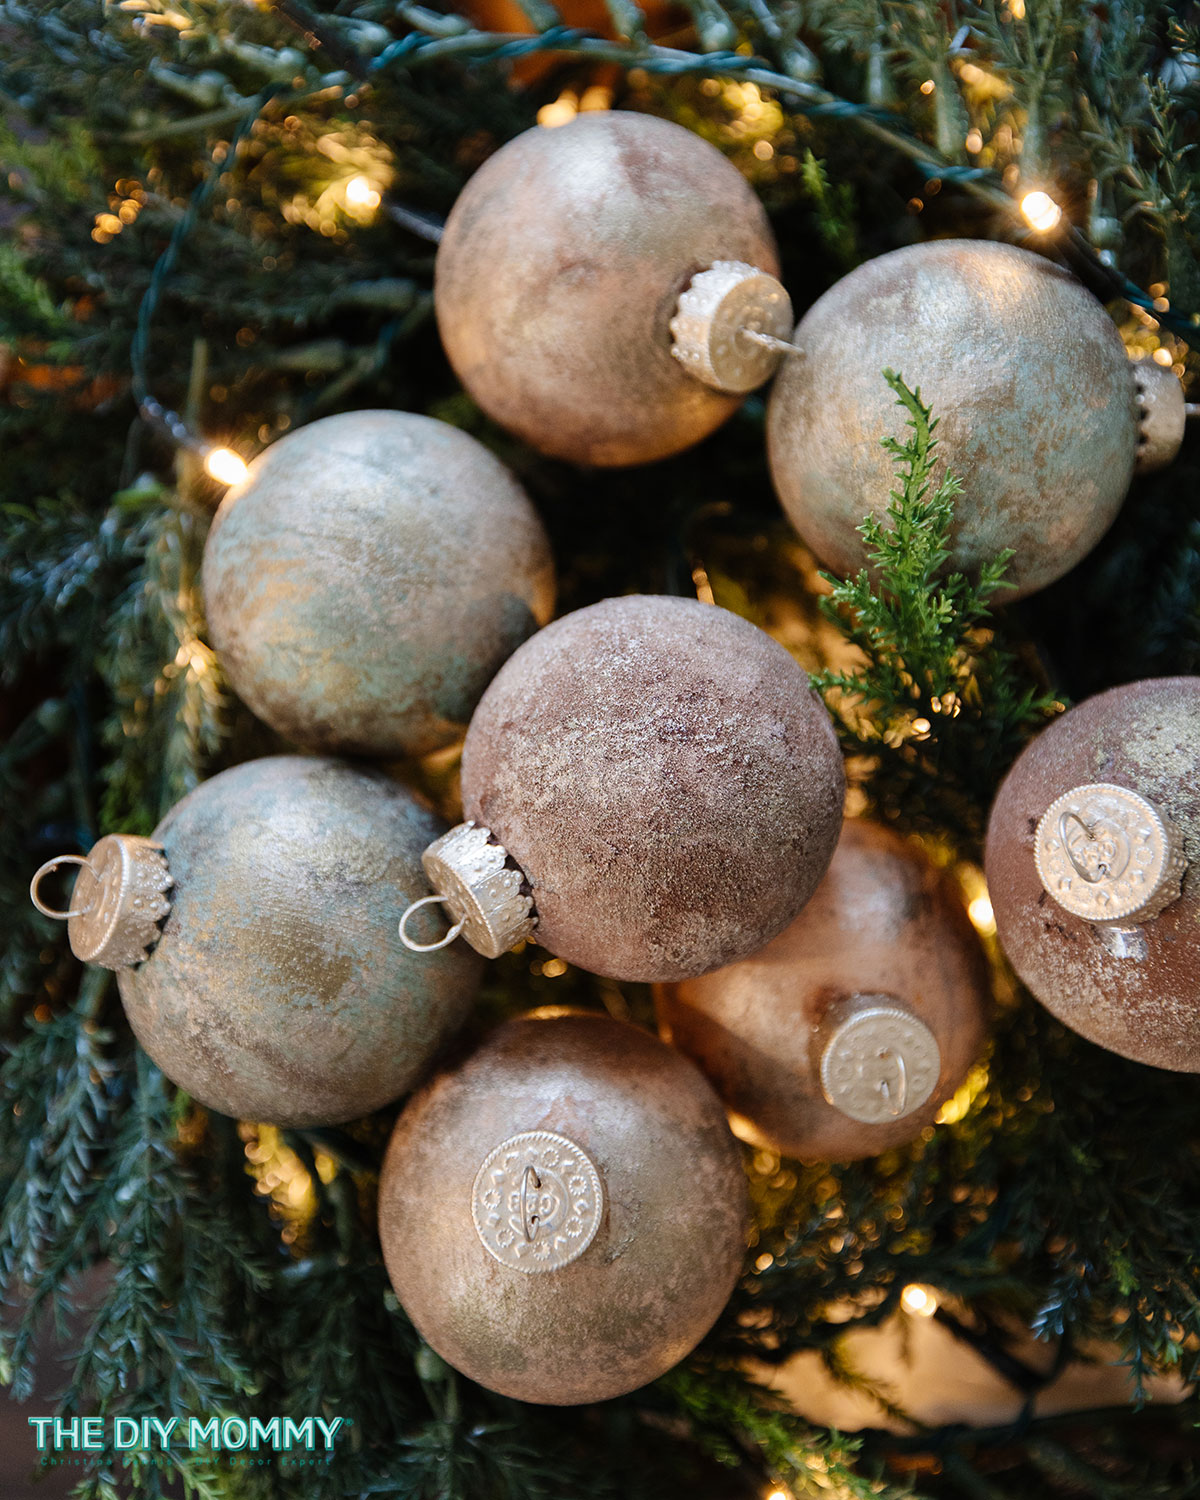
I love how these turned out! This DIY is one of my favourite crafts of the year! I love how textured these ornaments look. I love the glimmering metallic paint to make them glitter and shine.
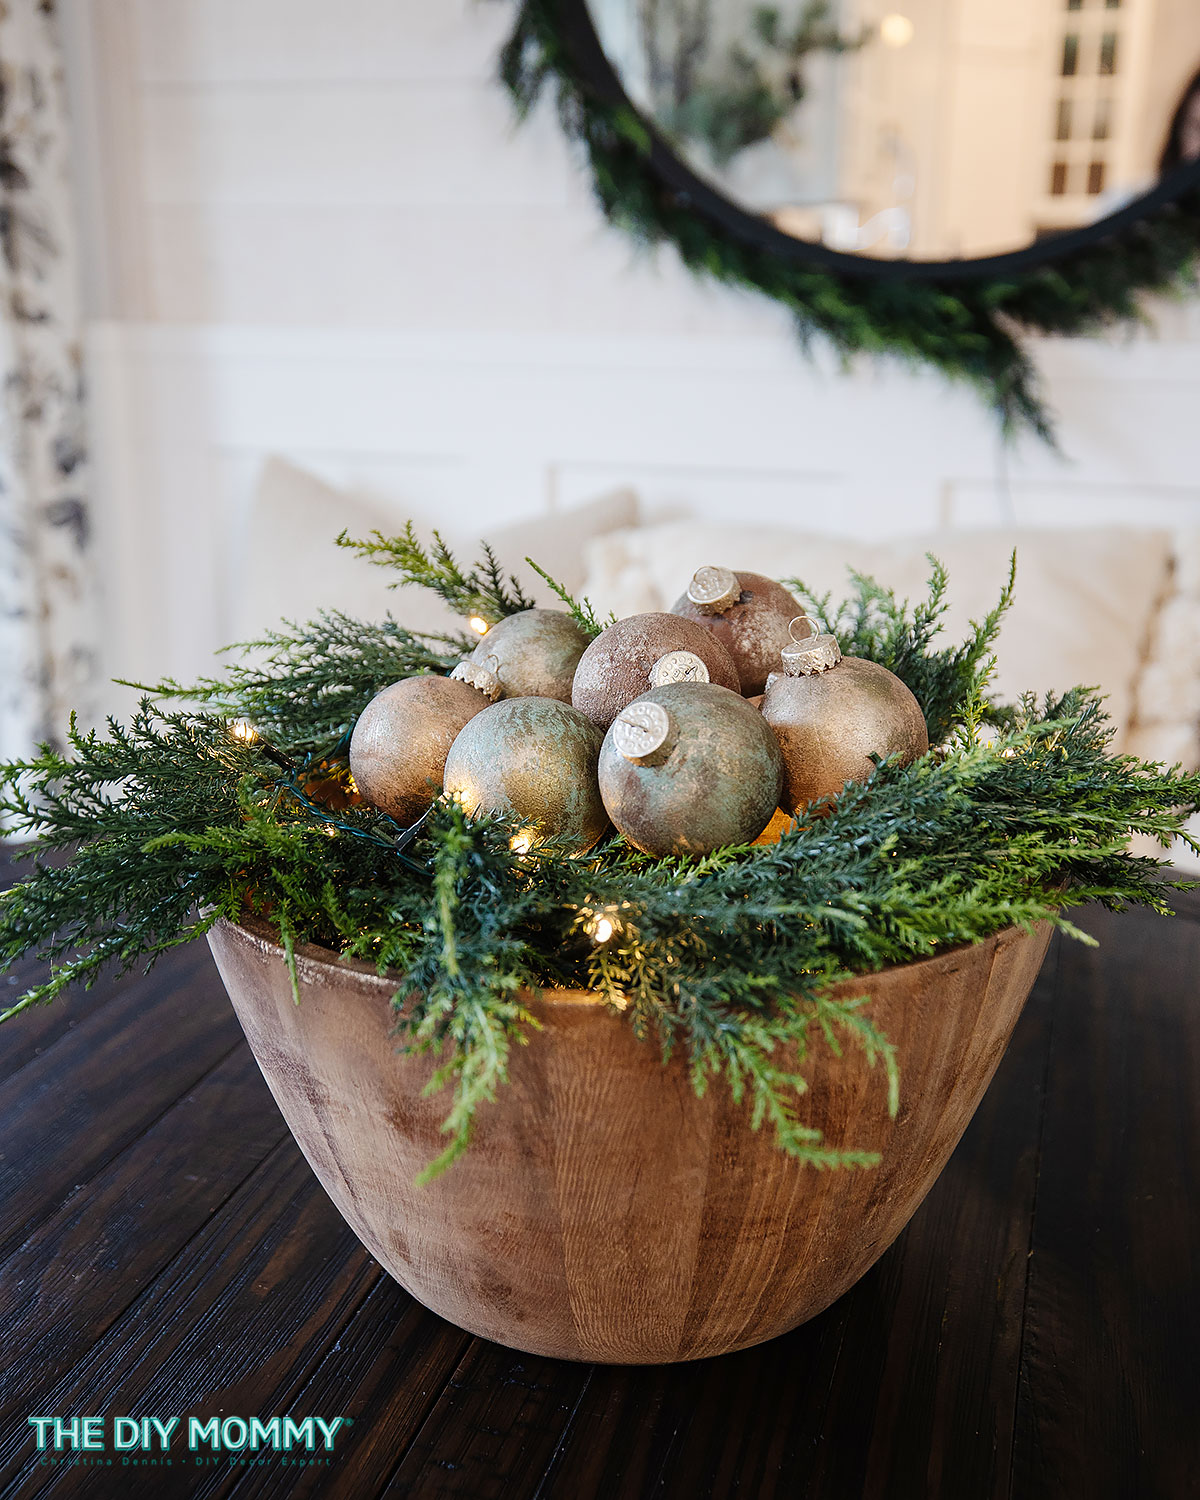
You can use these to decorate your Christmas tree, of course, or you can also use them in a centerpiece like I did here. I took a thrifted wooden bowl, added a greenery garland with lights on it inside, and I placed the ornaments on top for a beautiful centerpiece on my table. (Click here to see another way I’ve used this thrifted wooden bowl as a Christmas centerpiece!)
These ornaments would also be a lovely addition to gifts. Tie one onto your wrapped gift for a glimmering decoration. For stunning mantel decor, add a few of these with some floral wire to your garland.
More Christmas ball ornaments ideas
- pour some fake snow into clear plastic ornaments for a snow globe inspired look
- place a few faux floral stems into the ornaments for a boho chic feel
- add some gold or multi-coloured beads into clear ornaments to add texture and colour to your tree
- attach some faux pearl beads to the outside of an ornament with a hot glue gun for a glam look
PIN ME:
One Comment