Easy and Affordable DIY Halloween Porch Decor
This post may contain affiliate links · This blog generates income via ads
If you’re looking for ways to make your fall front porch decor just a little bit spooky for October 31st, this post is for you! I might not love Halloween as much as some people do but I’ve gotten very good at infusing a little touch of spooky glam here and there in my regular front porch fall scene. Let me show you how you can decorate for Halloween without all the gore!
Happy Halloween, everybody! This time of year is always tricky for me, outdoor decor wise. Not quite Christmas, not quite winter, but nearing the end of the fall, and all the warm colours that are my inspiration in September. It doesn’t help that I’m not a HUGE fan of Halloween. I’ve never been into skeletons, witches, witch hats, skulls, and all that kind of stuff. However, now that I have kids, I’m finding Halloween makes its way into my home whether I like it or not. So, over the years I have found ways to put a touch of tasteful Halloween here and there that makes both me and my girls happy! I’ve got some great ideas here for ways you can give your fall decor that little twist of Halloween. Let’s get to it!
Halloween Inspired Door Mat
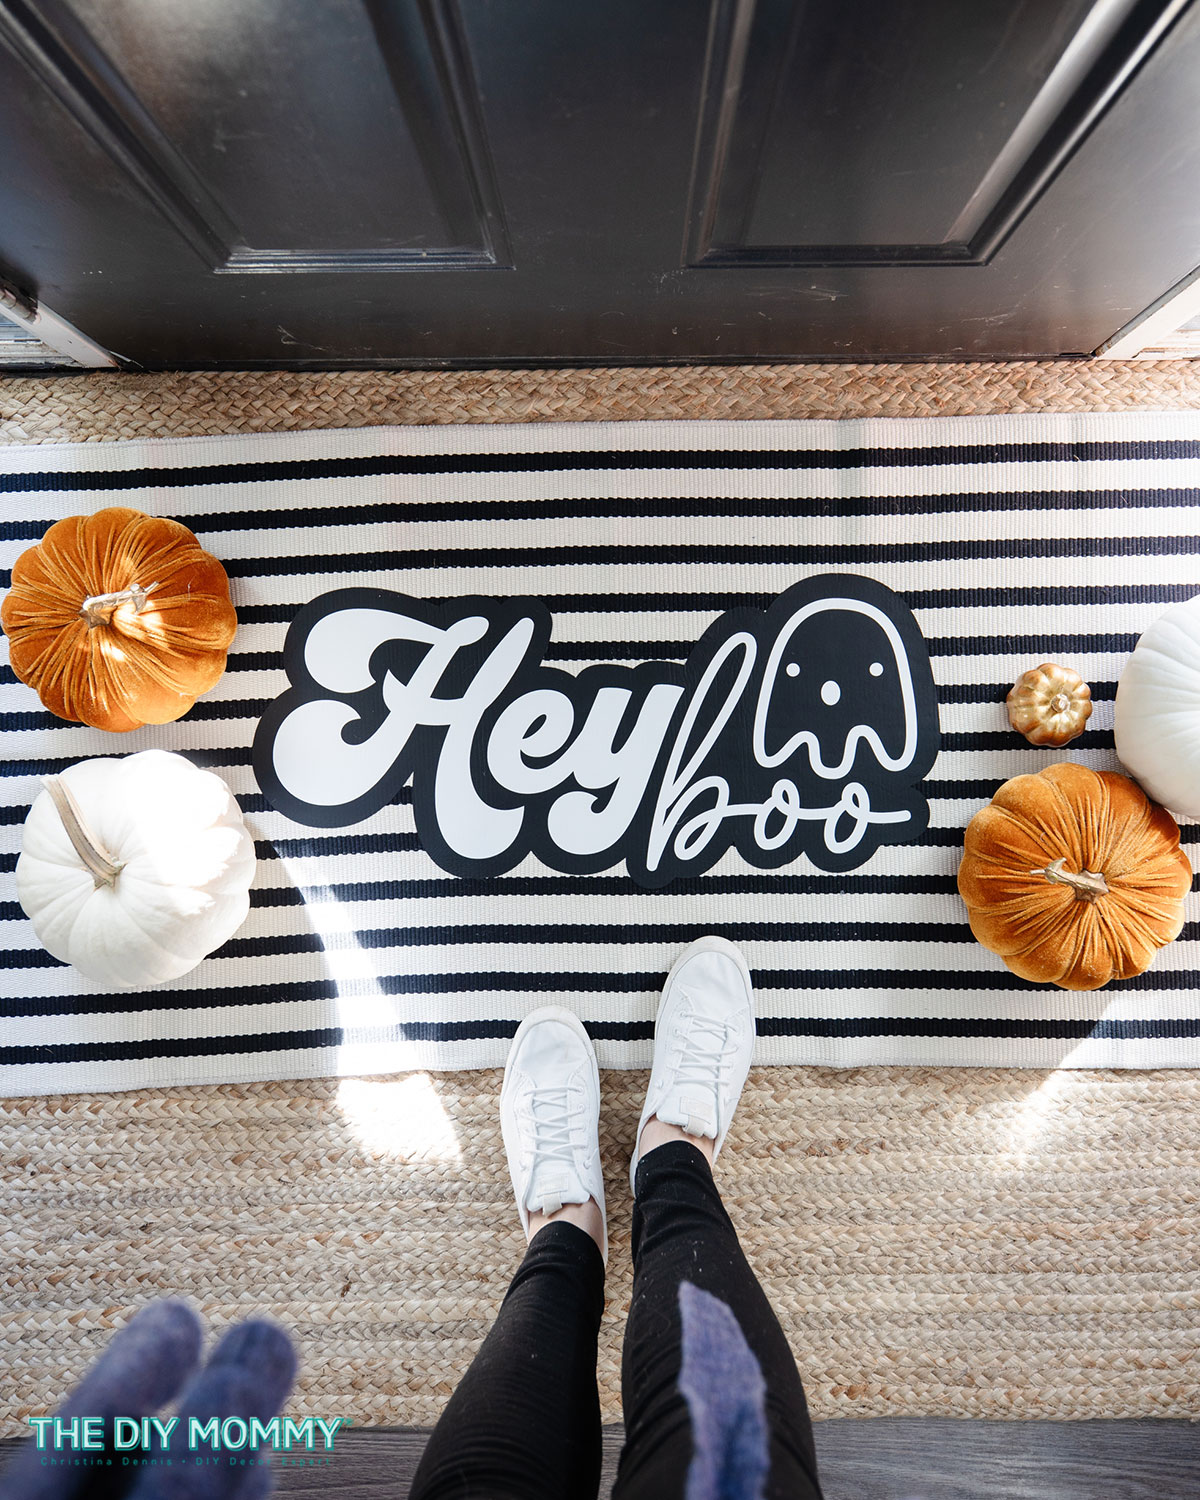
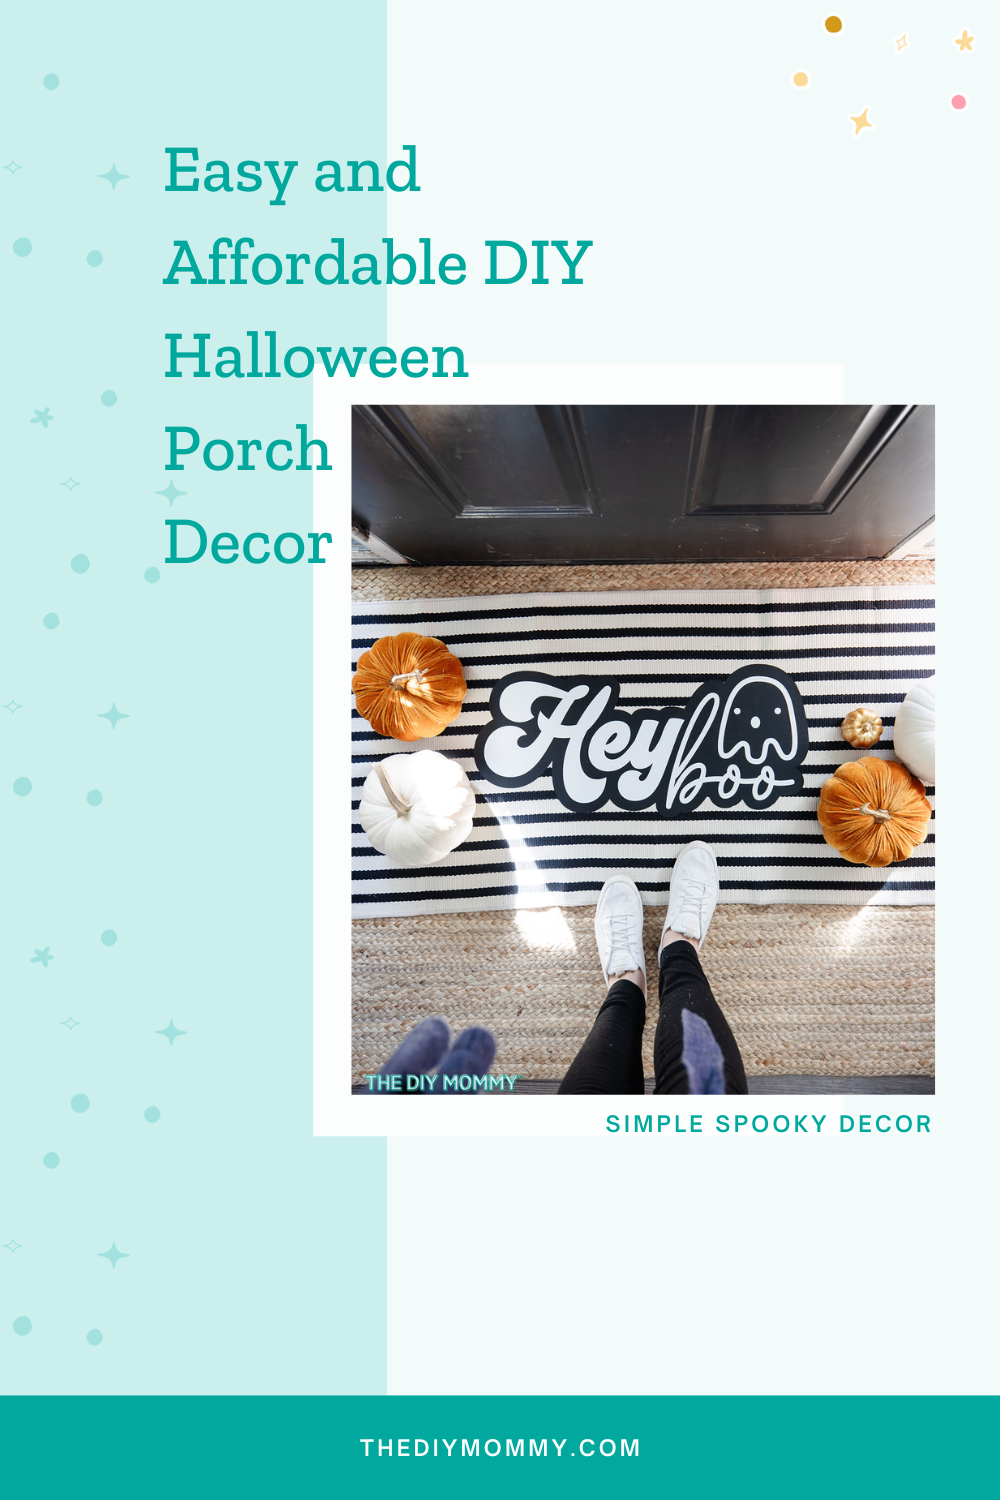
Let’s start with this super adorable “Hey boo” DIY door mat! I like my Halloween decor cute and subtle rather than scary, and this door mat checks all those boxes for me. I used my Cricut Explore 3 to create this mat. All you need is an inexpensive black and white striped mat from Amazon, your Cricut, and some black and white iron-on transfer paper. And as always, if you don’t have a Cricut, you can order a cute pre-made iron on decal for exactly the same look!
- First, I chose a design that I liked and cut it out onto iron-on transfer paper with my Cricut. You can also create your own unique design and upload it to Cricut Design Space.
- After I cut out my shapes I weeded all the excess material away.
- Now, it’s time to put it together! I spread out the mat and used my Cricut EasyPress to apply the black iron-on transfer paper background.
- Then, I pressed the white words and image in the right place over the black.
I think it turned out so cute! Who said ghosts have to be scary, anyway? I think this is one of my favourite Halloween front porch decorating ideas. When the season is over I can just flip the mat over and use the plain side for a holiday-neutral door mat! Perfect.
Make Emoji Carved Pumpkins for Halloween
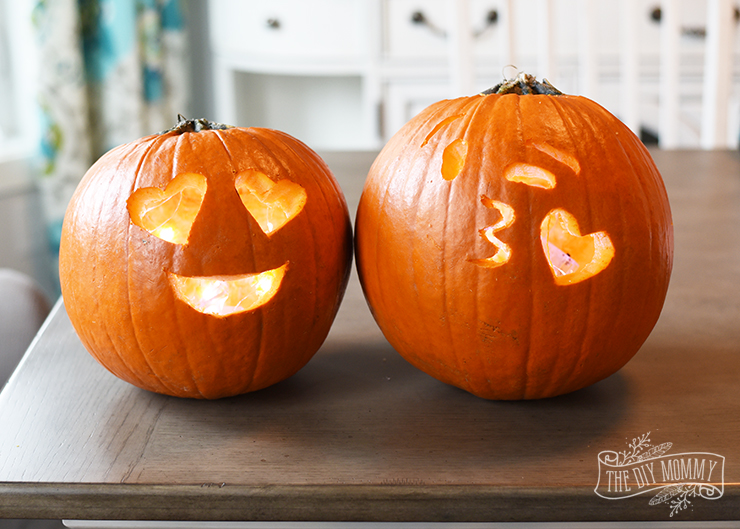
I might not love Halloween as much as I love Christmas, but I DO love carving pumpkins! We like to keep our Halloween decor silly and cute around here rather than gory and scary, so these emoji pumpkins were perfect and so fun to make! To make an emoji carved pumpkin, simply find a graphic of your favourite emoji online. Then, enlarge the graphic to the size you want it to be for your pumpkin and print it. Cut out the portions of the emoji that you want to create a stencil, and then transfer the design to your pumpkin. Carve the design with a serrated knife. Finish the pumpkin off with a thin coat of petroleum jelly to keep the pumpkin from drying out. These make for happy little jack-o-lantern crafts that the trick-or-treaters at your door will love too!
5 Painted Pumpkin Ideas with Step-by-Step Instructions
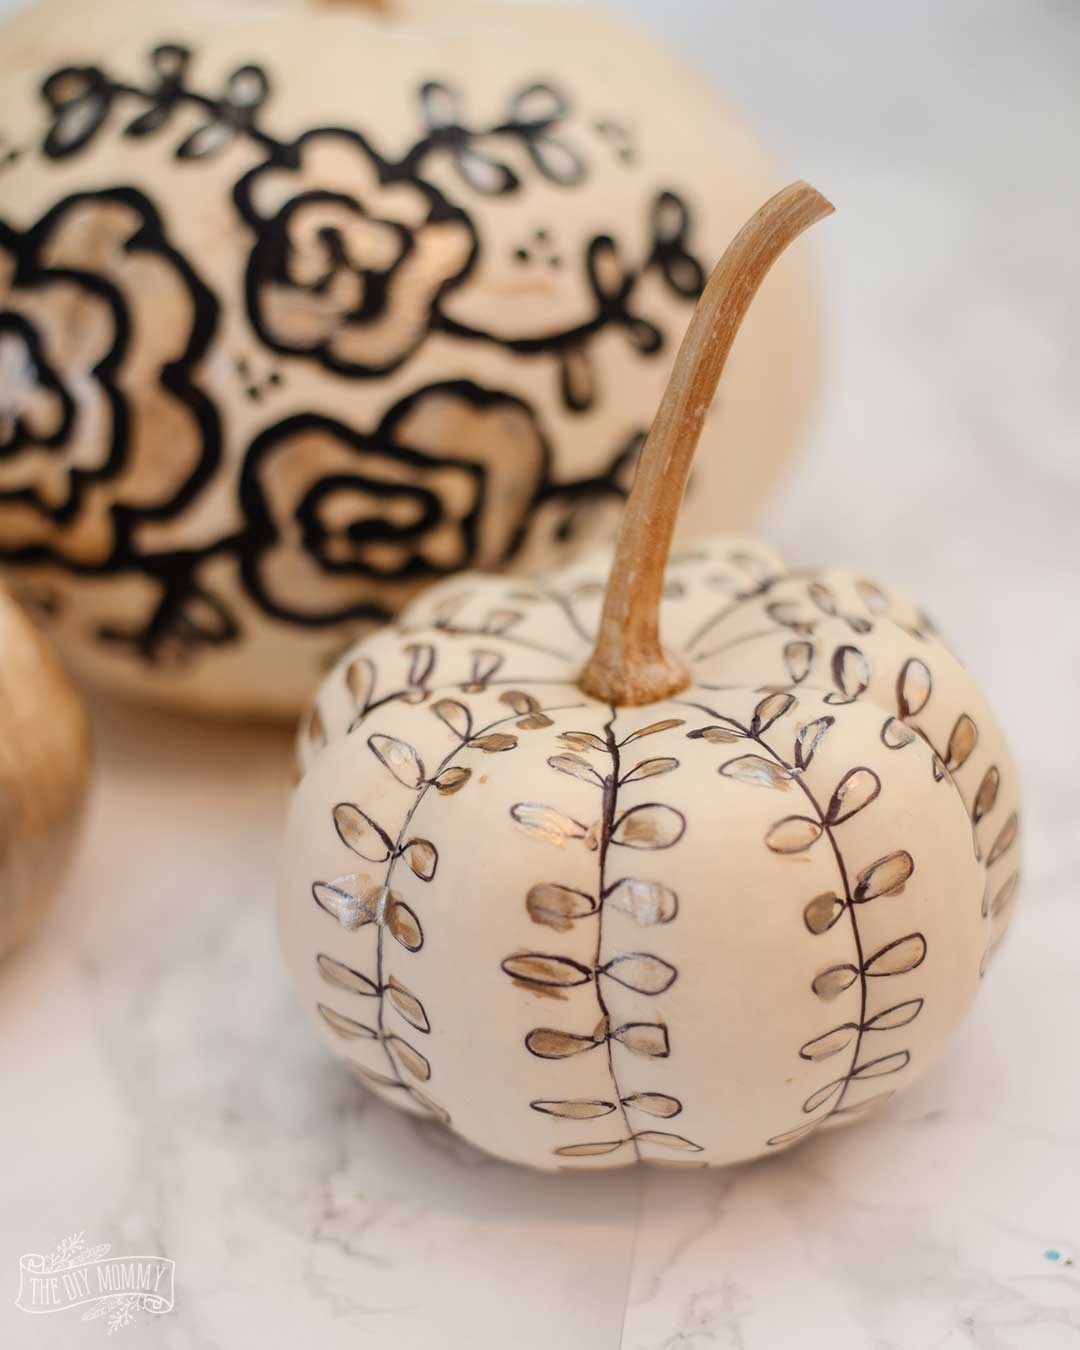
Is carving pumpkins not your thing? Then paint them instead! Here are 5 easy pumpkin painting ideas with easy to make, step-by-step instructions. Using some black and gold paint and a black permanent marker, I was able to create 5 different white painted pumpkin looks in less than an hour. I used acrylic craft paint on my pumpkins, but you can also use latex or chalk style paint. You can even use spray paint if you’re planning to seal your pumpkins. Use your imagination and my ideas to get your creative juices flowing. These pumpkins would look lovely sitting on your front porch as outdoor Halloween decorations. They would look beautiful on a sideboard or breakfast nook table too.
Decorating the Front Steps
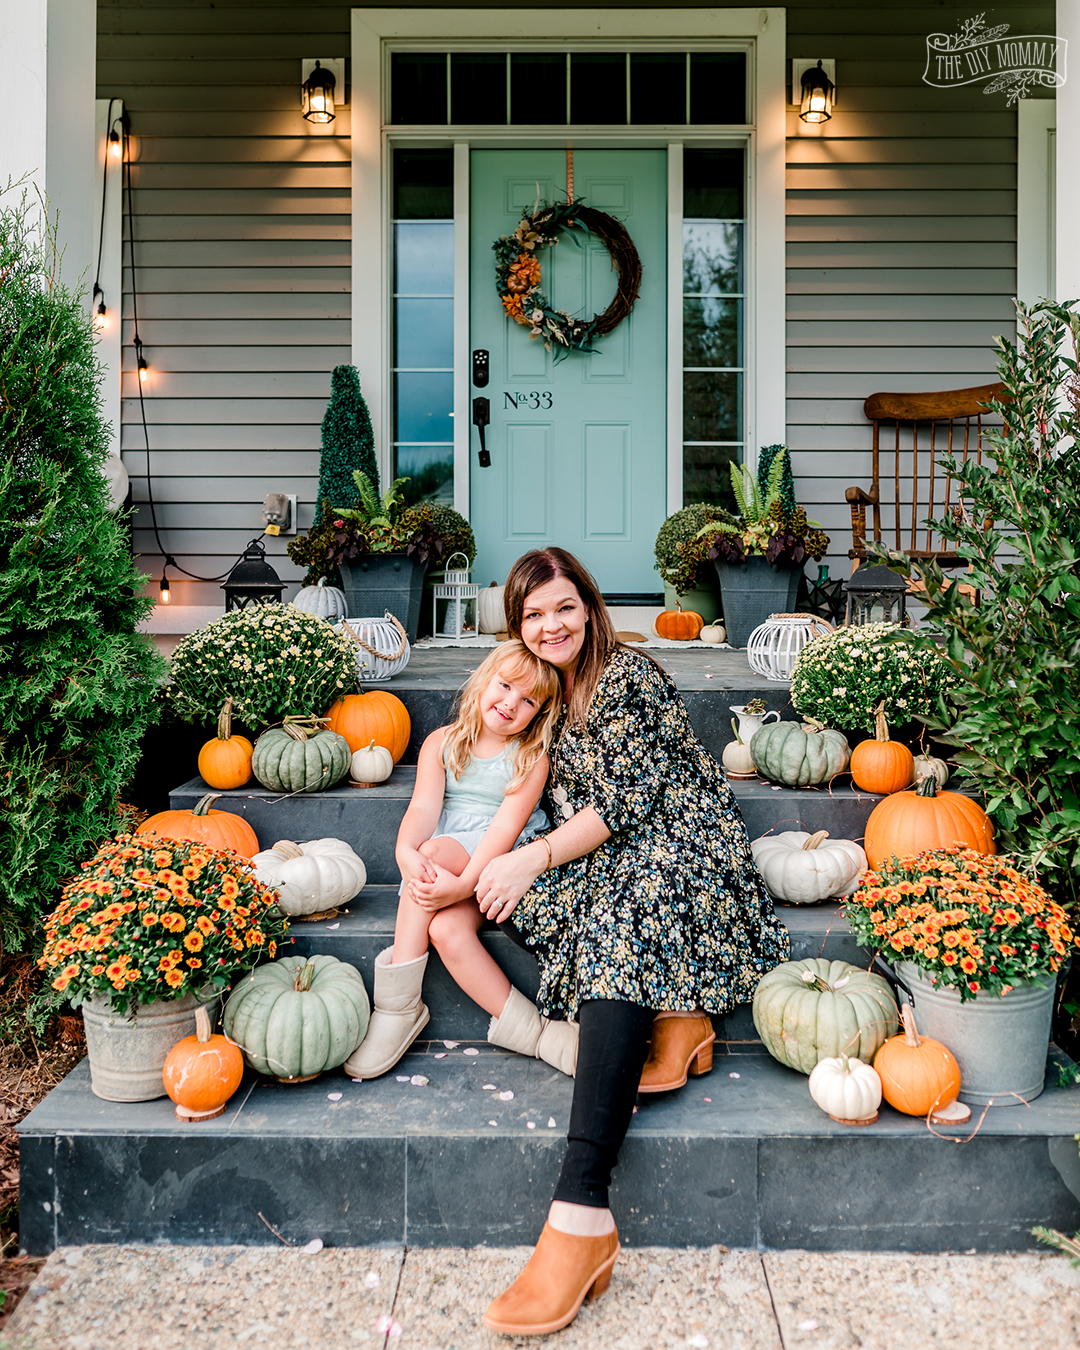
I may not exactly love Halloween, but I do love decorating with pumpkins and the two go hand in hand! Here’s how I decorated our house for autumn one year with touches of traditional and muted seasonal colours and tons of budget-friendly DIY ideas. Pops of burnt orange and pumpkins feature heavily in almost every space, making any of these ideas perfect for the Halloween season with a few simple little tweaks. Think carved pumpkins and cute little spiders. Easy peasy!
How to Make Pumpkins Last Longer with Vinegar
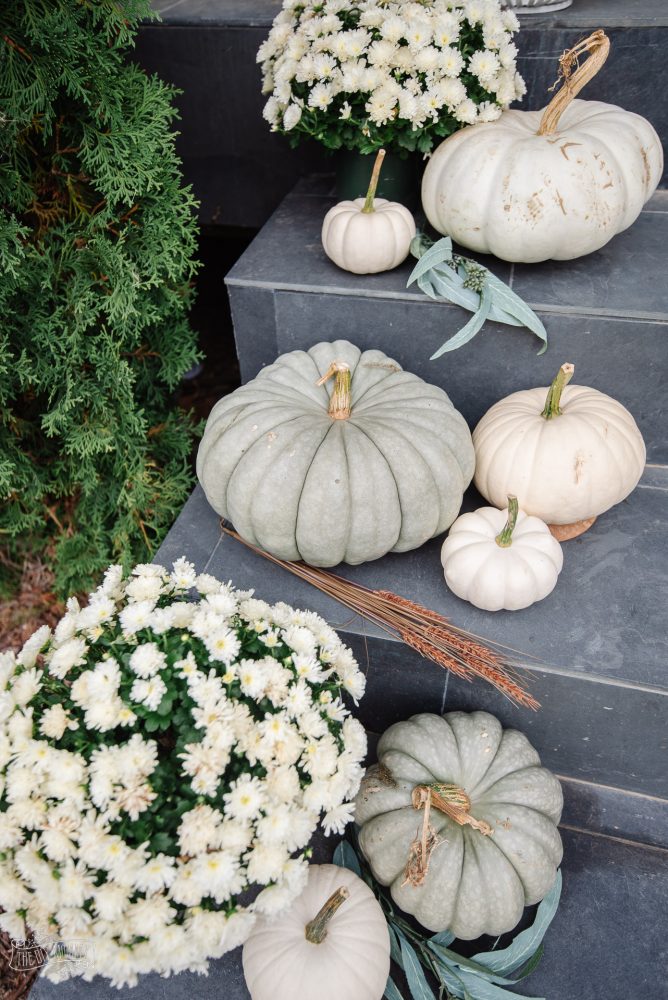
Since we are talking about decorating with pumpkins, let’s talk logistics! I love decorating with real pumpkins in the fall…and eating them, too. They can be tricky to preserve, but over the years I’ve learned some helpful tricks on how to make pumpkins last longer using vinegar. I usually hit up our local pumpkin farm and decorate our front porch with all of my favourite varieties. Look how great they look on either side of our stairs with some mums and lanterns sprinkled in! You want this look to last as long as possible, so here’s what I suggest.
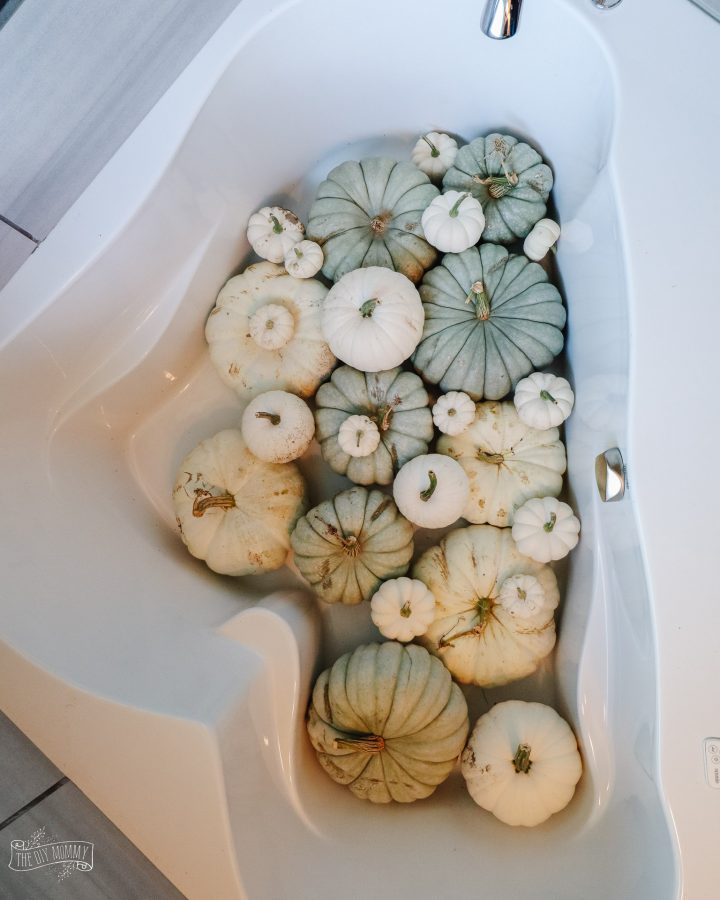
- Wash your pumpkins with something that helps remove any bacteria will help make them last longer. Over the years I’ve used bleach water (1 Tbsp bleach per 4 cups water), but lately I’ve been making my pumpkins last longer with a food-safe distilled vinegar solution (about 1 part vinegar to 10 parts water).
- Soak them for about 20-30 minutes. Then let them air dry and leave them out in the sun to cure. Curing will harden the exterior of the pumpkin to prevent mold and help the insides stay fresh!
- And to further prevent pretty pumpkins from turning into a rotten pile of mushy grossness before Halloween, ensure you’re never putting them directly on concrete. It’s too cold! I like to prop mine up on little wooden rounds or cork trivets.
- You also need to take pumpkins indoors before it frosts or snows. You can store them in a cool place inside with lots of airflow. We store ours in our basement up and off the concrete floor.
These ideas work the same for orange pumpkins or the white or green variety too. If you follow these tips and tricks, your pumpkins will last as long as you need them for your fall and Halloween porch decor!
Spooky Glam Halloween Dollar Store Wreath
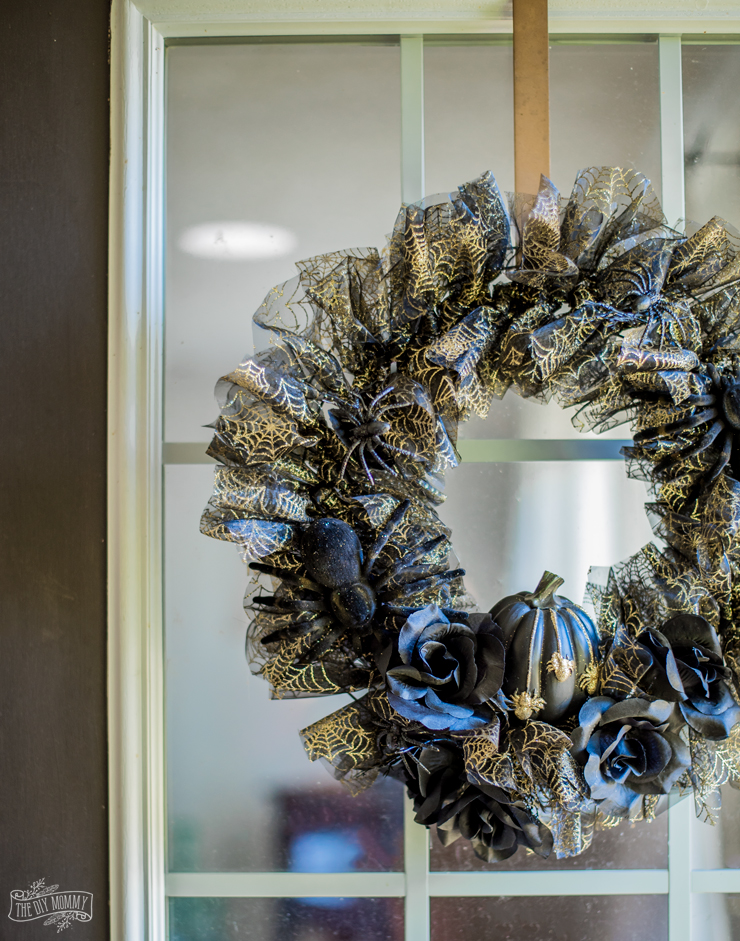
No Halloween front porch decor is complete without a door wreath! Come see how I made a spooky glam Halloween Dollar Tree wreath & other decor for my front step. It’s Halloween-esque, but it’s not gory or icky. It’s also just a little bit glamourous with it’s black and gold colour scheme. The best part? It only cost a few dollars to make with items all found at the Dollar Tree!
Halloween ribbon, a giant spider or two, and faux pumpkins all came together to create a look I love. I supplemented the wreath with some classic spider webs garland in the bushes by the porch, and my DIY porch lanterns lit up by spooky lights and dollar store faux roses in black. Fishing line or hot glue works great to get everything to stay in place! This entryway is ready for Halloween and I only had to spend $20 to make it happen.
Make Wooden Lanterns for Under $10
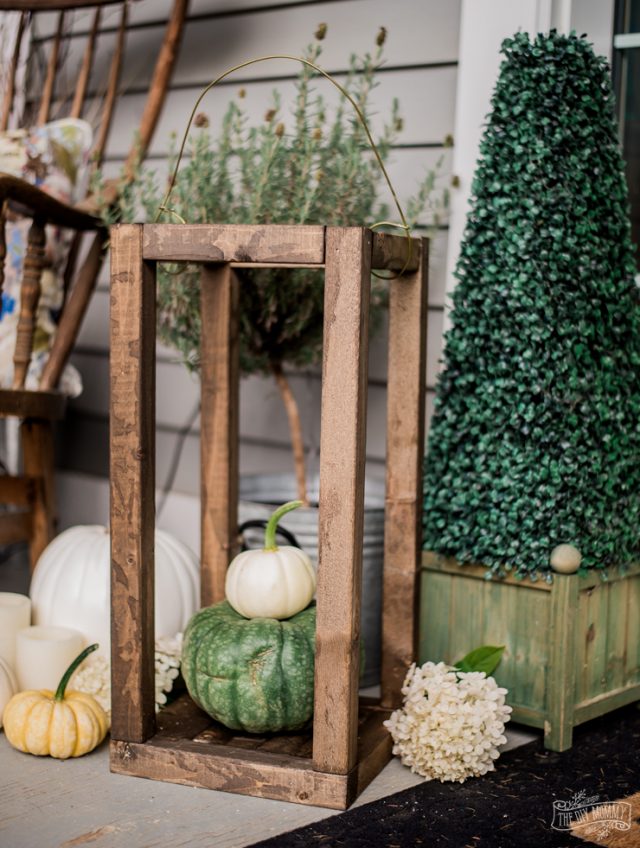
Did you like my lanterns decorated for Halloween in the spooky glam wreath post above? You can make your very own, and then decorate them the way you want for any season! When I saw some beautiful but simple wooden outdoor lanterns at an expensive store, they inspired me to build my own. These rustic lanterns look beautiful on either side of my door, and they cost me less than $10 each to make! They’re a great beginner’s woodworking project because they’re so simple. They would make a beautiful backdrop for all kinds of spooky Halloween decor! You could fill them with:
- Candles or battery-operated tea lights
- A carved orange pumpkin
- Witch legs hanging out the bottom
- A bubbling cauldron
- Black crows
As far as Halloween porch decor ideas go, you can see it doesn’t get much more versatile than these lanterns! Fill them with whatever you wish and then lean a couple witch brooms against them and you’re all set for an easy DIY Halloween.
DIY Dollar Store Halloween Decor Ideas

For our final set of Halloween decor ideas, let’s talk about the dollar store! The dollar store is a great place to find Halloween decor and materials to make fun Halloween DIY projects. There are some great ideas here on how you can decorate your home for Halloween on a budget!
Especially if you’ve got a semi-enclosed porch or or a window that looks out on the street, almost any “mantel” decor will look great out there! My fun ghost banner made from Styrofoam balls, cheesecloth, and twine that I draped across my mantel inside would look great hung with twinkle lights and draped across your front porch entryway or your front window. The other dollar store ideas I have to offer (crows, black cloth, letter board, spiders and lights) would look fantastic on your front porch too! It’s all about repurposing and thinking about what you can take from the inside and put on the outside.
I hope I’ve shown you that your outdoor decor doesn’t have to be over the top to be Halloween-ish and fun! Tweaking your current fall decor with a few little spooky touches can go a long way to getting your house ready for the trick or treating season. Tag me with how you take these ideas and make them your own @thediymommy!
Pin me:
One Comment