Gorgeous DIY Table Centerpiece with Dried Flowers
This post may contain affiliate links · This blog generates income via ads
If you’re looking for a unique but stunning DIY table centerpiece to craft this season, this dried floral version is a lot of fun to make! You can use a scrap piece of lumber to make it budget-friendly, and it doesn’t require much skill to create. Let me show you how!
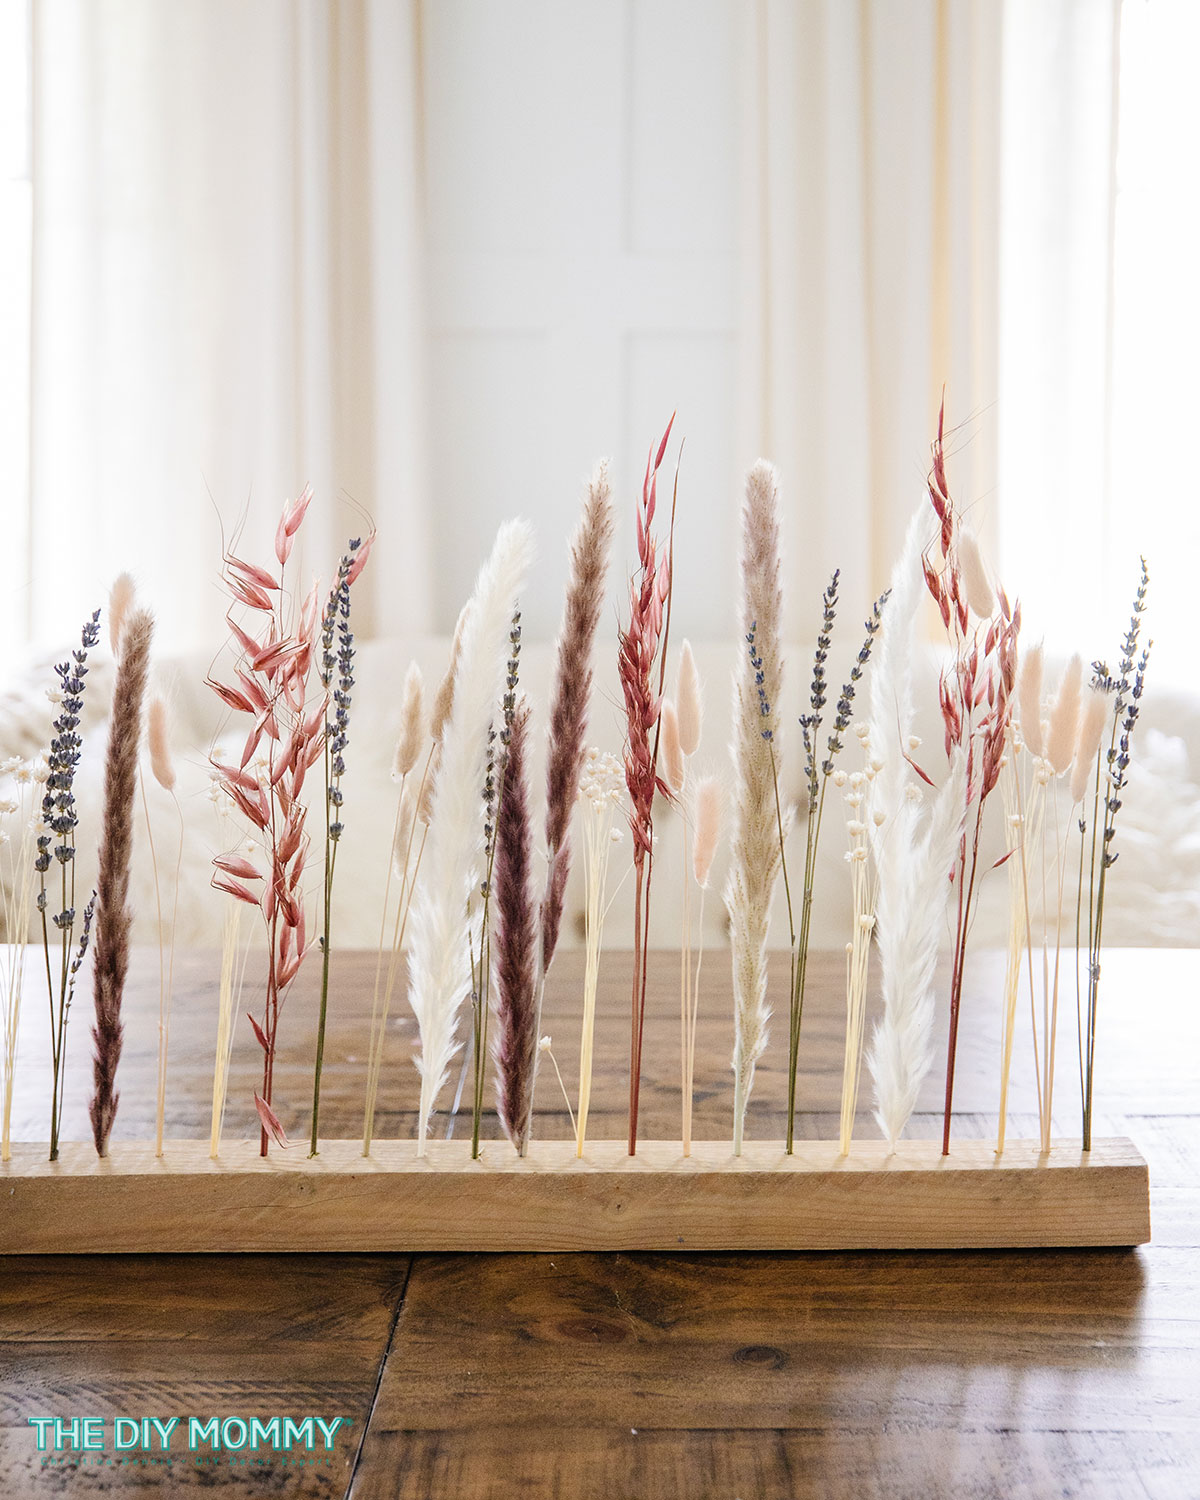
I love dried flowers because they last much longer than fresh flowers, and they can add colour and texture to your home. Using them in a table centerpiece is a beautiful way to showcase them, and this particular centerpiece can be used for any season. You can use a variety of colours of flowers for a multi-tonal look, or stick with one colour for something more subtle.
For this DIY centerpiece you’ll need:
- 26 inch long piece of 2×2 lumber
- drill
- measuring tape
- pencil
- 120 grit sandpaper block
- a variety of dried flowers
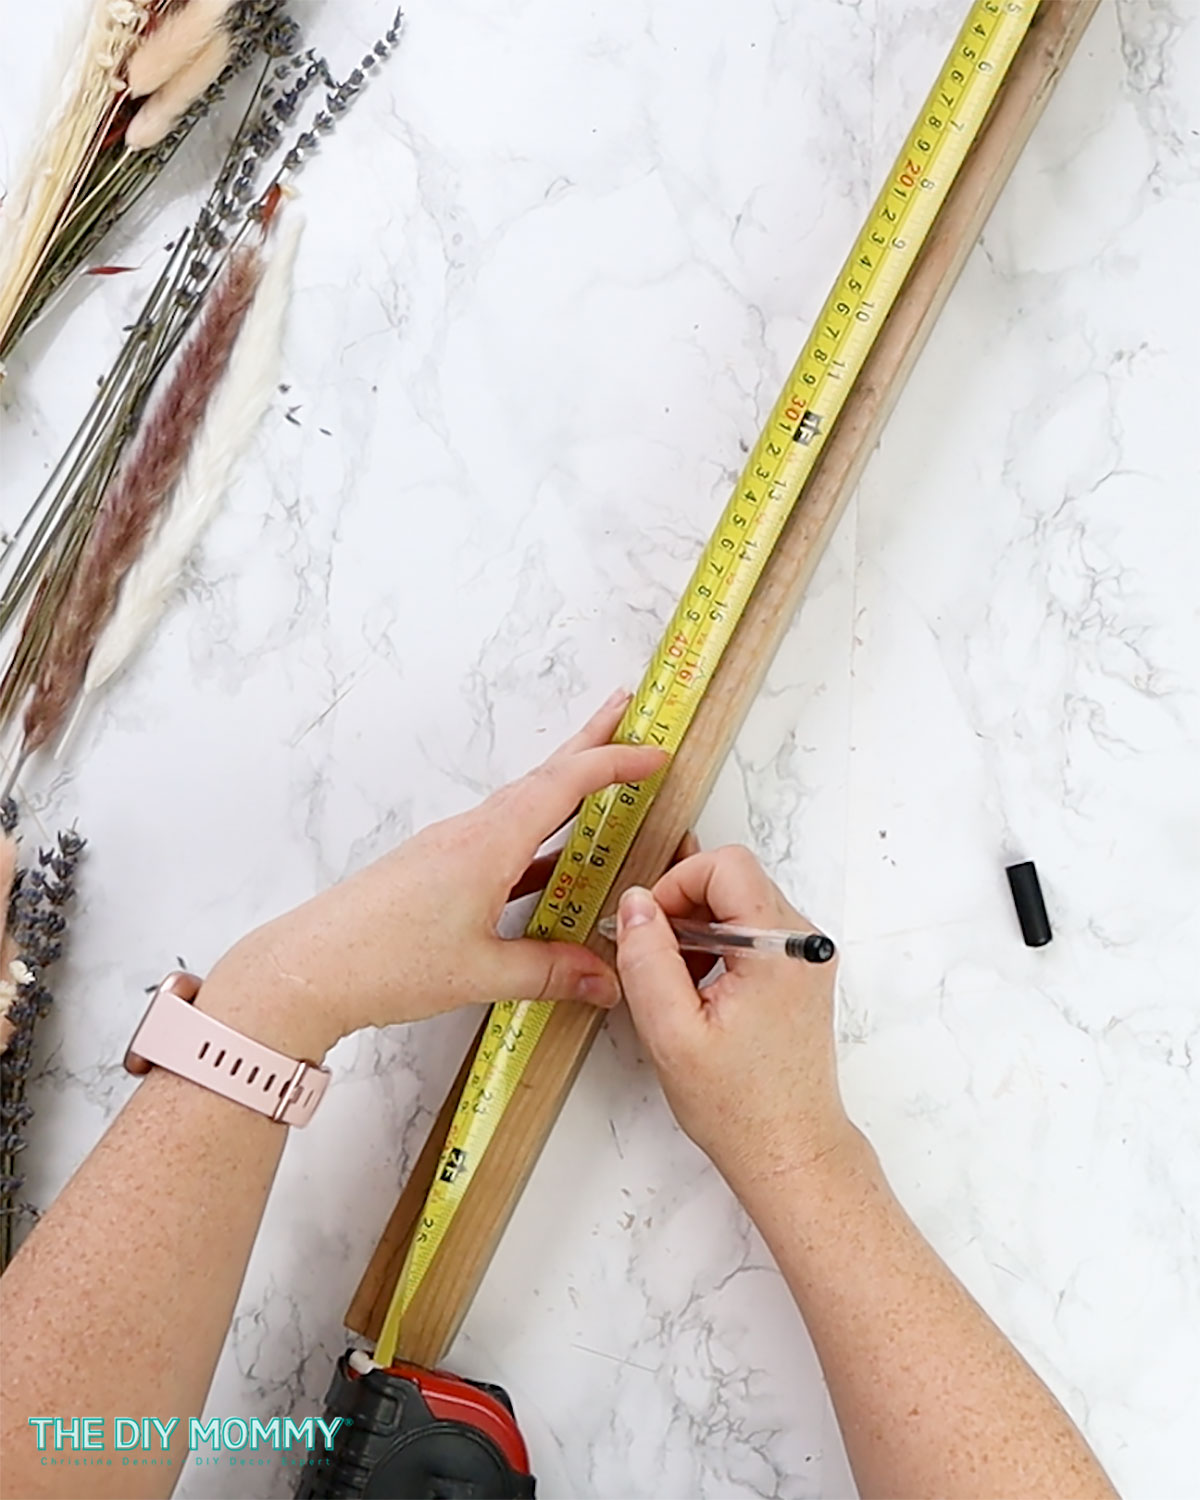
Cut & Measure the Lumber
To begin, cut a piece of 2×2 lumber to about 26″ long. I’m using MicroPro Sienna treated lumber, but you can use any type you’d like. You can make your centerpiece as long or as short as you wish, but mine is 26 inches long to suit my large rectangular dining table. Then, mark a dot with a pencil on the top side of the lumber every 1 inch. Make sure to center the dot widthwise on the lumber.
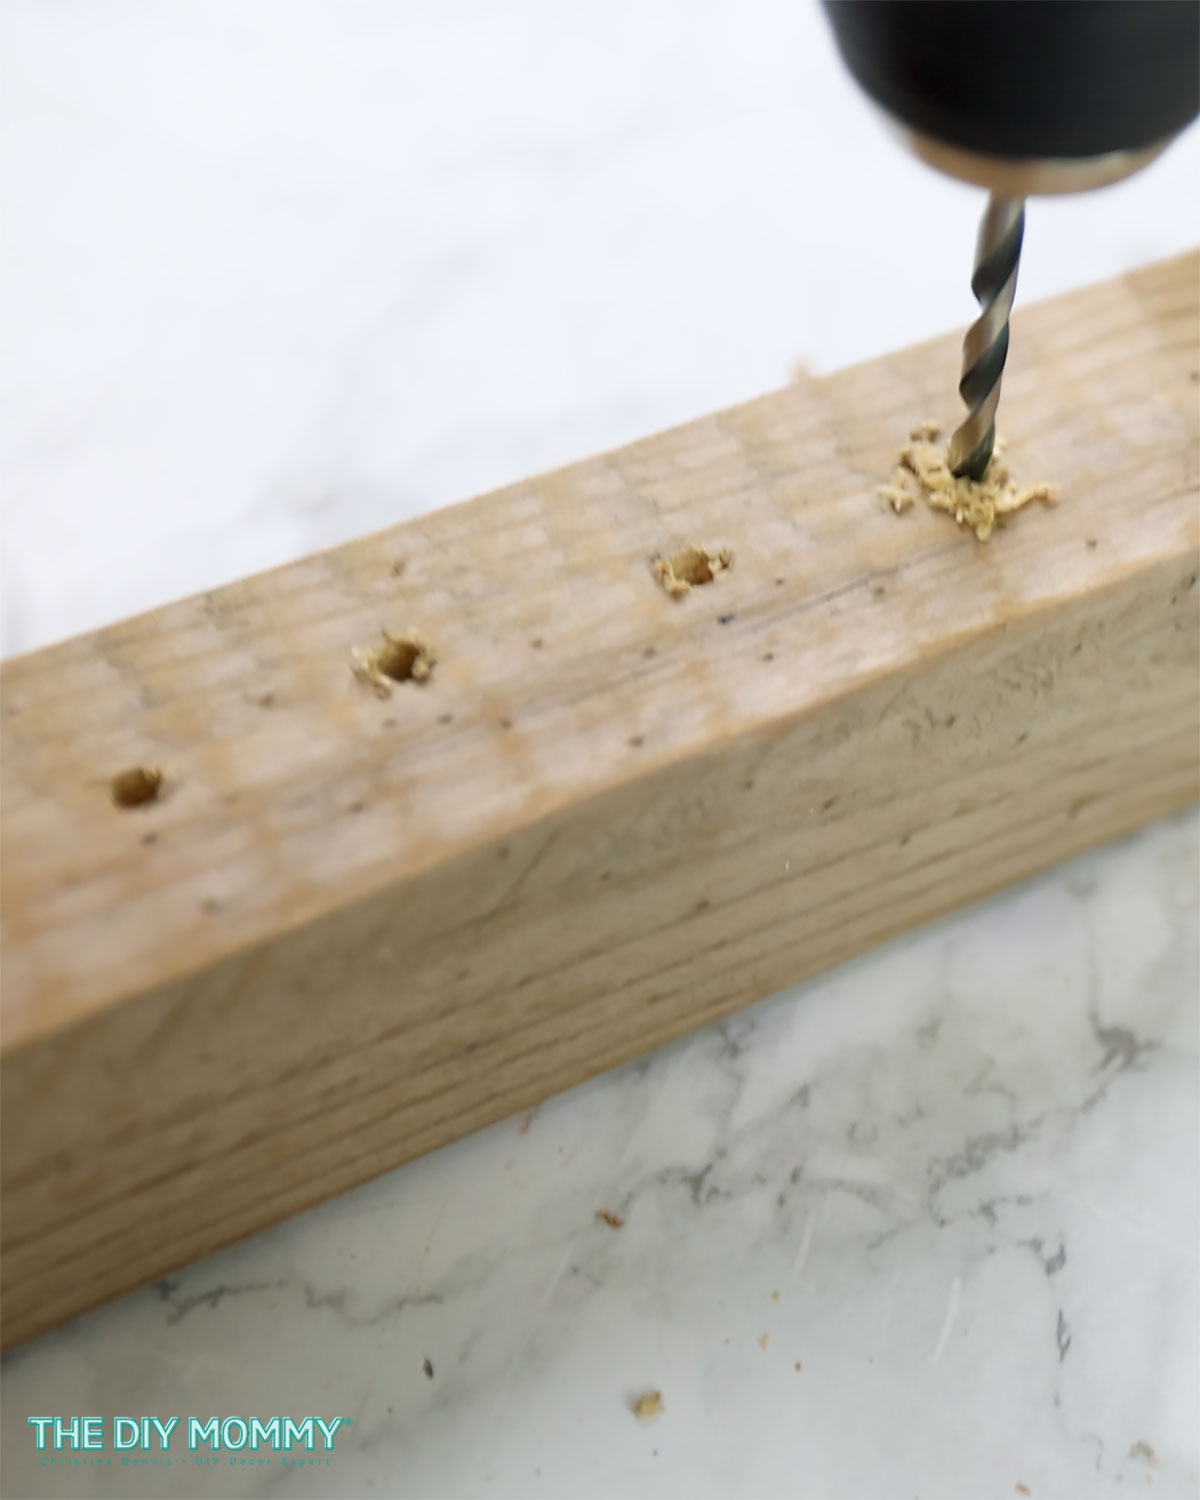
Drill the Holes
Next, take a small drill bit and drill a hole in the lumber at each of the marks. You can go quite far into the wood, but not all the way through.
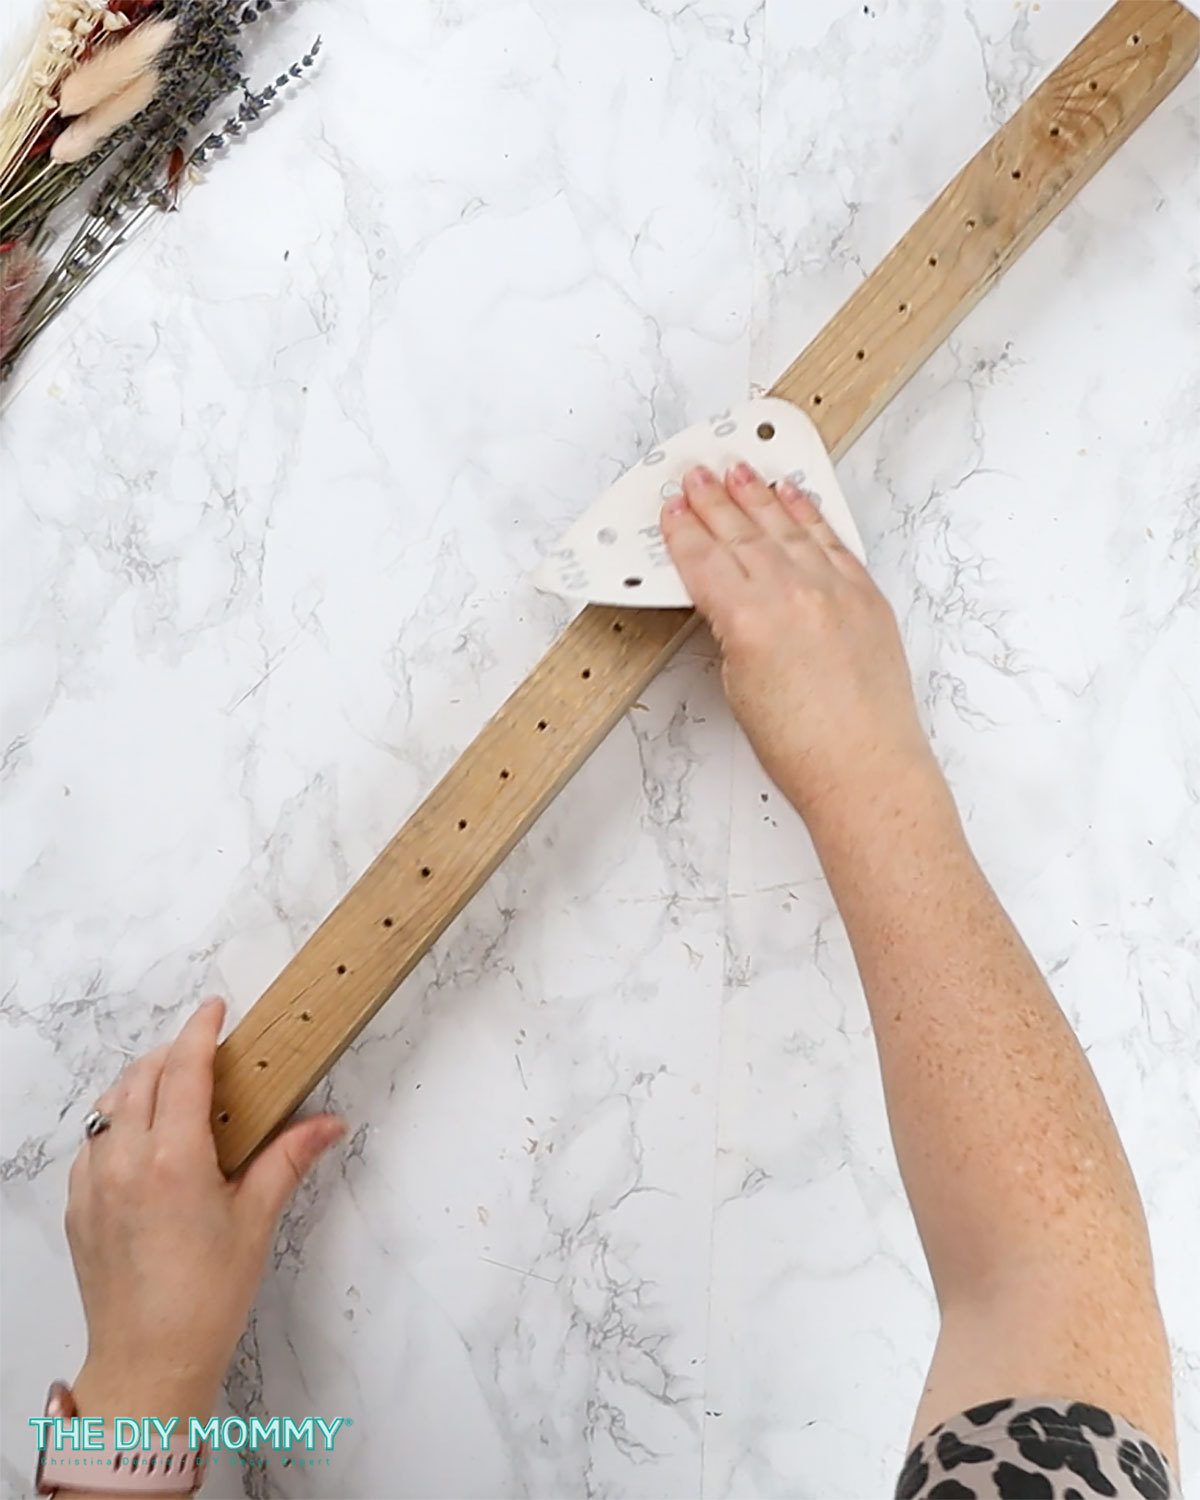
Sand the Centerpiece
Then, take a piece of 120 grit sandpaper and sand the piece of lumber so that the holes and cut ends are smooth. You can choose to paint or stain your lumber at this point, but I’m keeping mine natural. Spray-painting this wooden base in a bright colour would give it a completely different (but fun!) vibe.
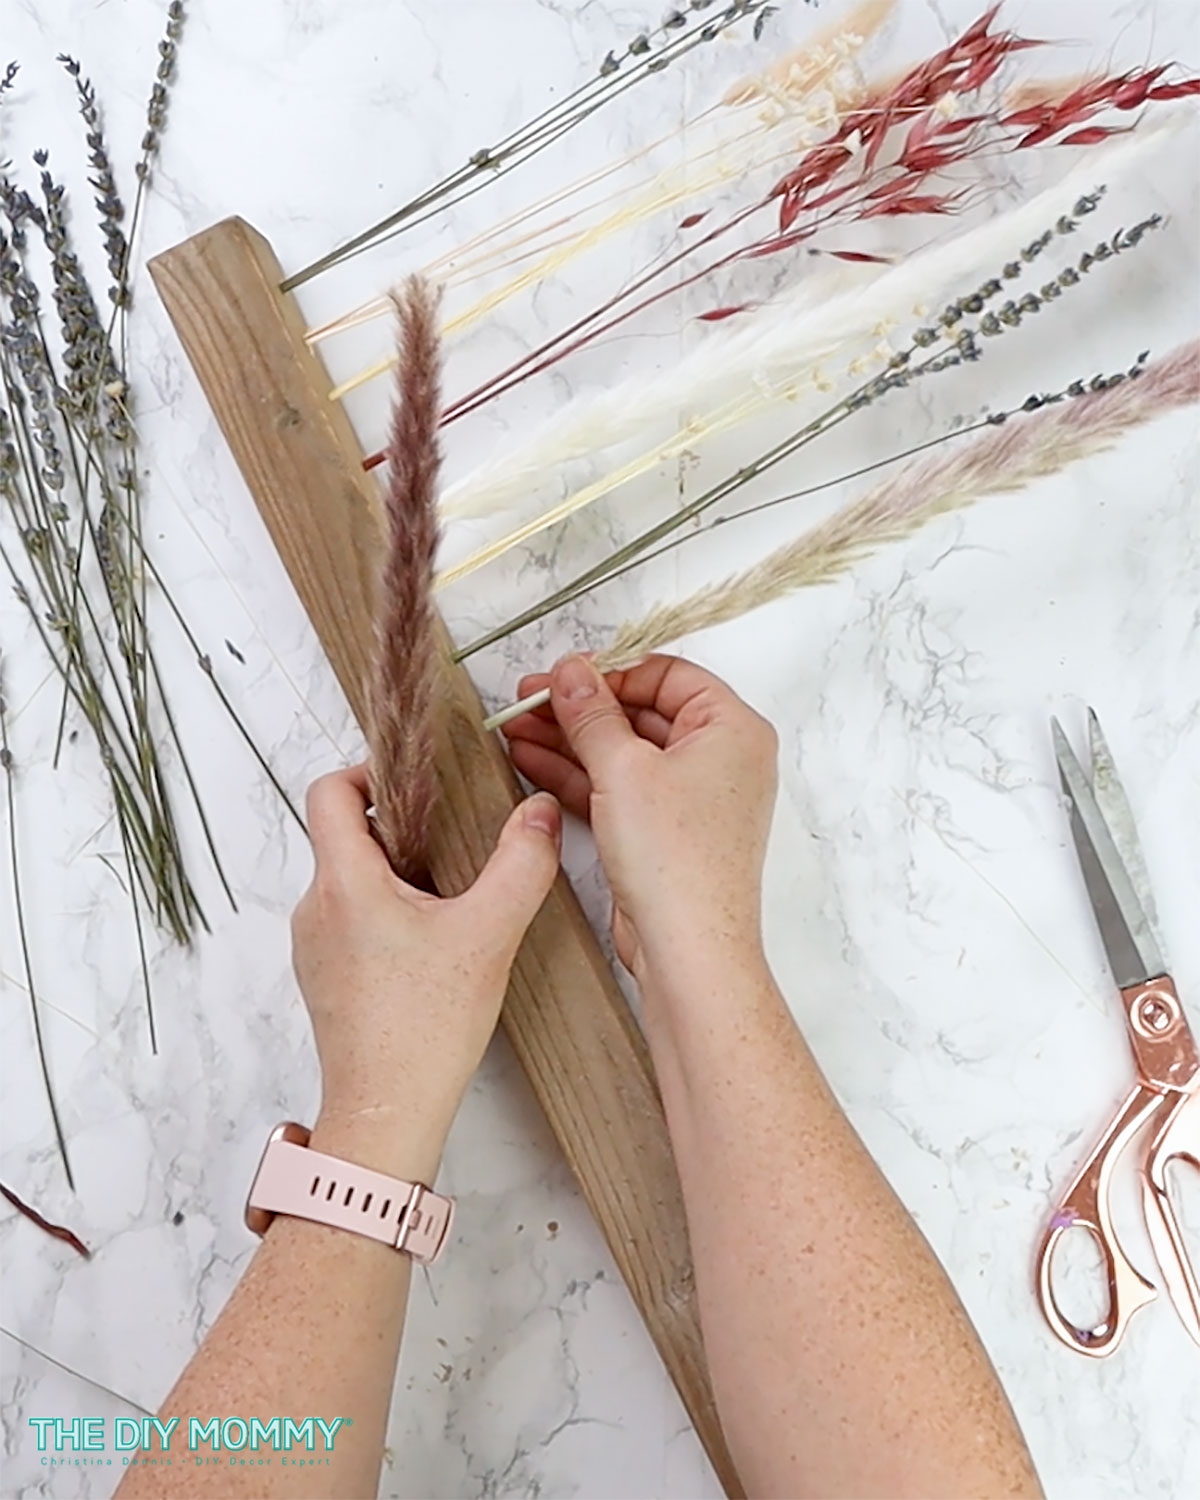
Add the Dried Flowers
Finally, put single stems or small bunches of dried florals in each of the drilled holes. You’ll want to put a large enough bunch or thick enough floral stem in the hole to make it fit snugly. I found my dried flowers here on Amazon and here on Etsy, but you can also dry your own or find them at a craft store. For a colourful look, I used a selection of purple, beige, off-white and burgundy blooms and alternated the colours. Alternatively, you could use faux flowers for this centerpiece.
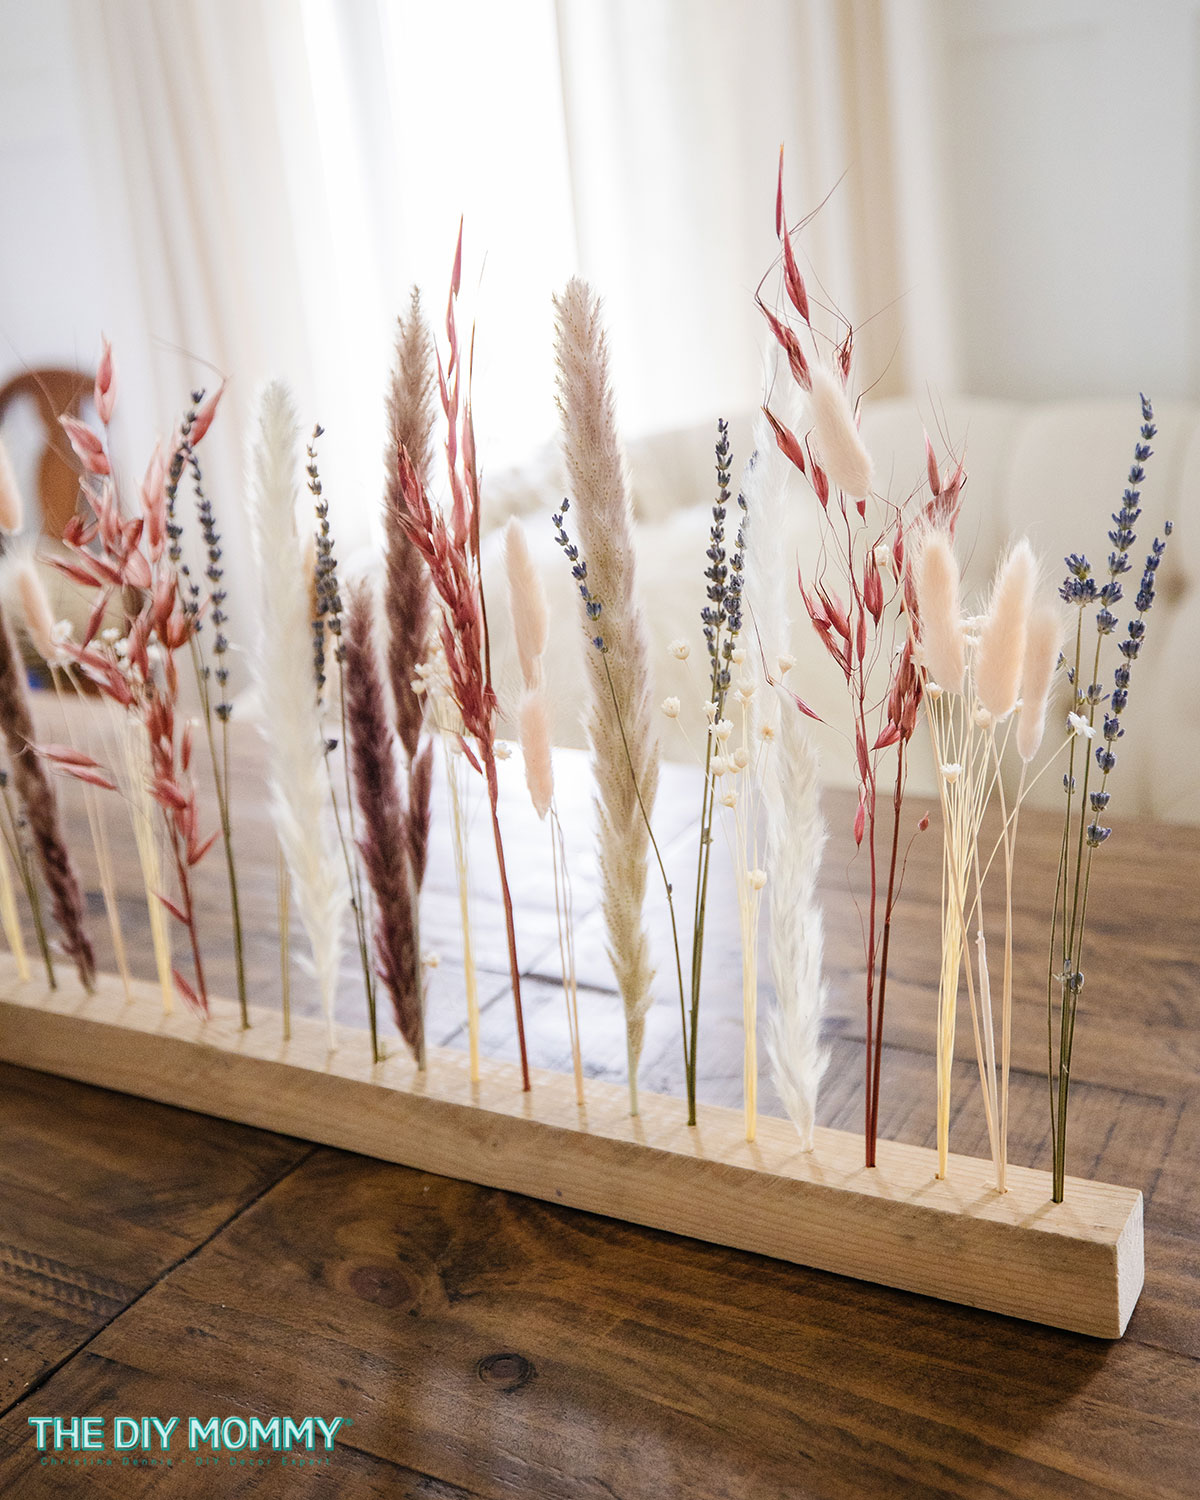
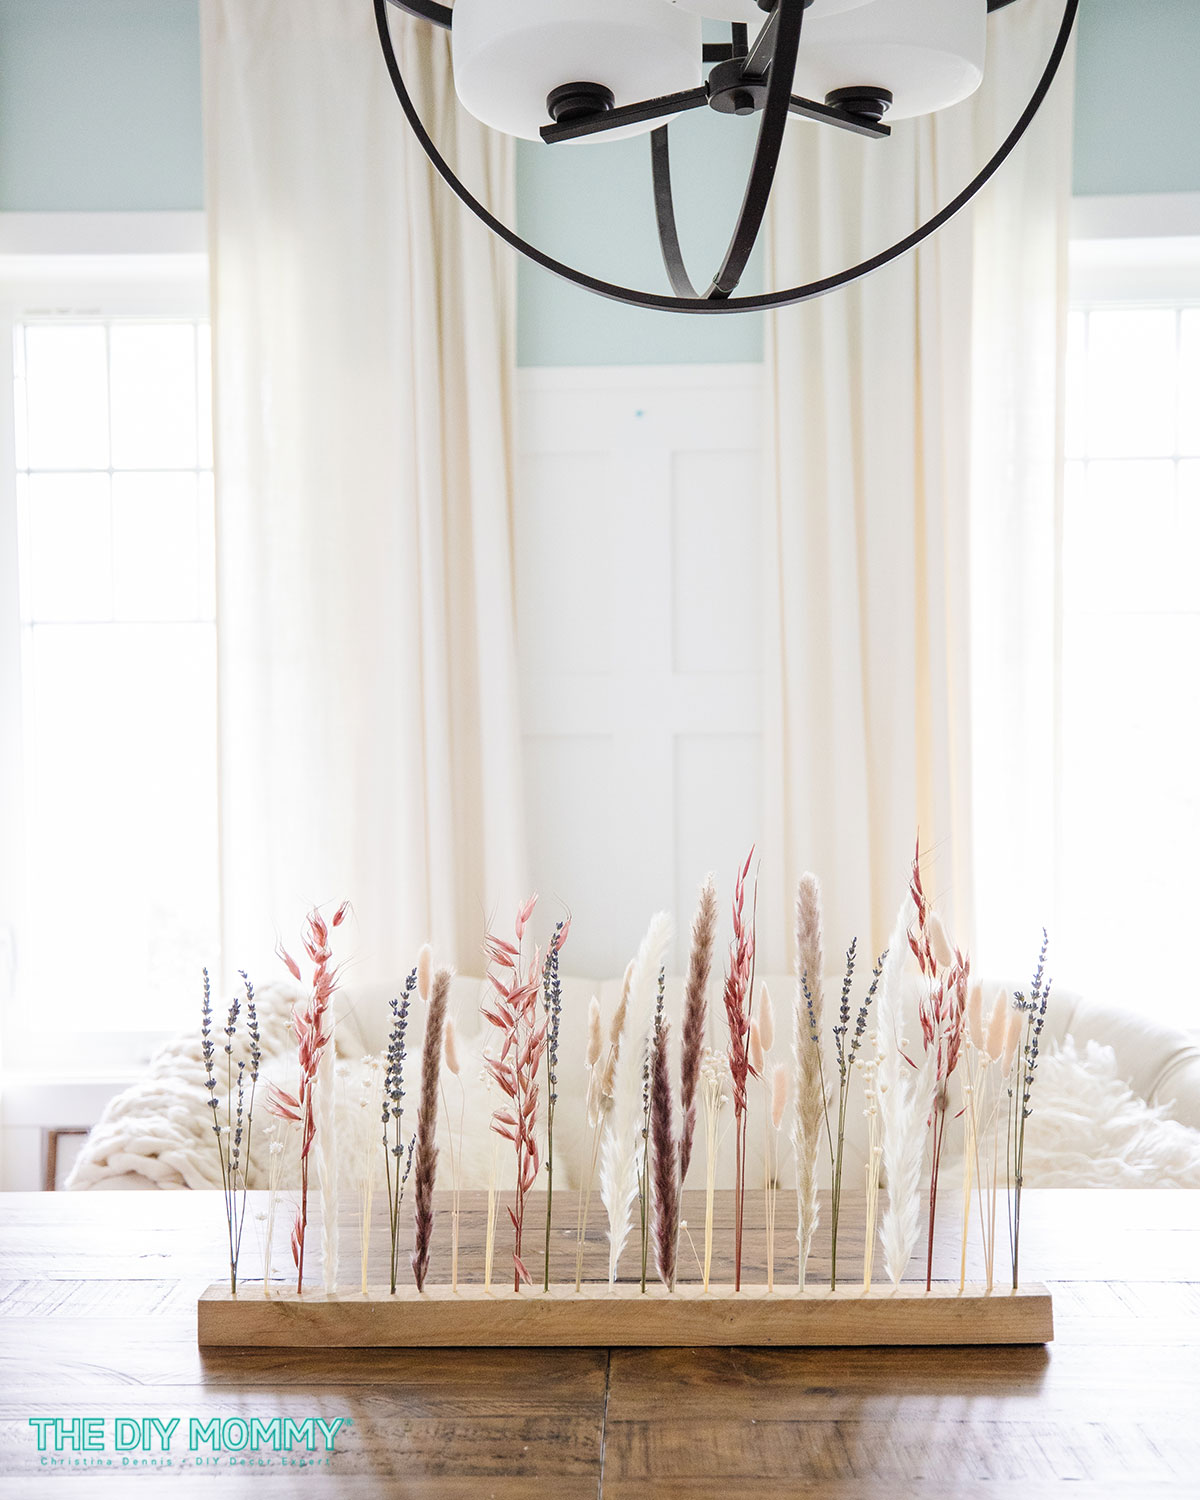
Now it’s time to place your gorgeous DIY table centerpiece in the middle of your dining room table for you and your guests to enjoy! This would also make a beautiful gift for someone who loves flowers or home decor.
How to Style this Dried Flower Centerpiece
To match the boho aesthetic of this floral centerpiece, I’d pair it with earthy-toned dinnerware and fringed linen napkins. Some copper cutlery would be a gorgeous match, and so would vintage glassware in colours like sepia, burgundy or green. This would be a gorgeous look for an everyday dinner party or a bridal shower.
I hope you enjoyed this simple centerpiece tutorial. Let me know what you think of this DIY in the comments, and if you make it be sure to share it on social media and tag me @thediymommy. Happy crafting!
Looking for more DIY table centerpiece inspiration?
- try this DIY dough bowl Fall centerpiece with moss, faux white pumpkins, leaves and pinecones
- make a glowy centerpiece from a thrifted wooden bowl, gold leaf, faux candles and twinkle lights
- mason jars and flowers are the perfect combo for this lovely, rustic centerpiece idea
- create wooden lanterns for under $10 and use them filled with flowers and greenery as a beautiful centerpiece
- design a romantic tablescape with dried floral bouquet arrangements mixed with candles
- try making a simple no-sew table runner to truly highlight your centerpiece