How to Paint Tile Floors with a Stencil
This post may contain affiliate links · This blog generates income via ads
Learn how to paint tile floors with a stencil with my step by step DIY tutorial. Get the look of farmhouse cement tile on a budget!
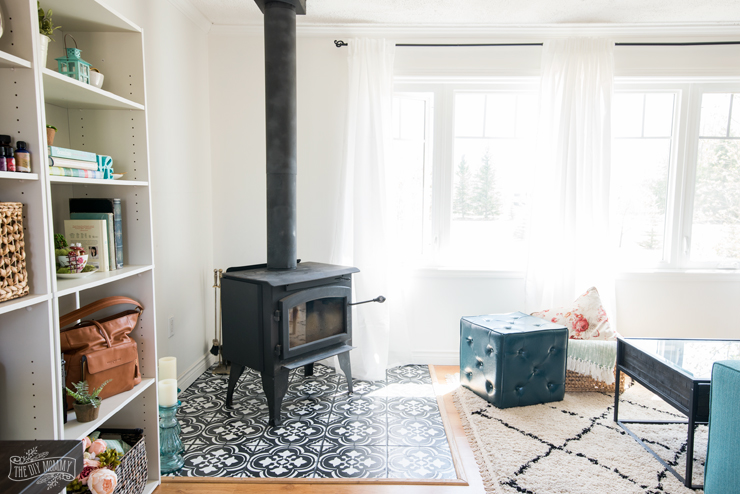
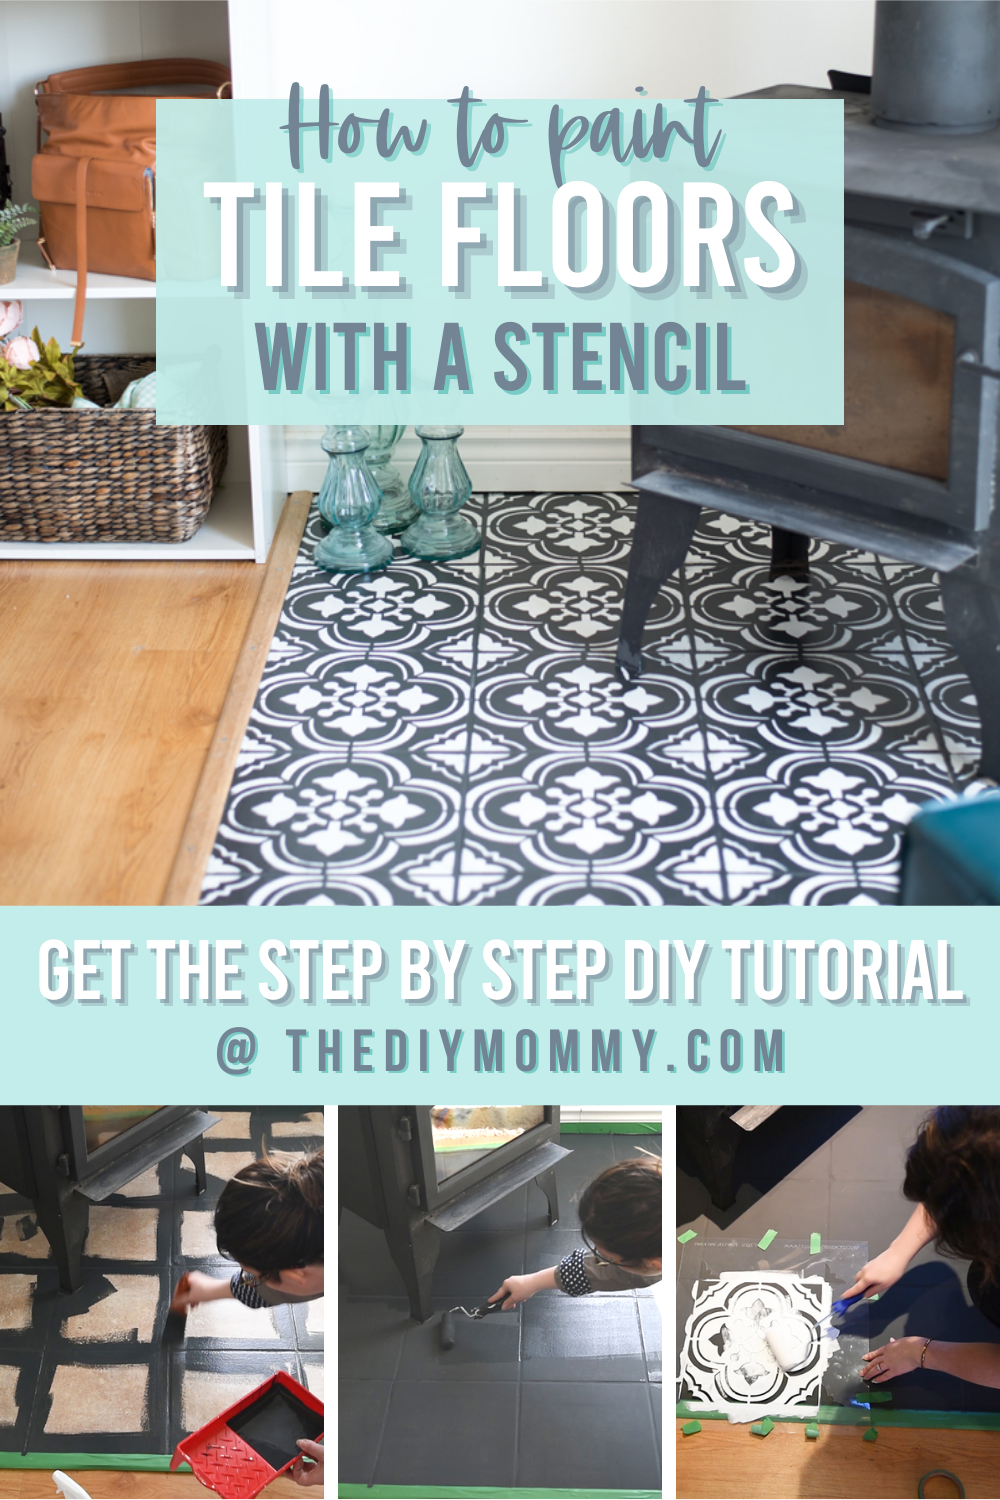
I’ve just finished renovating my work studio, and you can take the full tour of the space right here. In the corner of my studio was this wood stove area featuring some outdated, pinky beige tile that was very cool in the early 2000s, but isn’t anymore:

Because my studio is a fun place for me to experiment with DIY ideas and because this tile gets low traffic (if any), I thought it would be the perfect candidate for a ceramic tile painting project makeover!
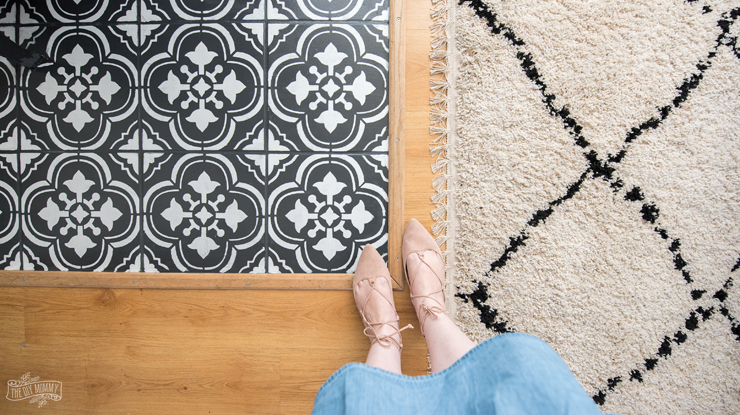
Here’s how this corner looks now:

Nope, I didn’t rip out the old tile and install new ones (you know I love me some peel and stick tiles so I don’t blame you for wondering!). I just painted & sealed the original tile’s surface with chalk style paint, a stencil, and some Varathane sealant! Read on to learn how I painted this floor tile and how you can too.
(I was inspired by both Remington Avenue and Blooming DIYer to paint & stencil my floor tiles!)
How to paint floor tiles with a stencil
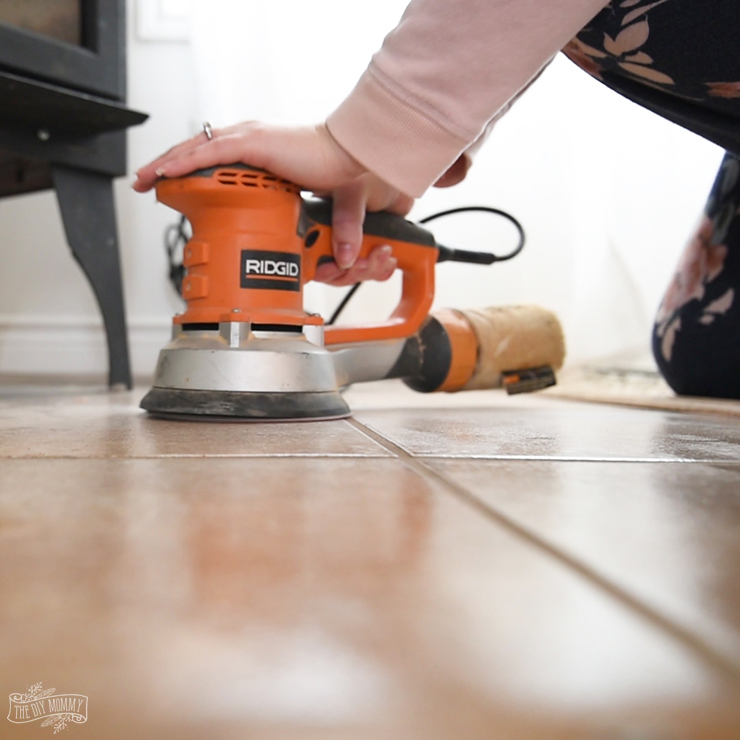
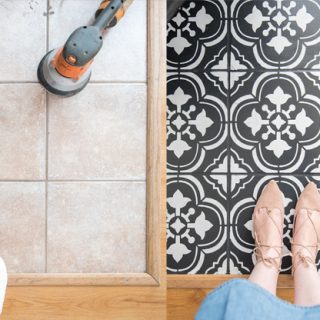
Prepping your tile to receive paint is probably the most important step. If you don’t clean it and rough it up properly, you aren’t setting yourself up for success. First, I used an orbital sander to sand the original tile to make it rough, so it would accept paint. Then, I cleaned it thoroughly with a de-greasing cleaner (something with TSP or Krud Kutter works great). Carefully follow the instructions for whatever cleaner you choose. You have to get rid of any dust, dirt, grease, and grime so that the paint will stick!

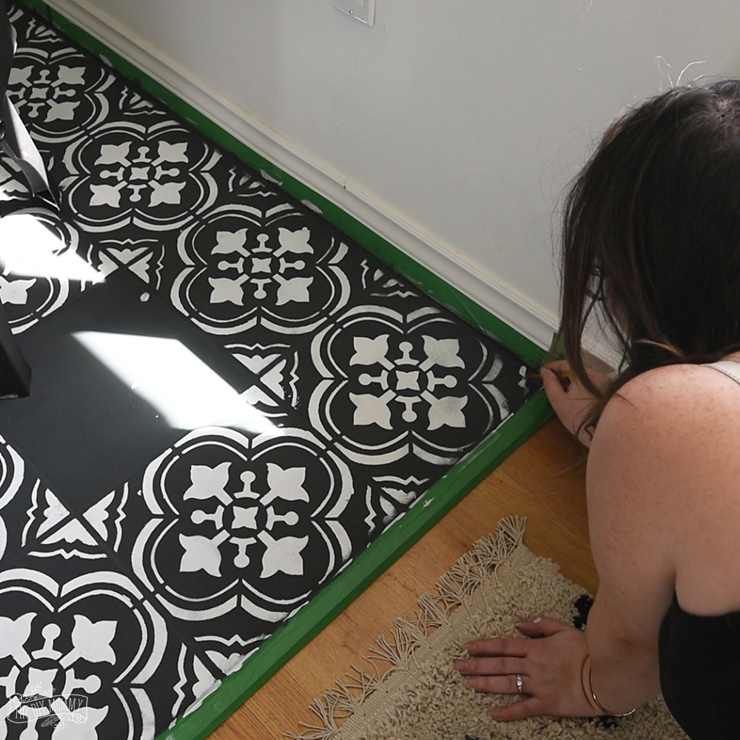
Next, I taped off the trim and baseboards around my tile area with painter’s tape as my final prep work.
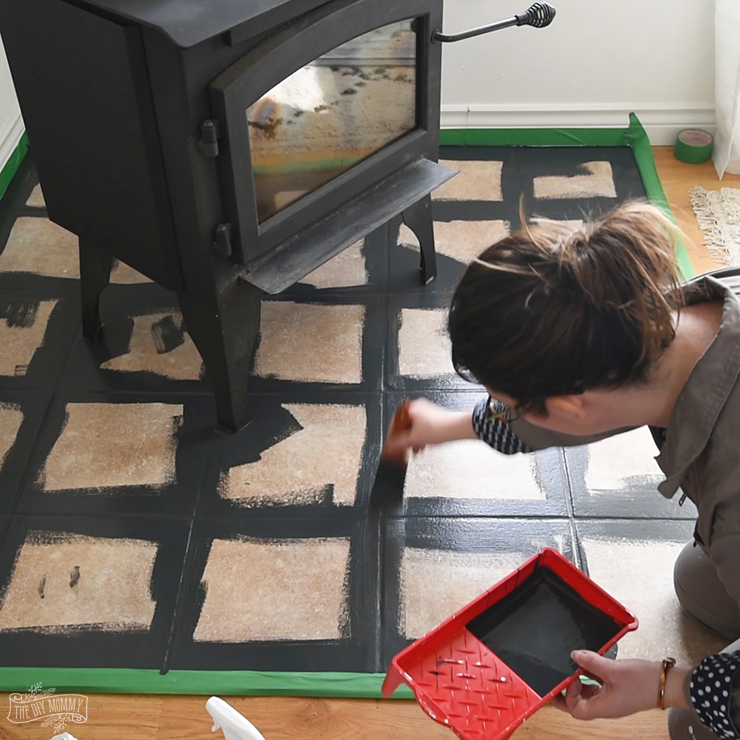
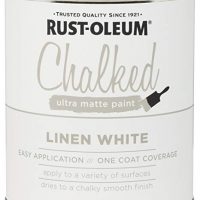
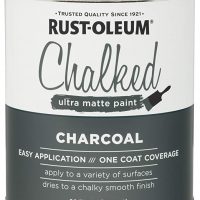
Then, I put some Chalked Paint in Charcoal in a paint tray and used a small paint brush to paint over the grout lines and into the edges of my tiled area. I decided to use chalk style paint because I like how it sticks well to surfaces, but if you use a regular latex paint you should definitely use primer on your tiles before painting them. I really don’t think specific floor tile paint is necessary, as long as you prep properly!
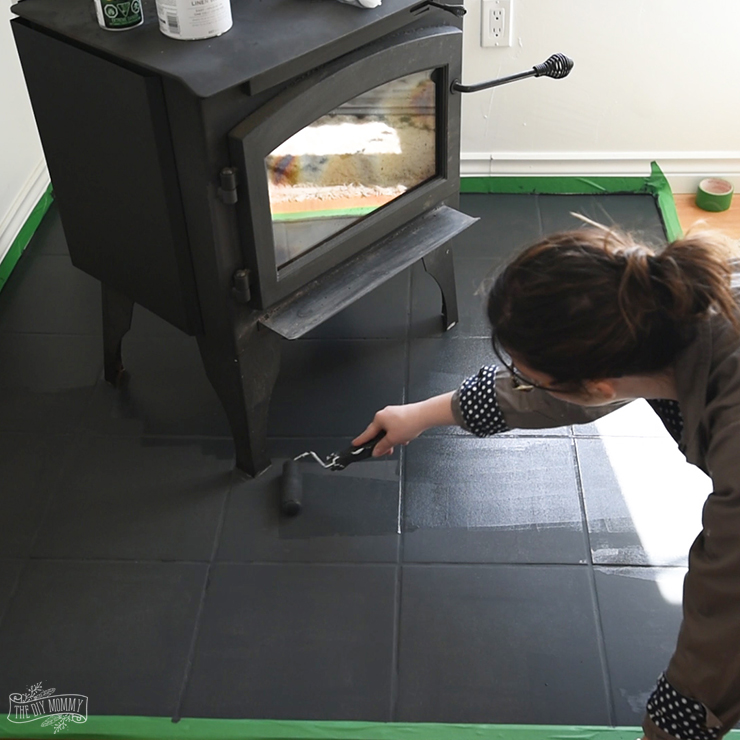
Next, I took a high density foam paint roller and painted all of the tiles with the Charcoal Chalked Paint. I ended up painting them with two coats.
Applying the stencil
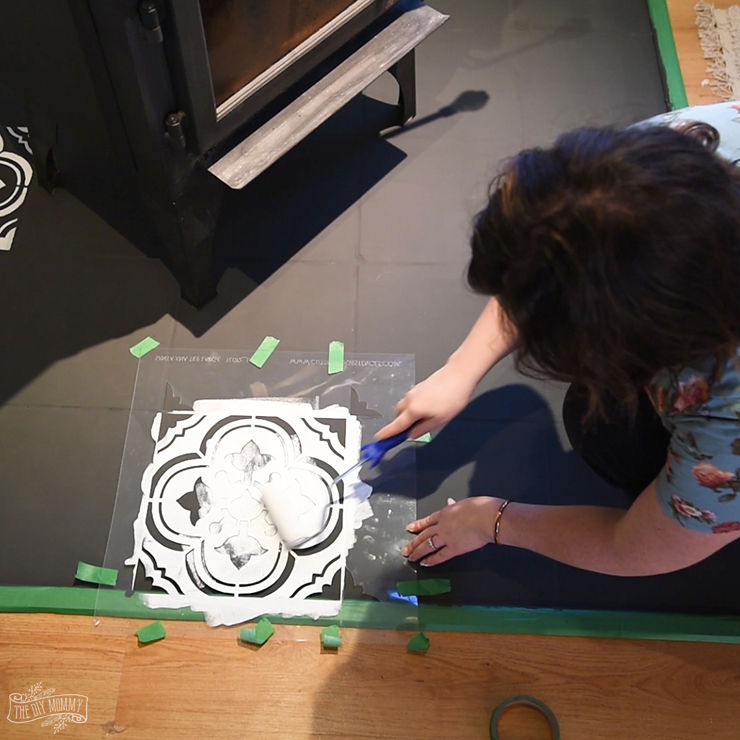
Now comes the fun (but time consuming) part! Cutting Edge Stencils sent me this beautiful Santa Ana Tile Stencil to try for free, and I thought it would be the perfect pattern for this area. Once my base coat was really dry (I waited a day), I taped the stencil down onto the tile with painter’s tape. Using a foam roller with a very small amount of Linen White Chalked Paint on it, I painted carefully over the stencil. You want to make sure there is almost NO paint on the roller you use for the stencil, since any extra will cause bleeding and paint runs. Try rolling on a paper towel before you apply the paint to the stencil, just to make sure you’ve really only got a tiny amount of paint on it before you begin.
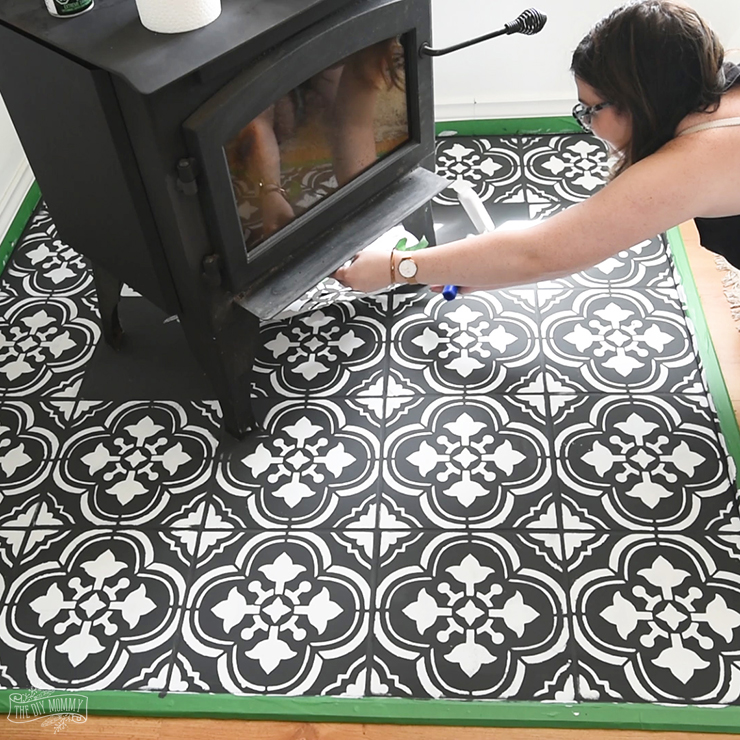
Starting in the corner of my tiled area, I stencilled every other tile, let them dry, and then completed the rest of the tiles.

Some of the tiles were really hard to stencil – like the corner tiles and the ones around the feet of the stove – so I took a small craft paint brush and touched up any areas that needed it with some more white paint.
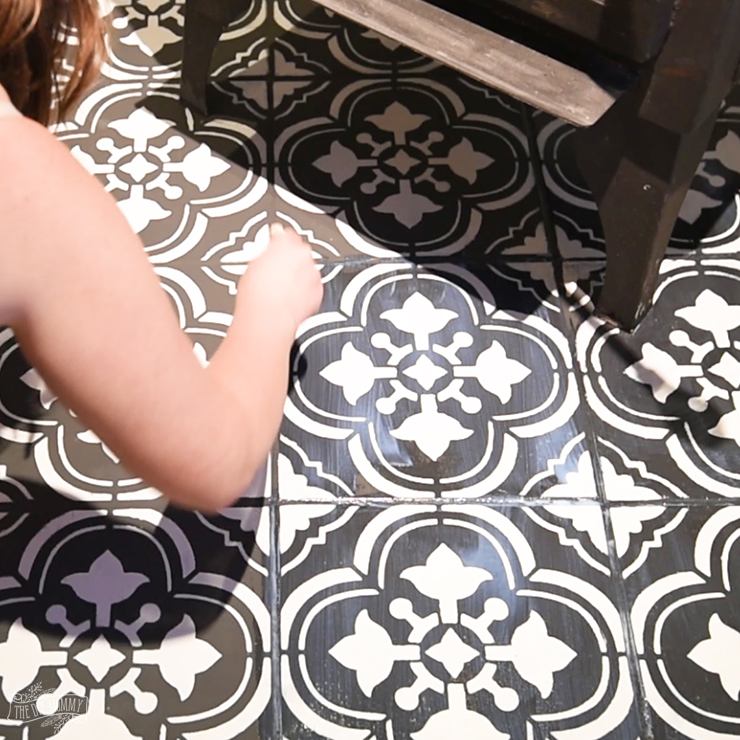
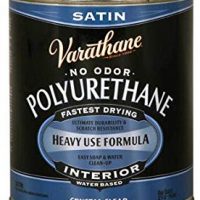
Once the tiles had dried thoroughly, I finished up by removing the painter’s tape and sealing everything with Varathane polyurethane in a satin finish. You could also do a high-gloss, semi-gloss, or matte finish, depending on your preference. I would recommend doing at least two coats (maybe even three) of sealant to protect your beautiful paint job and make it truly durable and prevent chips or cracks in the paint.
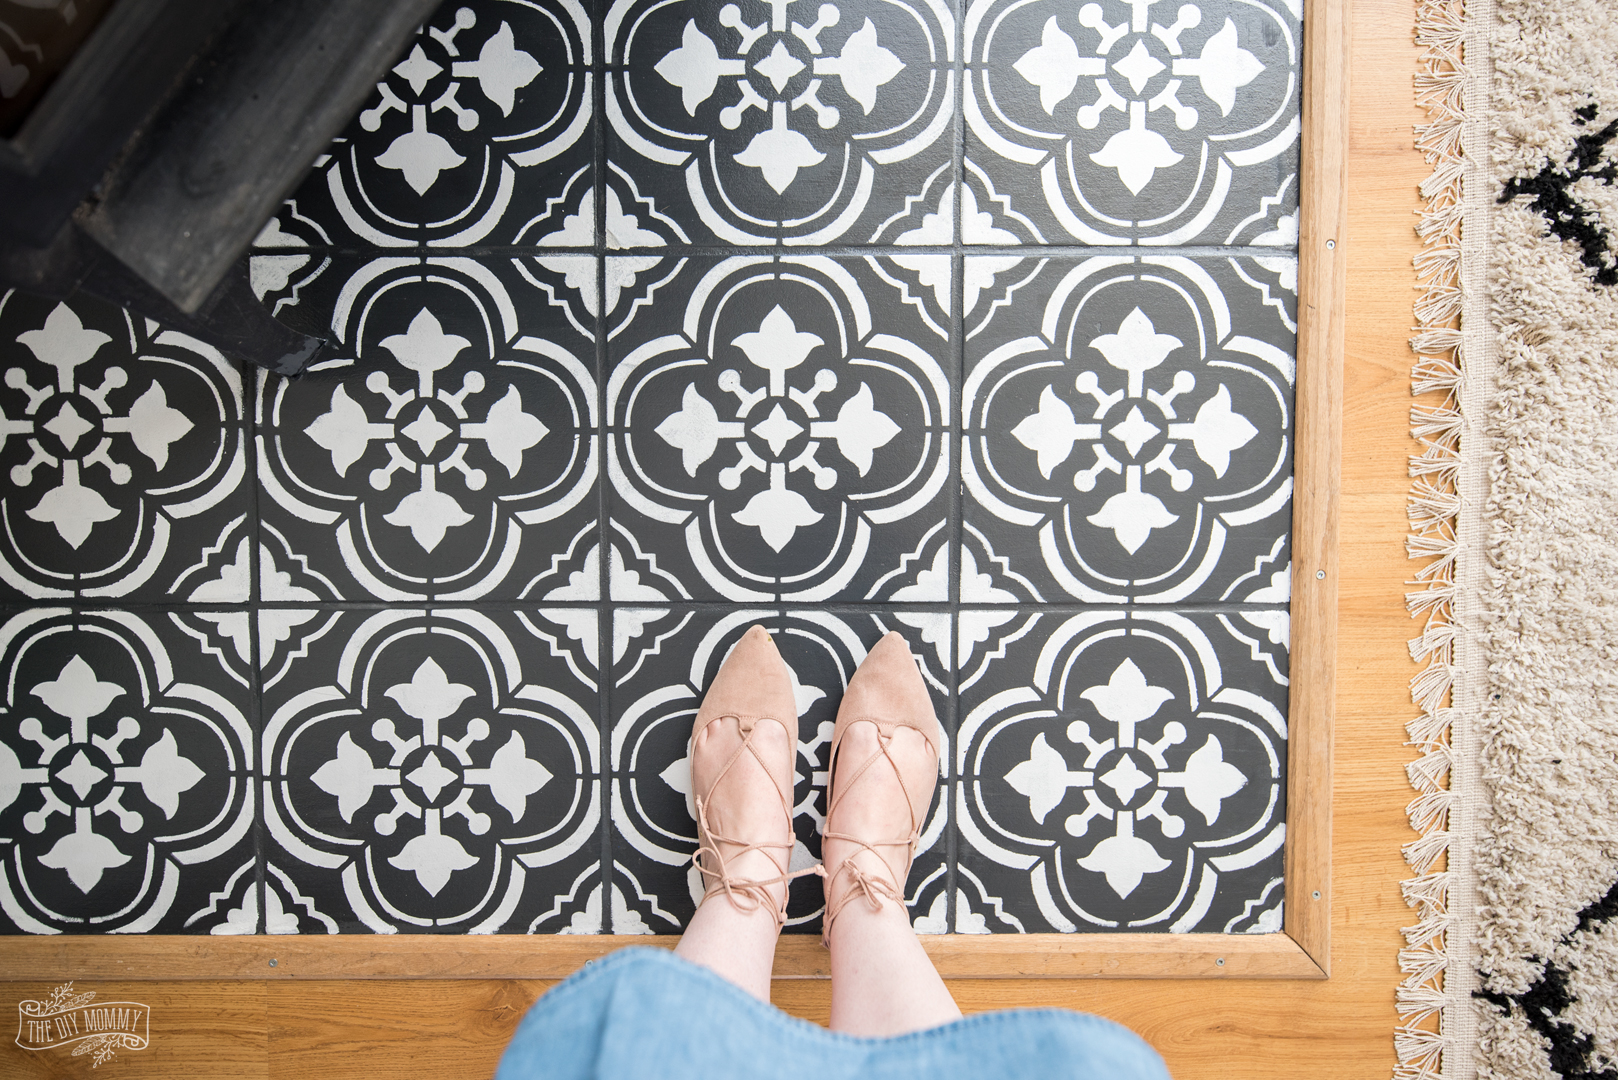
And that’s it! My tiles look like they’re brand new and they boast such a fun, bold pattern! This was one of those DIY projects that makes a huge difference with just a few materials and some time.
Full disclosure: I found this project pretty straightforward, but it was definitely time consuming and tedious if you’re not into this kind of thing. I’m also not sure I’d do it on a very high traffic area like a mudroom or laundry room, and I think I would definitely avoid areas that are constantly wet and really heavily used like bathroom floors and showers. But that being said I have seen other bloggers do it on kitchen and bathroom tile with apparent success!

Watch my video tutorial below to learn how to paint floor tile with stencils:
UPDATE: Did my painted floor tile last after 2 ½ years? Click right here to find out and get more painted floor tile tips and tricks!
How to Paint Tile Floors with a Stencil
Learn how to paint tile floors with a stencil with my step by step DIY tutorial. Get the look of farmhouse cement tile on a budget!
Materials
- De-Greaser
- Chalked Paint (I chose Charcoal and Linen White)
- Paint Tray
- Small Paint Brush
- High Density Foam Roller
- Stencil
- Painters Tape
- Small Craft Paint Brush
- Varathane polyurethane in a satin finish
Tools
- Orbital Sander
Instructions
- First, I sanded the original tile with an orbital sander to make it rough so it would accept paint better. Then, I cleaned it thoroughly with a de-greaser.
- Next, I taped off the trim and baseboards around my tile area with painter’s tape.
- Then, I put some Chalked Paint in Charcoal in a paint tray and used a small paint brush to paint over the grout lines and into the edges of my tiled area. I decided to use chalk style paint because I like how it sticks well to surfaces, but if you use a regular latex paint you should prime your tiles before painting.
- Next, I took a high density foam roller and painted all of the tiles with the Charcoal Chalked paint. I ended up painting them with two coats of paint.
- Now comes the fun (but time consuming) part! Once my base coat was really dry (I waited a day), I taped the stencil down onto the tile with painter’s tape. Using a foam roller with a very small amount of Linen White Chalked paint on it, I painted carefully over the stencil.
- I started in the corner of my tiled area, and stenciled every other tile, let those dry, and then completed the rest of the tiles.
- As I painted around a stove, some of the tiles were really hard to stencil so, I took a small craft paint brush and touched up any areas that needed it with some more white paint.
- Once the tiles had dried thoroughly, I sealed everything with Varathane polyurethane in a satin finish. I’d recommend doing at least two coats, maybe three, of sealant to protect your beautiful paint job.
Recommended Products
As an Amazon Associate and member of other affiliate programs, I earn from qualifying purchases.
Hello,
Genius idea.
Thanks.
Thank you
This is awesome! People always talk about the power of paint, and this is a tremendous example. I’m amazed by this transformation. Thanks for sharing your tutorial.
I would love to try this in my master bathroom! We have beautiful cherry wood cabinets and tile that is kind of that color – very dated. We built our home in 2006, laid our own tile. I thought I was stuck with it forever, but now I have hope. I’d like to try a light grey base with white overlay. I need light after having so dark. I can paint the cabinets light or white, too. Thank you for sharing. I had no idea.
I love this! My sister said I could paint her tile this summer when I visit! Thanks for sharing at #HomeMattersParty
How fun!! Thanks for stopping by ??
Love this! What size stencil was yours?
Your painted tiles look absolutely amazing!!! I love how you did it. Thanks for sharing your DIY at the #HomeMattersParty so we could feature you this week. 🙂
Thanks, Nicole!!
Fantastic tutorial and makeover! I would love for you to come over and link up this post at Thursday Favorite Things! The party is still live tonight through midnight. Leave a comment for a chance to be featured next week. Enjoy the weekend!
https://followtheyellowbrickhome.com/inspiring-diy-projects-and-makeovers-at-thursday-favorite-things/
Thanks, Amber
That is awesome, looks amazing!
Thank you, Denise
Hi Blog Admin
I enjoyed reading your post on tiles. I am a fan tiles, used anywhere in a house. Tiling of n the floor is surely the best way to have a durable floor, be it is in the kitchen, bathroom, of other area of the house. Thanks a lot for sharing your thoughts with us.
Thanks for stopping by!!
This looks great – thanks for the tutorial. I’m inspired to try this at home around my wood stove. How does the paint stand up to the heat from the fire?
Thanks Michelle. So far so good 🙂
Awesome work! Love hot the design makes that corner pop!
Hi, I realize this is an old post, but loved this so much, I decided to do my own. I used the same brand paint and colors. Bought the same poly- however, today when I started trying to use the poly, the charcoal chalk paint started bleeding. Did that happen to you? Thank you for the inspiration.
No I didn’t. I wonder if it was mixed well?
I’d love to try those tips. Thanks for sharing this. 🙂
Hi, could you do that with marble floors?
What paint to use on bathroom floors? How does one make them waterproof?
Hi my tiles are black can I just add a white stencil on top without painting the whole tile
Dear Christina,
thank you so much for the video! Found it when I searched for painting furniture, though some of your tips will still be useful there aswell. Love how calm and relaxed you talk, easy to follow, pleasure to watch. 🙂
Love this! Is it a wood burning stove? Can the chalk paint handle the heat?
Hi Nicole! We’re actually not sure because Christina doesn’t use the stove. Sorry!
Hi, just wondering how the paint has held up to heat from the stove? Thanks!
Christina doesn’t use the stove there so… really well! LOL! Honestly, we’re not sure how it would hold up to the heat.
These floors turned out so good! I love them. We are remodeling our kitchen and this might be a good solution for our floors. We are doing some kitchen cabinet painting next week so maybe after we are finished with that project! Thanks so much for all your tips.