Our DIY Camper: 2018 Tour
This post may contain affiliate links · This blog generates income via ads
We’ve had Our DIY Camper for over a year now. Come see how the renovations we’ve made have held up so far and how I’ve styled it for 2018.
If you were to ask me what my most favourite DIY that I’ve ever done is, my answer would be: Our DIY Camper. First, the before and after views of the RV are night & day! That’s always so satisfying. And second and most importantly, our family has made a ton of fabulous memories with our camper already. It’s allowed us to travel and explore our country for a lot less than buying a new camper or staying in hotels. We’ve LOVED Our DIY Camper!
Overall, I’ve been very pleased with how all our renovations have held up over this last year. We experience extreme temperature changes here (from -30 C to +30 C within a year), and the finishes have held up great!
Here’s how Our DIY Camper looked when we bought it (it’s a 1992 Vanguard 5th wheel):
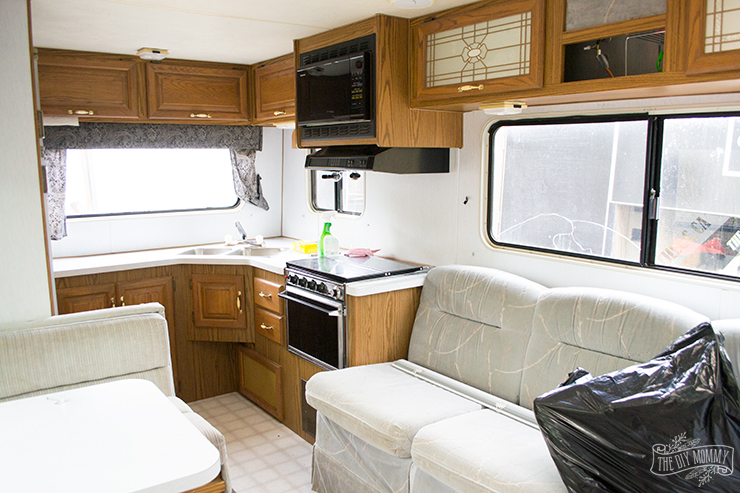
Come take the “before” tour right here.
Here’s how I styled it last year after it was freshly renovated:
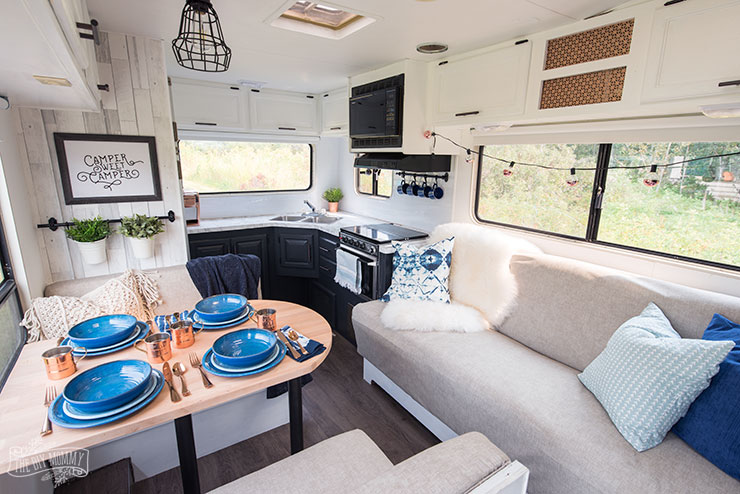
Come see last year’s tour right here.
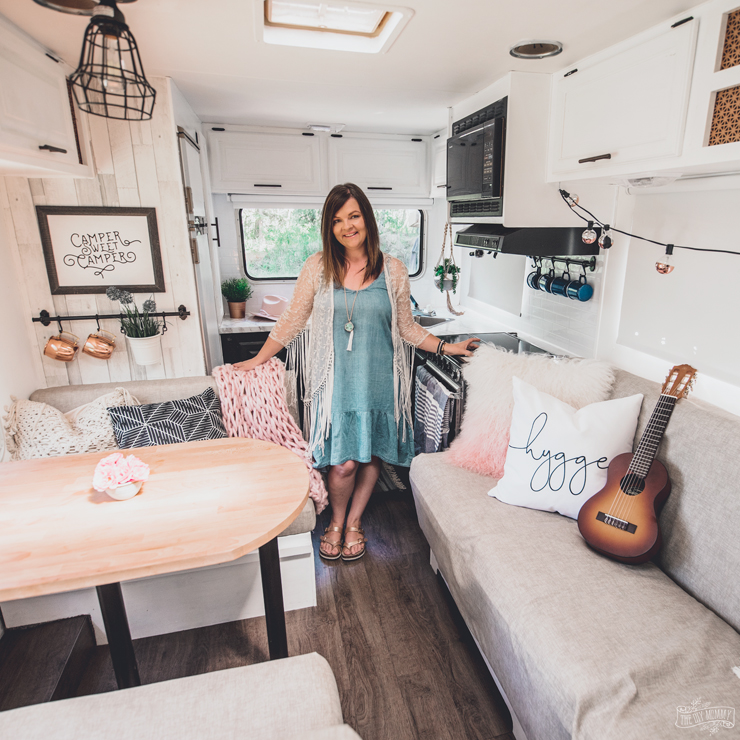
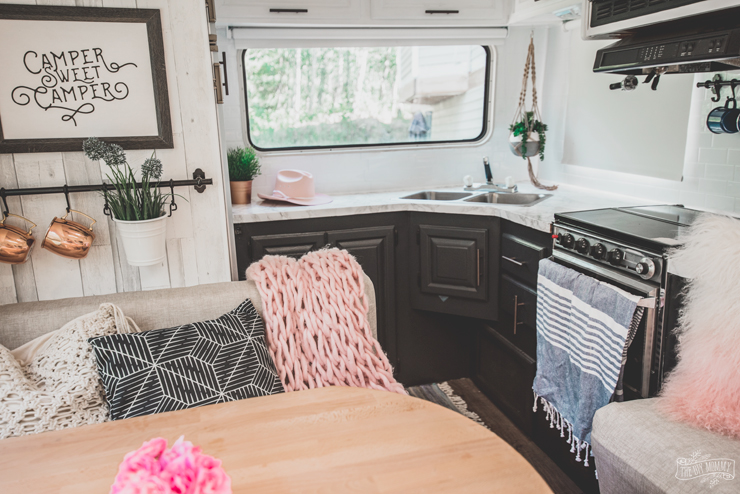
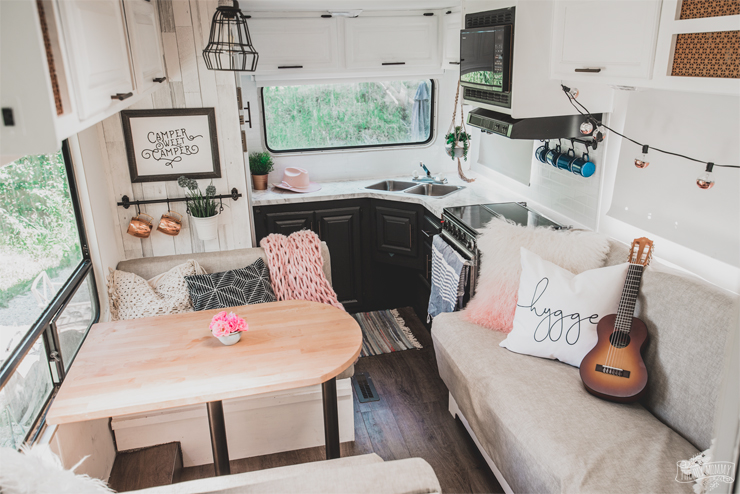
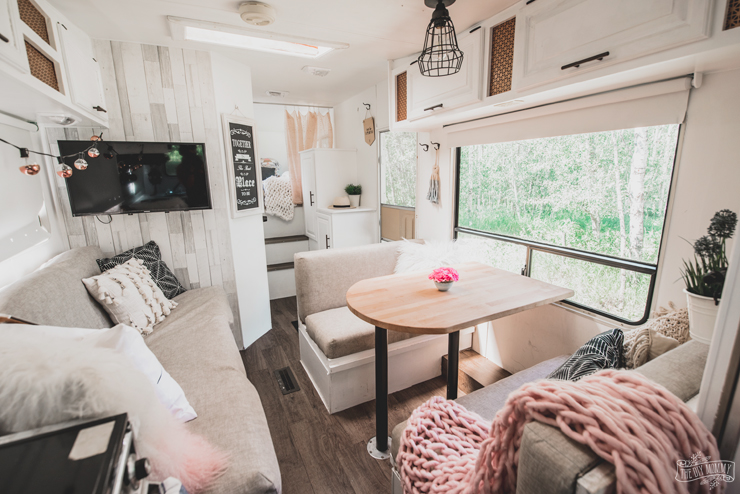
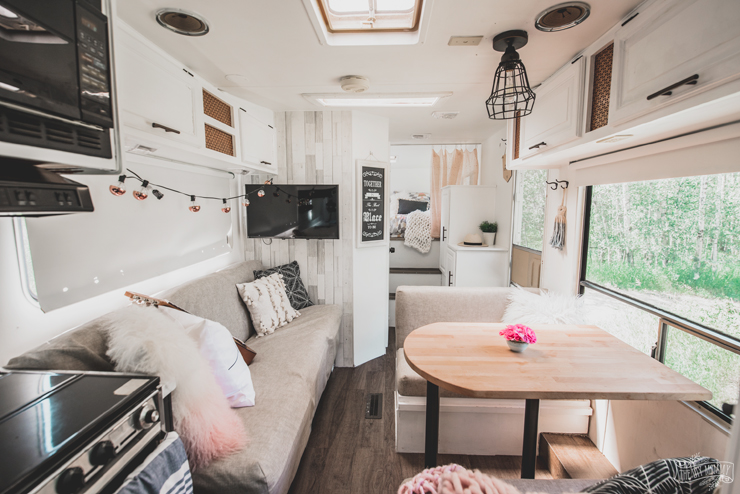
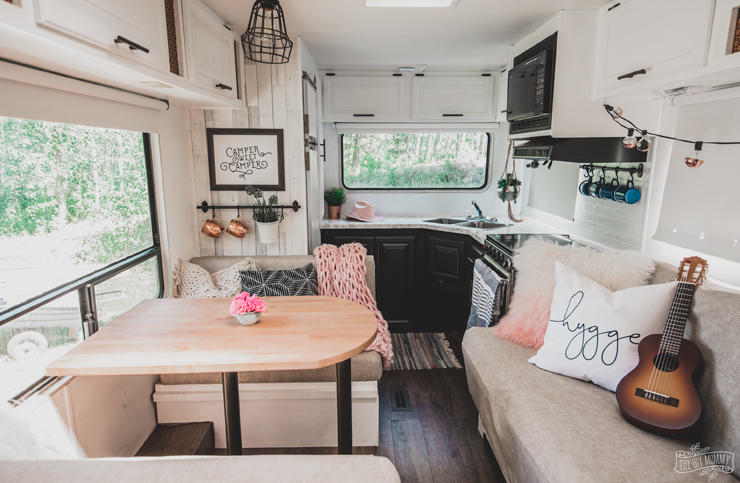
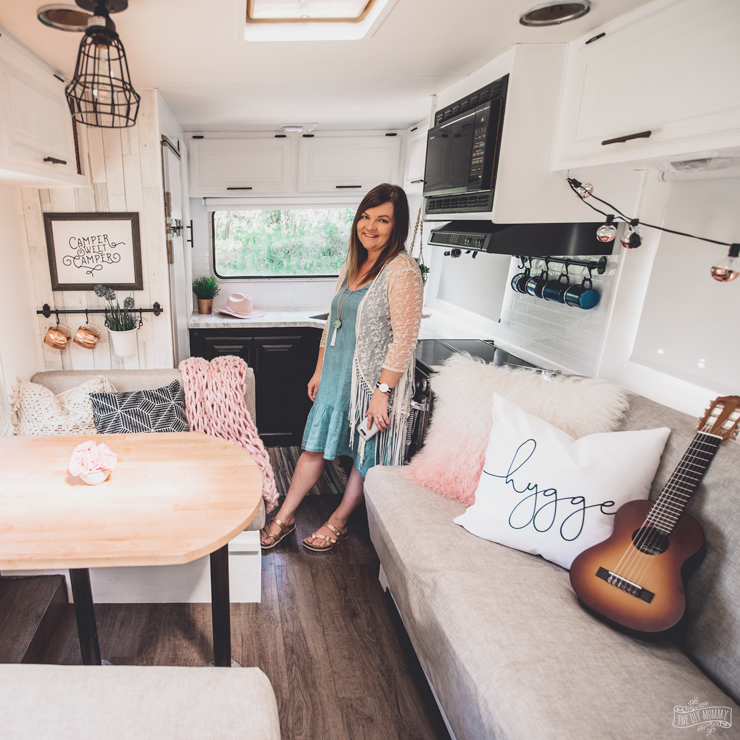
And here it is now:
See how we renovated the camper kitchen right here.
I’m often asked about the peel & stick tile, countertops & the wallpaper in here, and it all still looks brand new minus a little corner of one of the pieces of wallpaper. It started to peel off a little, and I fixed it with a little more wallpaper paste. Otherwise, I’m so happy with the tile, the counters, the flooring… all of it!
We also had a little mishap when driving back from our latest camping trip when a piece of our siding ripped off in the wind (YIKES!), but we’re hoping to fix that this week and get back on the road. The joys of old campers!
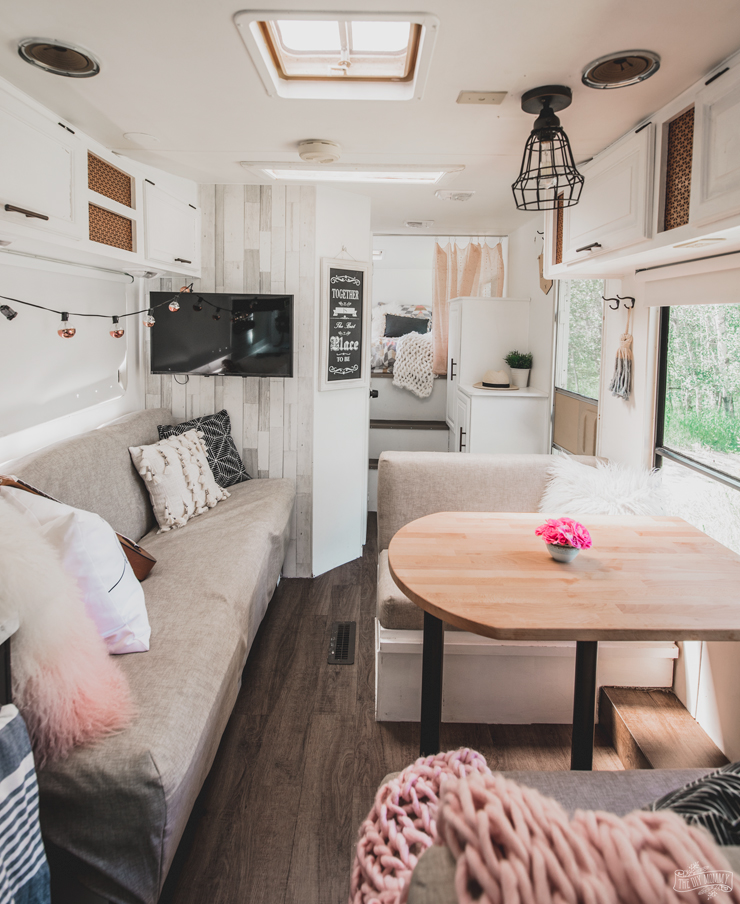
See how I slipcovered the jackknife sofa here and how I reupholstered the dinette cushions right here.
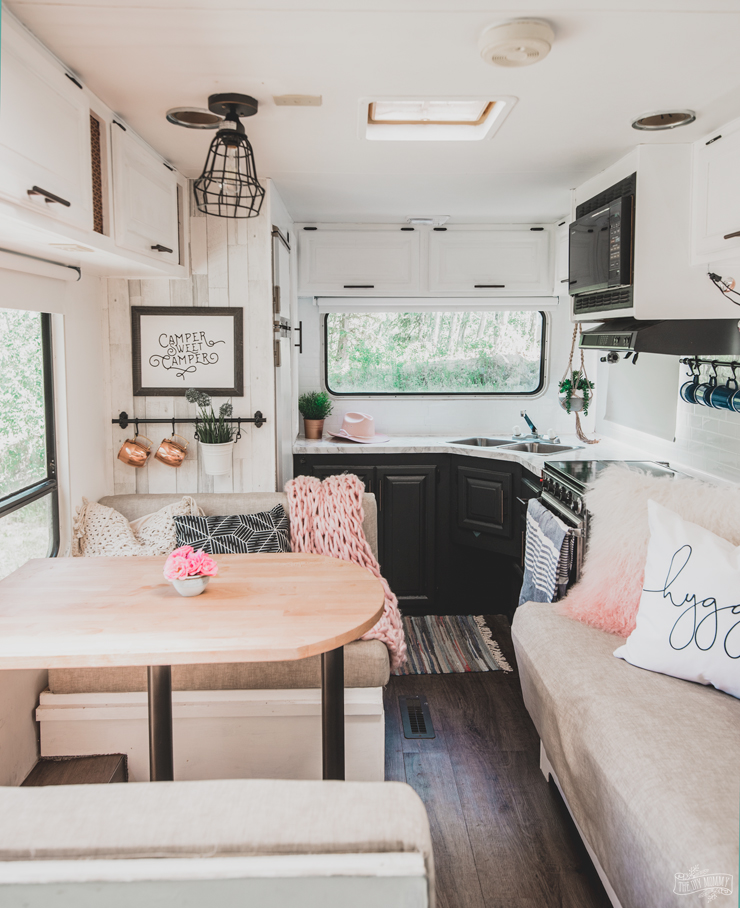
The painted cabinets have held up beautifully. I attribute that to the generous coat of Varathane Polyurethane that I applied on all of the cabinets to keep them from chipping. It’s really the best to protect painted items that get a lot of use!
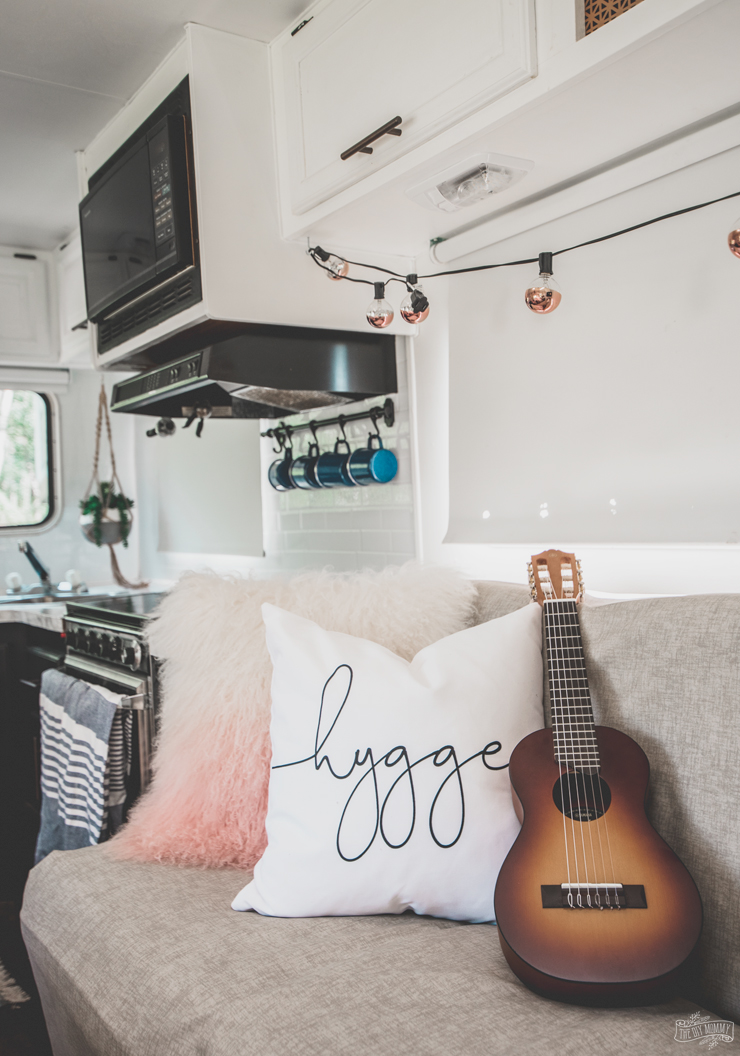
For this year, I’ve added a little bit of pink to the decor in our camper, and kept all of the copper and some of the blue elements. The “hygge” pillow is from my own collection, and we’ve also been taking this cute little guitelele from Amazon on our recent trips to learn to play some campfire songs!
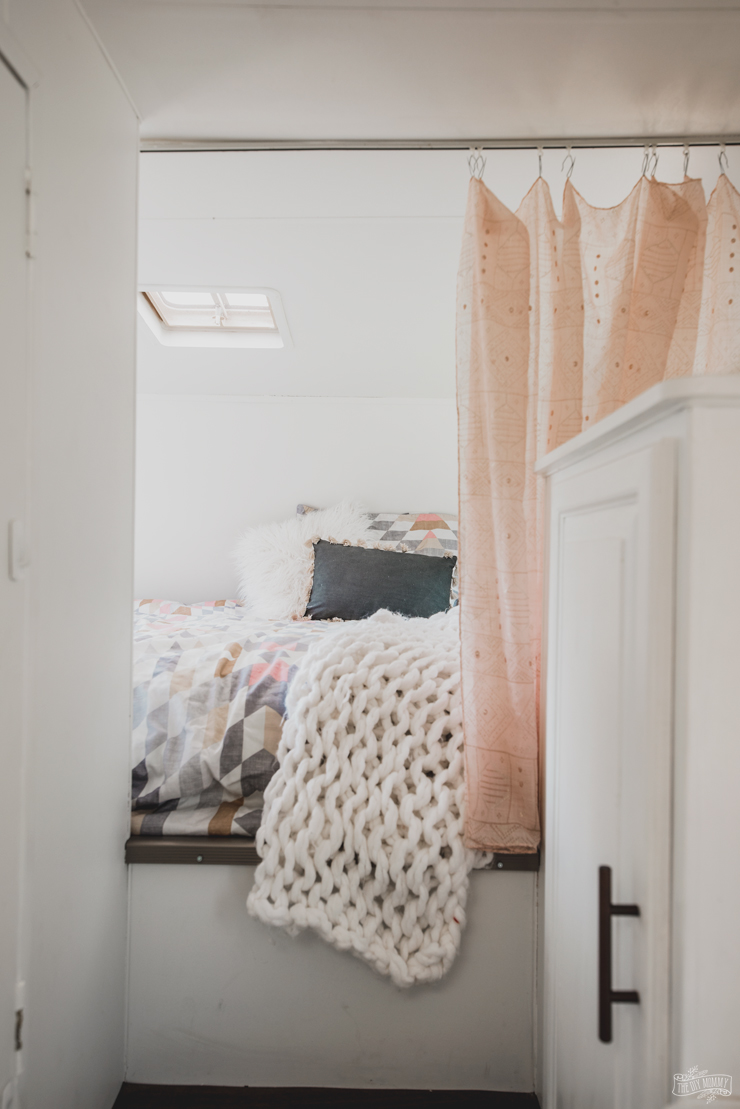
I was first inspired to put a little bit of blush pink into our camper’s decor this year when I found this pink, gold & grey duvet cover at Simons, and then I hung up a blush pink & rose gold scarf I had as a room divider.
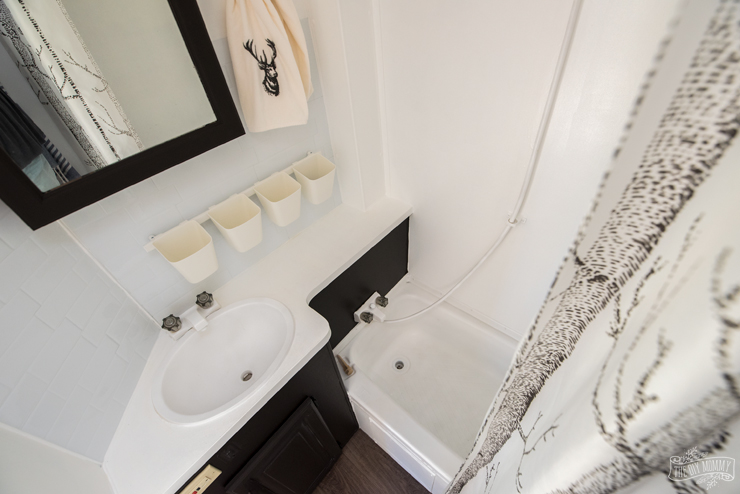
And don’t forget, I just renovated the tiny bathroom in here last month, and that’s been so much nicer to use this year!
I’ll be sharing some snaps from our recent camping trips here on the blog soon, but meanwhile here are the sources again for all of the items we’ve used in our camper renovation:
Our DIY Camper Source List:
- Paint: Valspar Ultra White, Benjamin Moore Simply White, Valspar Noir (lower cupboards)
- Wood Wallpaper: Home Depot (found in store; I can’t find a link online)
- Peel & Stick Tile: Smart Tiles Metro Blanco
- Marble Contact Paper for Counter
- Fabric: Shibori Design, Indigo Velvet, Indoor / Outdoor Griege Linen Look from Fabric.com
- Flooring: Allure Stayplace from Home Depot
- Cupboard Pulls
- Dinette Light Fixture (we hacked it to make it flush)
- Dinette 12V Edison Bulb
- TVs: 32″ Samsung Smart TVs from The Brick
- Mattress: Springwall Endeavour 3 Euro-Top Firm Queen Mattress from The Brick
- Melamine Dinnerware: Costco, in-store
- Copper Flatware: Walmart, in-store
- Copper Mugs: vintage
- Blue Enamel Mugs
- Spray Paint: Rustoleum Copper Rose & Oil Rubbed Bronze Metallic
- Aluminum Sheet (for cupboard inserts)
- Butcher Block Table Top: Gerton Desk top
- Black Out Blinds
- Hanging Rods
- LED Ceiling Lights
- Navy Bed Sheets
- Pink, Gold & Grey Duvet Cover
- “Hygge” pillow case
- Rustoleum Tub & Tile Epoxy
- Gloss-Off
- Varathane Triple Thick Polyurethane
- black hooks (bathroom)
- rail with cups (bathroom)

Come take a video tour of Our DIY Camper this year:
Thank you for coming along with me as I show you our camper this year! We just love it so much!
Disclosure: This post contains affiliate links. When you purchase a product via these links, I receive a small commission at no extra cost to you.
I absolutely love it. You’ve done an amazing job.
Thanks so much!!
Hey Christina aka DIY Mommy!
My friend & I found you on YouTube when we decided to renovate her older travel trailer. We followed & duplicated so many things you did to your RV especially your painting techniques/supplies! She is so happy with her little “get away on wheels” and we decided to call ourselves “DIY Grannies”!!!
Thanks so much for all your inspiration! Your RV is beautiful!!!
How fun is that!! So so cute
OMG. I am so in love with your camper. I recently redid our popup camper. This is inspiration for sure.
Thanks, Rachel
Hey there Christina. Did you say that trailer was only 1000$?!! How on earth did you find a deal like that?! The trailer is gorgeous. It’s inspiring. It makes living in a camper look purely blissful. Way to go!! I’m a prairie girl too, I looked last night on Kijiji and there’s NOTHING even close to that kind of deal!
Thanks Janet! Christina did luck out on he trailer!!
Thank you for the post.
Important things that you have to bear in mind during the design process should be the wheels/tyres and suspension. The specifications of these things will definitely affect the overall body design and chassis of your camper trailer.
Most definitely
OMG! Your Camper Reno is UNBELIEVABLE!!!! I am
Head Over Heels IN LOVE!!!!! We have an older camper
and we were thinking of selling it…but now that I have
seen your camper renovation, it brings so much Hope
& inspirations, as to what we can do with ours.
I Love EVERYTHING you did and will probably repeat
pretty much everything! Can’t thank you enough for
sharing this with us and for the check list of materials
and items you used. This truly is incredible and you
are an artistic (camper) genius!!!
THANK YOU, THANK YOU, THANK YOU!!!!!!!
Much Love & Blessings –
Aimee – Southern California
Hi There! How is the tub and tile epoxy holding up? Does your family and yourself use the tub frequently?
Thanks for the great post! You have covered here all the renovation of a home especially that sources mentioned like paint, tiles, led lightings and many more. Keep sharing posts like this!
Hi there! I LOVE your camper redo and have referenced it several times for sourcing of a few items. One thing I wondered is how you hung your IKEA Fintorp rails? We are new RV owners and have read time and again that you should not screw anything into your RV walls. We are exploring the option of a pop rivet gun but not sure it would work for this application. I would really appreciate some insight into how you hung your rails. Thank you in advance!
Thank you so much! I hung them with wood screws, but I’ve also seen people use construction glue to mount them!
Do you have a free printable for the Camper Sweet Camper sign? It is so cute!
Not quite yet but stay tuned!
Thank you so much for sharing..Love your DIY Camper
hi,
What are the inside measurements of the Van and the bathroom ? Love your renovation ! it looks fresh and comfy.
I’m not sure. The trailer is a 1992 Vanguard though 🙂
Hello!
Would love to know which camper model this was? I’m looking to renovate and the size of this one is exactly what I need!
It’s a 1993 Vanguard 🙂