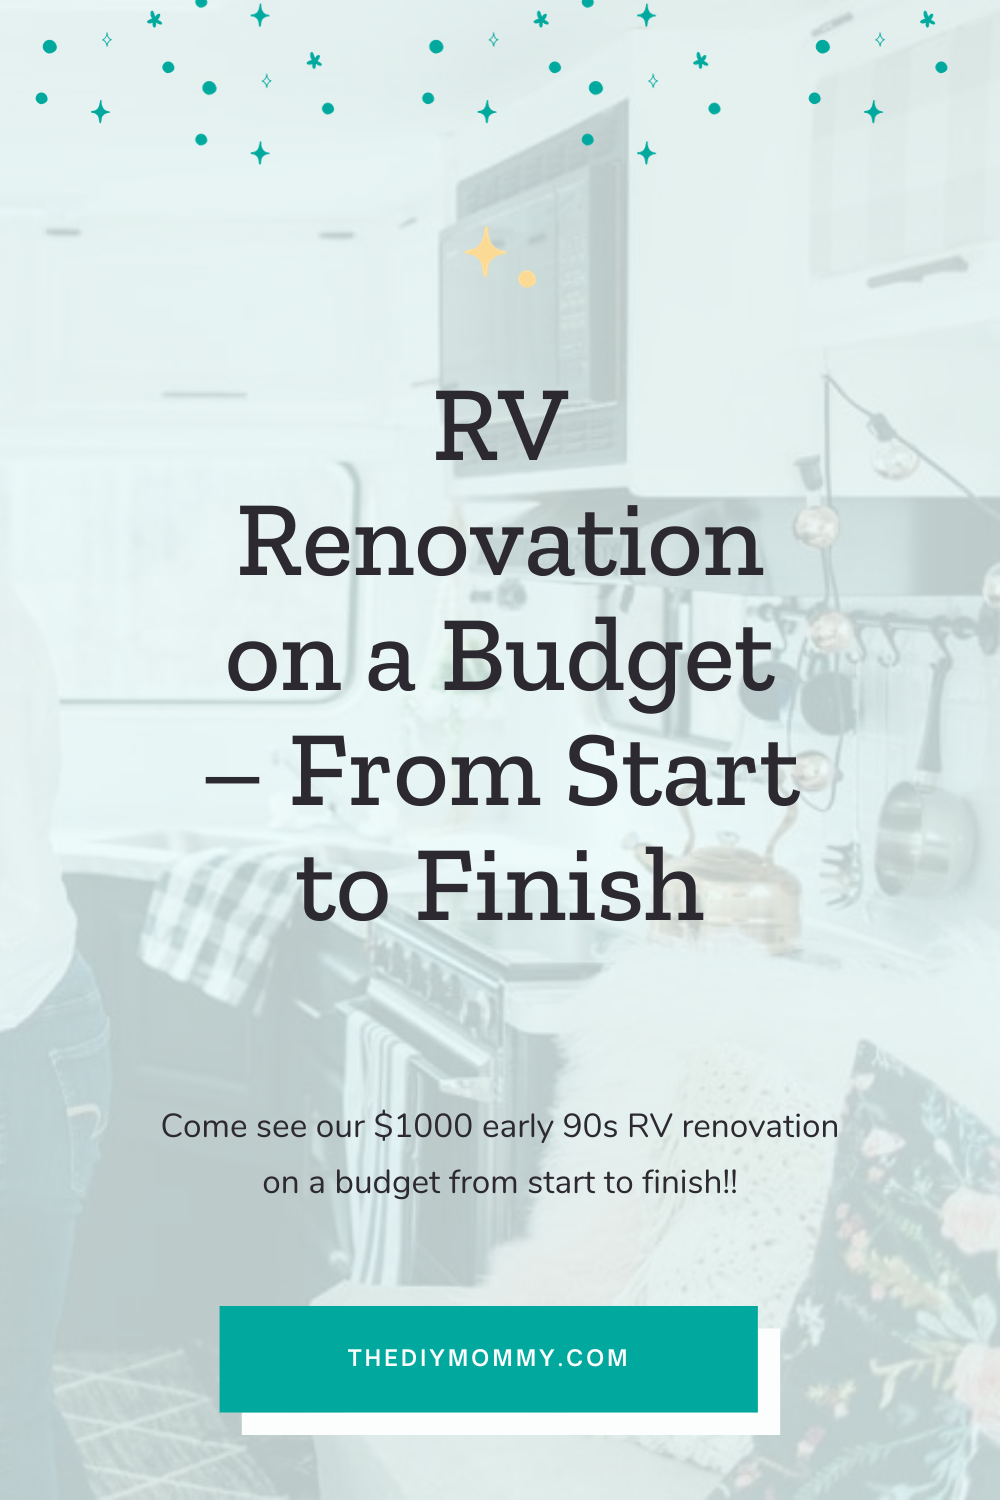
RV Renovation on a Budget – From Start to Finish
This post may contain affiliate links · This blog generates income via ads
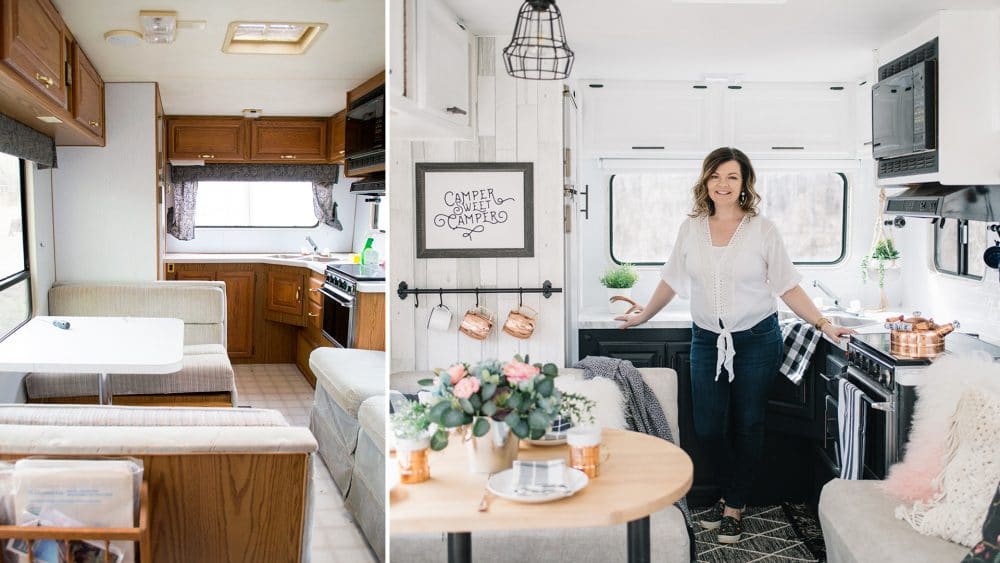
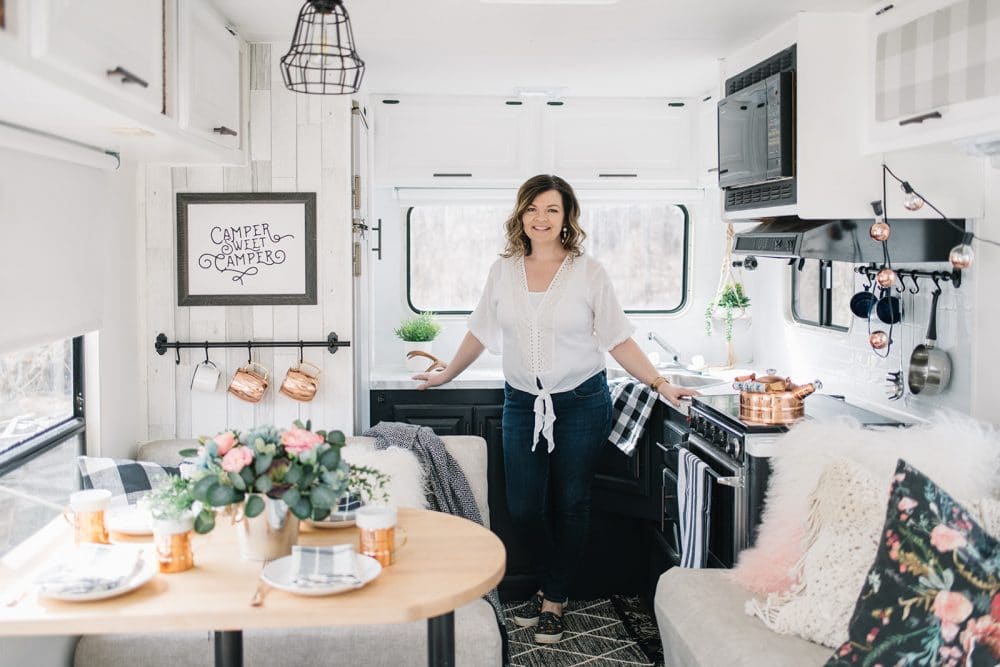
Come see our $1000 early 90s RV renovation on a budget from start to finish! Learn how to paint oak cupboards, reupholster camper cushions and seating, refinish an RV bathroom, and more to get you started on your journey of updating an old travel trailer. With a little hard work, you can make such a huge difference in the look of your old RV. Let me show you how!
By far one of the most asked about DIYs on my blog and YouTube channel is our RV renovation. I totally get it – we LOVE it too! We have made so many wonderful memories in it, and I love that we didn’t spend a ton of money to create a functional and beautiful little home on wheels for our summertime adventures.
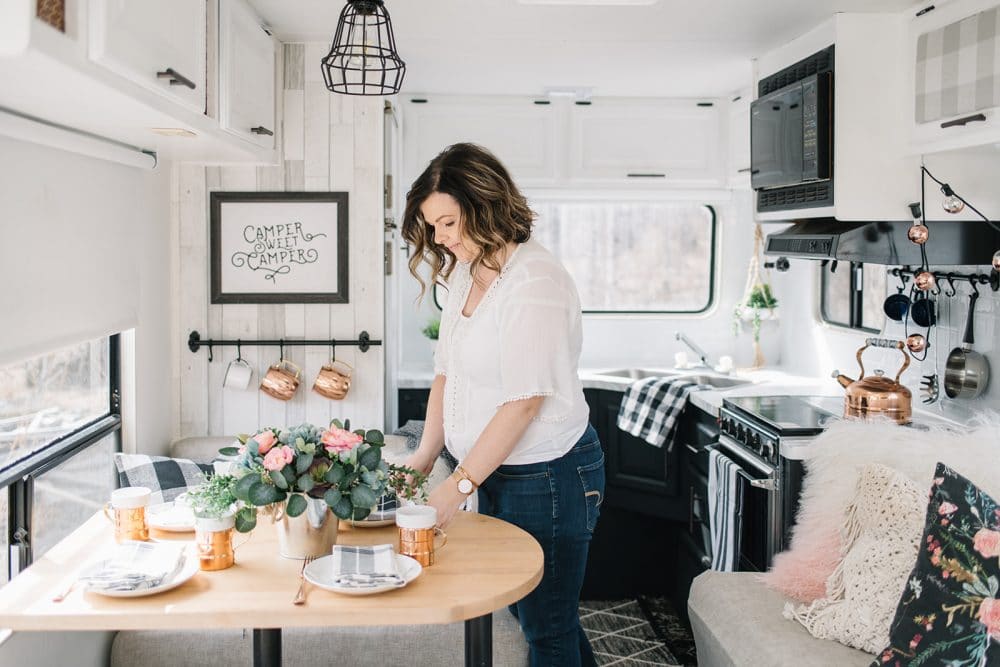
We started renovating our fifth wheel in May of 2017 and finished it in 2018 with the bathroom remodel. It was a ton of work and there were so many steps involved, so I thought it would be a good idea to compile a list of exactly what we did from start to finish in one giant blog post! Plus, these photos of the camper by Tracey Jazmin were too cute not to share. I love that they show how well everything has held up!
EDIT: This is my FIRST RV makeover! Want to see the LATEST RV that I renovated? Our second RV is a 30-foot Jayco fifth wheel that I started renovating in 2020. Click right here to check it out!
How much does it cost to renovate an RV?
Our 2018 RV renovation cost us about $1600 from start to finish. We did have many of the supplies on hand, and some were given to us too. We were also fortunate in that we didn’t need to replace the appliances, which can be a fairly large cost. You can expect bringing new life to your own RV to cost more or less, depending on how much work your trailer needs, what needs to be replaced, how much of the work you can do yourself, and how much time you’re willing to put in.
Please note that I’m a self-taught DIYer and not a trained professional, so this step-by-step guide is based on my experience only. However, if you love to do things yourself just like me, I think you’ll find these steps effective for doing your own RV remodel! This little camper makes us feel like very serious and joyful RVers, and I can’t wait to help you feel the same way.
RV Renovation: Step-by-Step!
I’m going to take you right back to the beginning of this entire renovation, back to before we were the RV owners of this cute little finished home away from home. We did a lot of research upfront and thought the whole thing through very carefully. I think it’s important to take you to the start of our process so that you can do the same!
Step 1: Find an Old Camper for Sale and Assess It
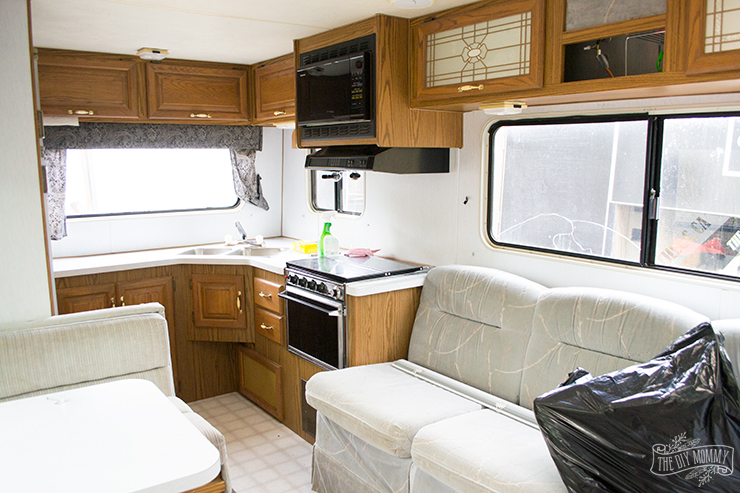
There are always lots of used RVs and campers for sale on buy-and-sell sites like Facebook Marketplace, Kijiji, and Craigslist. I often see them along the side of the road, too! We were lucky and found ours for only $1000. But even spending a few thousand on an old camper can be worthwhile if the camper is in decent shape. It’s still much less than a new RV, after all! When looking for a used RV, check for things like water damage (which is common), mechanical issues, electrical issues, and structural issues. Most other things like original furniture, upholstery, and finishes can be replaced easily. It’s also incredible what a big difference a few coats of paint can make, so try to look beyond all the original decor at this point. Decide what kinds of issues you are able to handle in terms of cost and labour, and make your decision based on this.
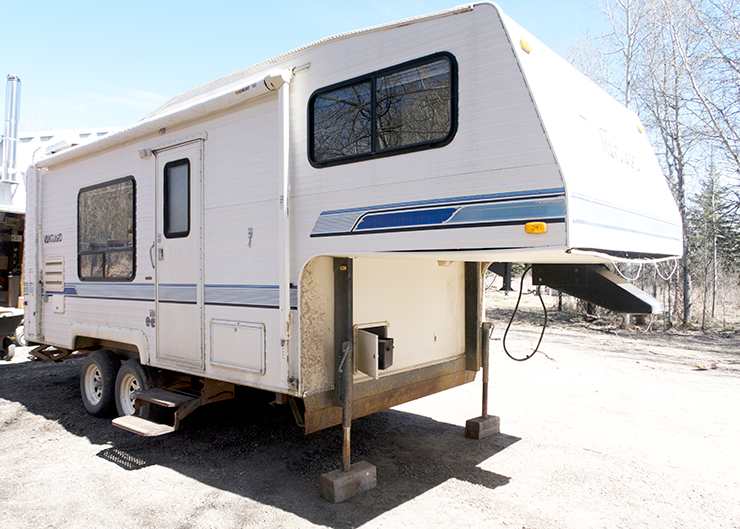
Step 2: Make any Necessary Repairs
Once you’ve purchased your new-to-you RV, the first thing you need to do is address all those structural, mechanical, or electrical issues that led to you getting your trailer for such a good price. Before working on fun things like painting and reupholstering, make these necessary repairs. In our particular case, we had to rip off the whole back wall of our fifth wheel and replace it because of water damage! There was water damage in the front too, which needed to be dealt with before we could go any further with our plans. Thankfully, my hubby is great at this sort of thing! I admit that there were points in this process where this “easy DIY project” didn’t feel so easy, but we pushed through and got to the fun part.
Step 3: Rip it All Out!
Now it’s time to begin those huge impact changes you’ve been looking forward to! Remove anything from the RV’s interior that you want to replace, like old window treatments, carpet, linoleum, blinds, fabric panels, etc. Don’t attack your couch or dinette just yet – you can fix those later. I removed all of the old soft furnishings and the carpet from our camper too, because I wanted fresh, easy-to-clean finishes. Dirt, mold, and other debris tend to hide in these soft furnishings, so I really recommend taking them out and going for a whole new look!
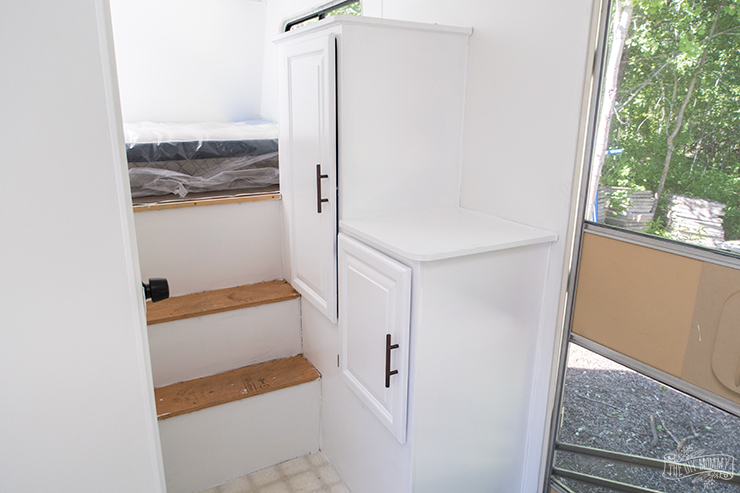
Step 4: Prime and Paint the Walls & Cabinets
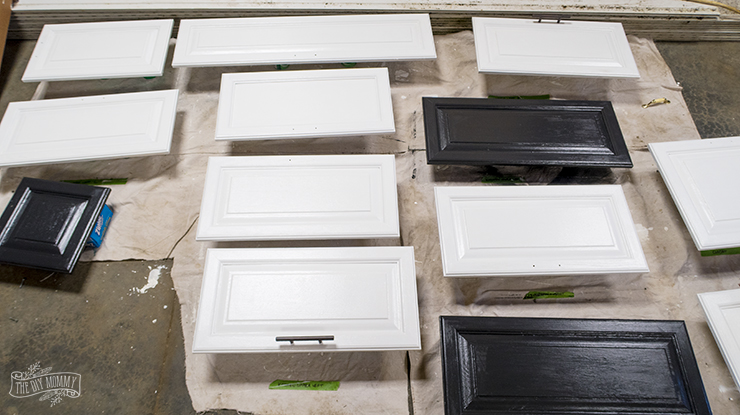
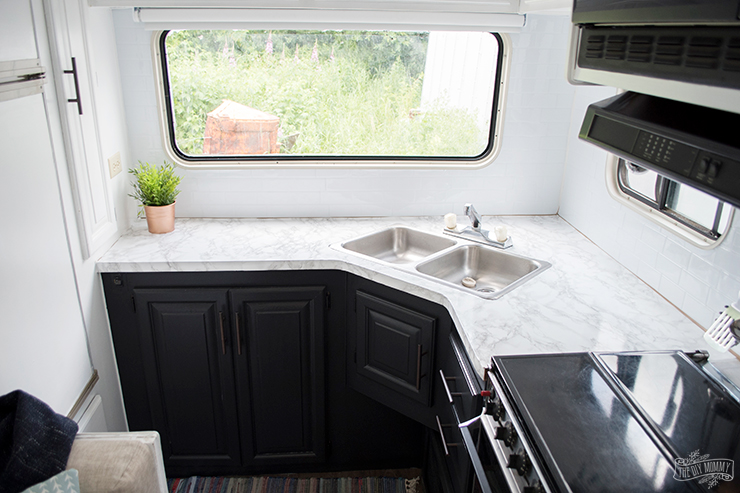
The most important and most time-consuming step of your RV renovation is the painting! Start in the kitchen area. Remove all of the doors from the kitchen cabinets in your RV. Then prime all of the walls, the ceiling, the cabinets, and the cabinet doors. Before painting I sanded everything with liquid sandpaper, used Killz oil-based primer, and finished with latex paint that I had left over from another project. I think that lighter colors make a small space feel bigger and brighter, so I used white paint. I painted the camper fridge the same way as the cabinets. You can also seal the cabinets with a Varathane sealant to prolong the life of the paint. If you want to go a little bit further with this update, you could spray paint the hinges and/or pulls on your cabinets. These minor changes can make such a difference in the look of your RV!
In the bathroom, you can use a paint specially formulated for painting over old bathroom fixtures to resurface your tub, shower, toilet, and sink if required. Get more details on our entire process of cupboard painting and camper kitchen renovation here.
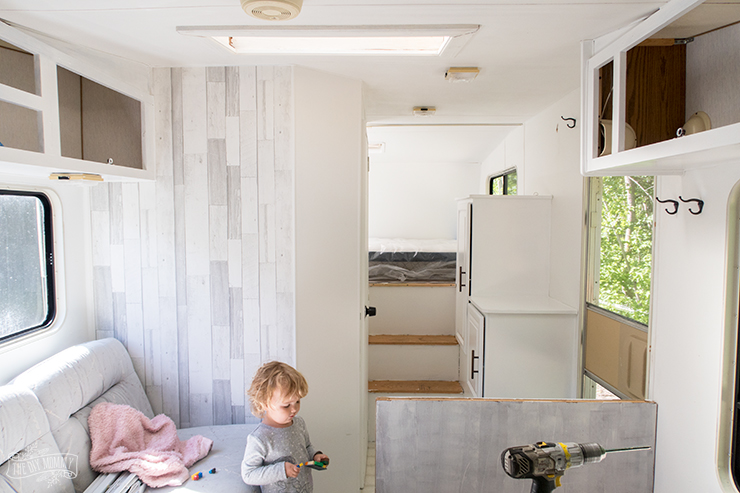
Step 5: Add Decorative Surface Treatments like Wallpaper, Contact Paper, and Peel-and-Stick Tile
Next, to give your RV some personality, you can add wallpaper and/or peel-and-stick wallpaper or tile to make an accent wall or two. It can also be used as a backsplash over the sink and counter on your kitchen wall. I recommend using a dehumidifier when applying things like wallpaper to make sure everything dries nicely. It’s also important to prime any walls you want to add paper or vinyl tile to. For one of those fun camper remodel projects that are really so easy to do, consider covering an old kitchen counter with marble contact paper like we did. I love how our counter has held up! You can also replace any fabric panels in the cupboards with something more modern and durable, like decorative tin panels. I spray painted and cut some of these to suit my style.
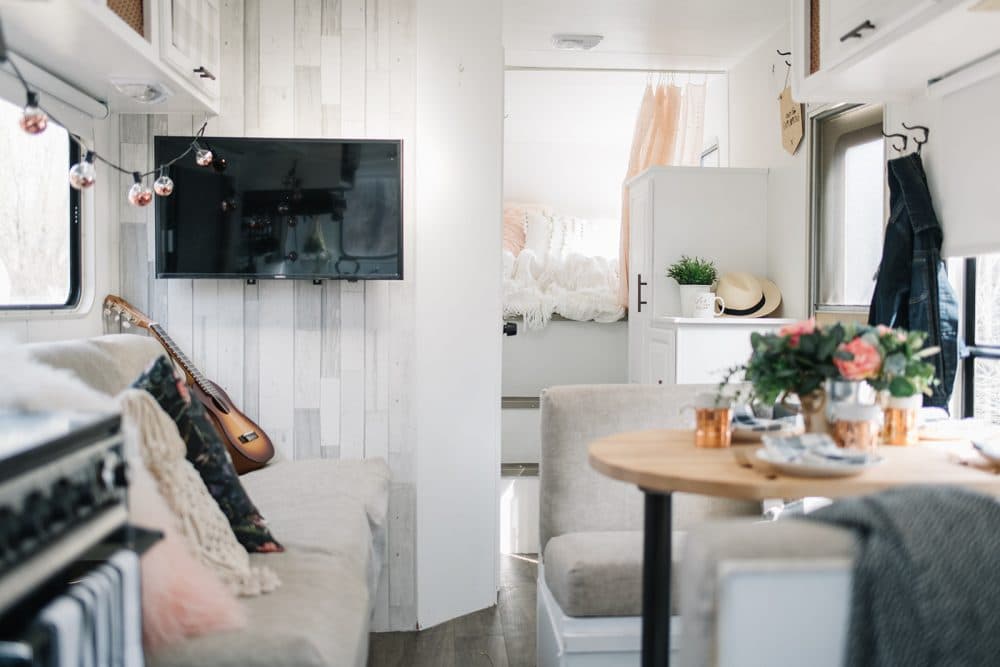
Step 6: Install New Hardware, Lighting, and Window Treatments
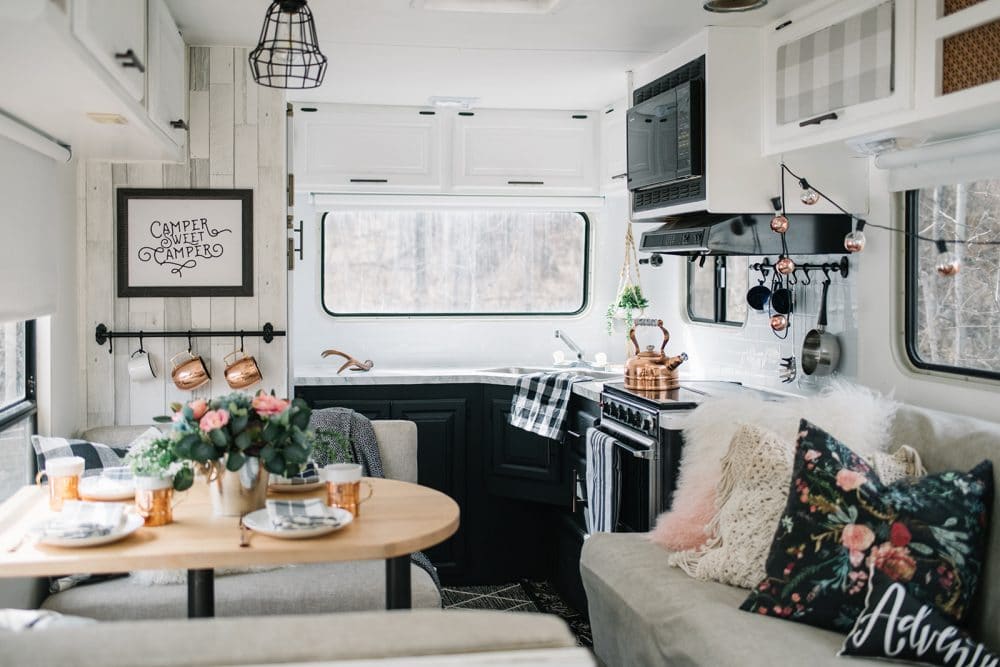
If you don’t want to paint the old ones, new cupboard pulls can make a huge difference in the look of your RV for a small extra cost. Buying hardware that fits the old holes in your cupboards makes it an easy swap! You can also use regular light fixtures in your camper if you want to make a statement chandelier. However, make sure you use light bulbs that are made specifically for RVs – they’re the 12-volt kind. We bought a pendant light, shortened it, and placed it over our dinette. Amazon has modern looking LED RV lights for a great price! For window treatments, consider installing simple blackout blinds that will help everyone sleep a little better. We found ours at IKEA. We also replaced our dinette table with an IKEA desktop and used the hardware from the old table for an easy swap.
Step 7: Recover or Slipcover Soft Furnishings
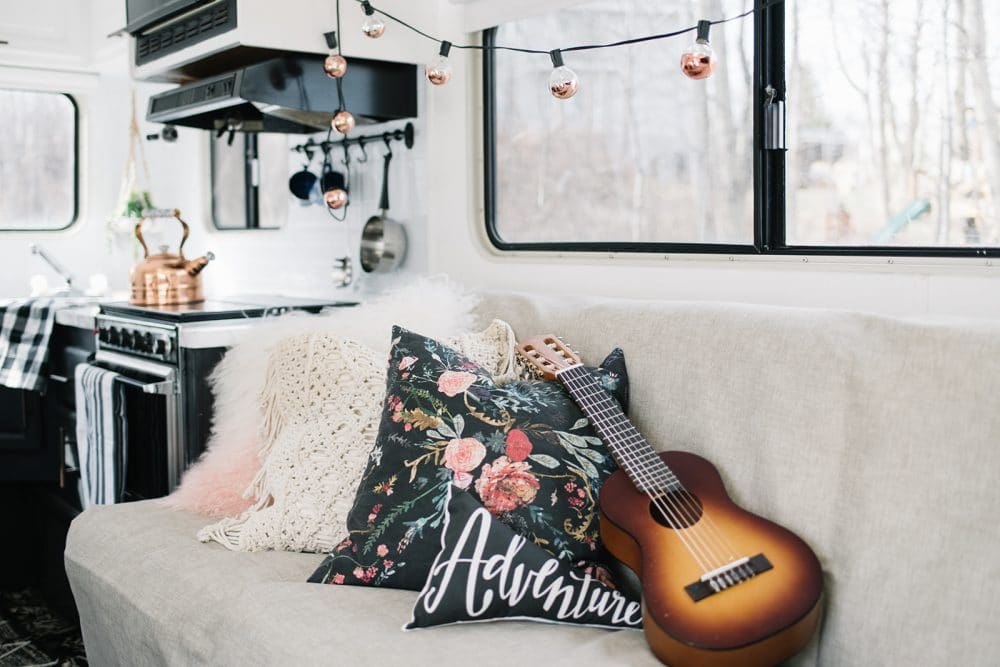
Next, if the foam in your sofa and dinette is still good, you can recover or slipcover them. I’ve already shared complete tutorials on how to do this, so you can learn how to recover dinette seats right here and how to make a slipcover for a jackknife sofa right here. Replace any foam that is destroyed, and replace any old mattresses. I would seriously recommend replacing any foam that has seen better days instead of simply recovering it. The process for creating new slipcovers is the same whether you use new or old foam, and the peace of mind you will get knowing that all the soft surfaces in your camper are clean (or at least, started that way before your family moved in!) is worth the few extra dollars.
Step 8: Install New Flooring
Consider installing vinyl plank as flooring for your RV renovation. It’s inexpensive, light, durable, and it’s easy to install! You can lay it over old vinyl and use a ruler and craft knife to cut it. We love how ours looks, feels, and wears! I still cannot believe the difference the new flooring has made in our camper living space.
Step 9: Add the Final Touches!
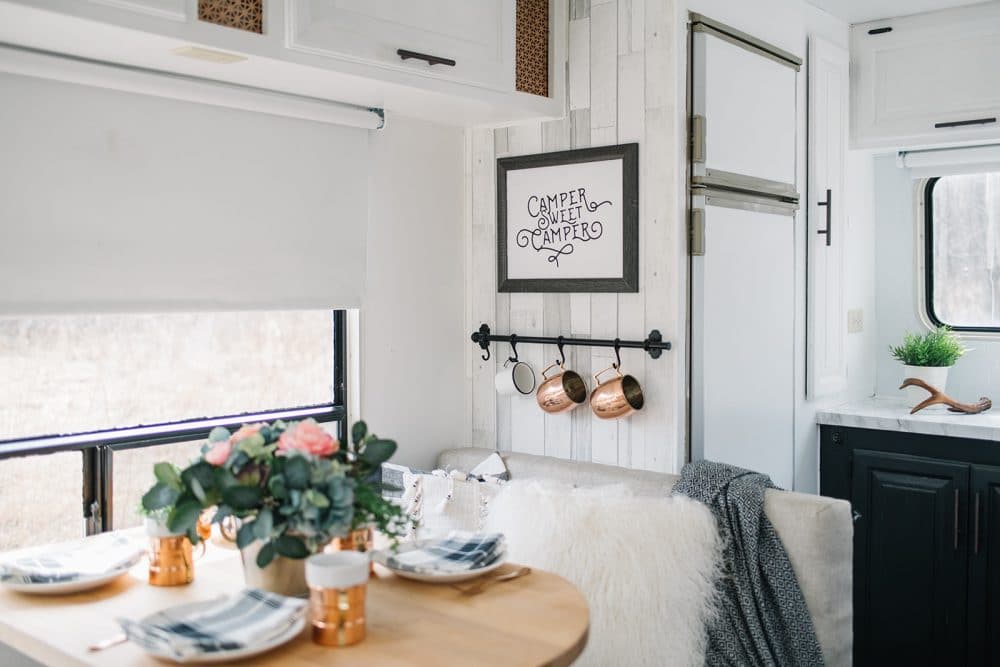
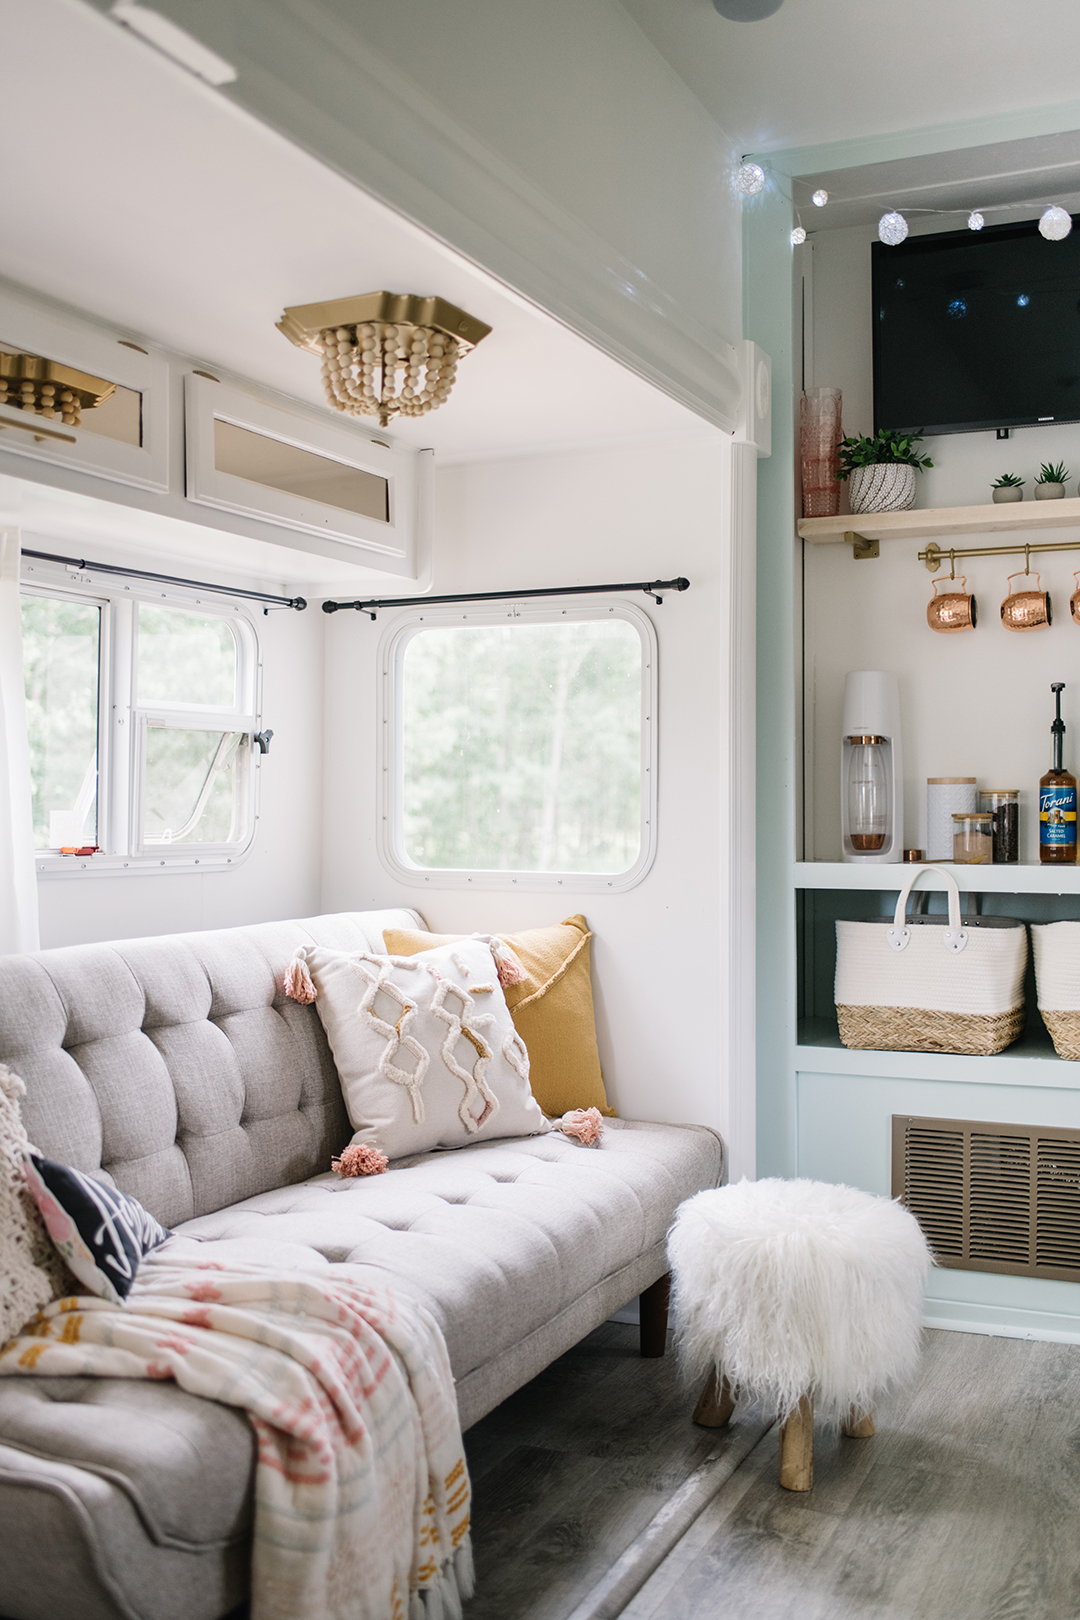
Finally, we’re at the fun part! Add some final accessories to make your RV both functional and beautiful. For extra storage I added hooks and bars to the walls (I used wood screws to attach them). Hooks added to the bottoms of your cupboards work great for mugs or pots and pan storage or decorative items. Attach art to the wall with wood screws or Command Photo Hanging Strips. Make some DIY pillow covers in your favorite colors to make your little home feel bright and cozy. And finally, find durable melamine or metal dinnerware that will hold up to the hard use it will get while out on the road!
Come see how I styled our camper in 2017, and see how I styled it in 2018 right here!
I would say that my most important RV remodel tip is to give yourself more time than you think you need to complete the renovation of your camper. These things always, ALWAYS take longer than you plan for, so don’t stress yourself out with a hard and fast deadline only a few weeks away. This project will be a lot of work, but you’ll be so proud when you’re done! And if you get your whole family involved, it stops feeling so much like work and starts to feel like family bonding time. After all, what kid doesn’t love ripping up carpet or baseboard? Or priming cupboards? The older your kids are the more they can help!
Our RV Renovation Source List:
Here’s the list of renovation materials and sources that I promised you! You can either purchase these exact products for your own RV makeover project, or you can use them as inspiration and a jumping-off point for your own ideas and tastes.
- Paint: Valspar Ultra White, Benjamin Moore Simply White, Valspar Noir (lower cupboards). I love the colour Simply White for any wall anywhere! But if you have paint left over from another project, feel free to use it instead.
- Wood Wallpaper: Home Depot (in-store)
- Peel & Stick Tile: Smart Tiles Metro Blanco
- Marble Contact Paper for Counter
- Fabric: Shibori Design, Indigo Velvet, Indoor / Outdoor Griege Linen Look from Fabric.com
- Flooring: Allure Stayplace from Home Depot
- Cupboard Pulls
- Dinette Light Fixture (we hacked it to make it flush)
- Dinette 12V Edison Bulb
- TVs: 32″ Samsung Smart TVs from The Brick
- Mattress: Springwall Endeavour 3 Euro-Top Firm Queen Mattress from The Brick
- Melamine Dinnerware: Costco, in-store
- Copper Flatware: Walmart, in-store
- Copper Mugs: vintage thrift store find! I cannot emphasize enough how helpful the thrift store can be in your quest for camper furnishings. Items are affordable, you won’t worry so much if you lose something or break it, and thrift store decor items that you would never put in your home might be perfect for the trailer!
- Blue Enamel Mugs
- Spray Paint: Rustoleum Copper Rose & Oil Rubbed Bronze Metallic
- Aluminum Sheet (for cupboard inserts)
- Butcher Block Table Top: Gerton Desktop
- Black Out Blinds
- Hanging Rods
- LED Ceiling Lights
- Navy Bed Sheets
- “Camper Sweet Camper” sign is a free printable here!
Watch my YouTube video on how to renovate an RV on a budget:
There you have it: everything you could possibly need to know to begin your own RV makeover, including my step-by-step process and all the materials I used to get my camper looking exactly the way I want. We’ve LOVED using our renovated camper, and I know you will love yours too! Our exciting, comfortable RV travel days have totally been worth all the time and work both Sean and I put in to get us to this point. I can’t wait to see before and after pics of your own project! Tag me @thediymommy with your DIY camper!
Happy camping, everyone!
Pin Me:
Vintage Glam RV Renovation
Looking for more inspiration? Next up, I give you my DIY Camper 2.0! I enjoyed doing the first RV renovation so much that I decided to do a camper that was newer and had more space for my three kids to sleep comfortably. Let me show you the main area makeover of the camper, plus all the steps it took to get here!

How to Renovate an RV
Come see how we renovated our early 90s $1000 camper from start to finish on a budget! Learn how to paint oak cupboards, reupholster camper seating, refinish an RV bathroom and more to update an old travel trailer.
Materials
- Used RV
- Oil Based Primer
- Latex Paint
- Spray Paint
- Tub & Tile Paint
- Varathane Sealant
- Wallpaper
- Peel-and-Stick Tile
- Contact Paper
- Drawer Pulls
- Decorate Sheet Tin
- Indoor/Outdoor Fabric
- Velcro
- Blackout Blinds
- Vinyl Plank Flooring
- Light Fixtures
- 12V Light Bulbs
- Wall Hooks
- Wood Screws
Tools
- Staple Remover
- Crow Bar
- Paint Brush & Tray
- Sewing Machine
- Foam Brush
- Safety Mask
- Utility Knife
- Ruler
- Drill
Instructions
Find an Old Camper for Sale & Assess It
There are lots of used RVs for sale on buy-and-sell sites like Facebook, Kijiji and Craigslist. I often see them along the side of the road, too! We were lucky and found ours for only $1000, but even spending a few thousand on an old camper can be worth it if the camper’s in decent shape. It’s still much less than a new RV! When looking for a used RV, check for things like water damage (common), mechanical issues, electrical issues and structural issues. Most other things can be repaired easily (like upholstery and finishes).
Make any Necessary Repairs
Before working on the more fun things like painting and reupholstering, make any repairs to the structure or mechanics of your camper. We had to rip off the whole back wall of our fifth wheel and replace it because of water damage. You can see water damage in the front here too, which also had to be replaced. Thankfully, my hubby is great at this sort of thing!
Rip it All Out!
Remove anything from the camper that you want to replace like old window treatments, carpet, linoleum, blinds, fabric panels etc. Don’t attack your couch or dinette just yet – you can fix those later! I removed all of the old soft furnishings and carpet from our camper because I wanted fresh, easy-to-clean finishes.
Prime & Paint the Walls & Cabinets.
This will be the most time consuming step of your renovation, but it will make the biggest difference. Remove all of the cabinet doors in your RV, and then prime all of the walls, ceiling, cabinets and cabinet doors. I sanded everything first with liquid sandpaper, used Killz oil-based primer, and finished with latex paint. I painted the camper fridge the same way. You can also seal the cabinets with a Varathane sealant to prolong the life of the paint. For an inexpensive update, you can also spray paint the hinges and/or pulls on your cabinets. In the bathroom, you can use a paint especially formulated for painting over old bathroom fixtures to resurface your tub, toilet and sink if required.
Add Decorative Surface Treatments like Wallpaper, Contact Paper & Peel-and-Stick Tile
To give your RV some personality, you can add wallpaper and/or peel-and-stick tile to accent walls and the kitchen wall in your camper. I found a dehumidifier to be essential when applying things like wallpaper so that everything dried nicely. It’s also important to prime any walls you want to add paper or vinyl tile to. Consider covering an old kitchen counter with marble contact paper like we did; I love how our counter has held up! You can also replace any fabric panels in the cupboards with something more modern and durable like decorative tin panels. I spray painted and cut some to suit my style. We completely replaced our dinette table with an Ikea desk top and used the hardware from the old table.
Install New Hardware, Lighting and Window Treatments
If you don’t want to paint the old ones, new cupboard pulls can make a huge difference in the look of your RV. Buying hardware that fits the old holes of your cupboards makes it an easy swap! You can use regular light fixtures in your camper if you want to make a statement chandelier, just use light bulbs that are especially for RVs – they’re the 12 volt kind. We used a pendant light an shortened it for over our dinette. Amazon has modern looking LED RV lights for a great price! For window treatments, consider installing simple blackout blinds that will help everyone sleep a little better. We found ours at Ikea.
Recover or Slipcover Soft Furnishings
If the foam in your sofa and dinette is still good, you can recover or slipcover them. I’ve shared complete tutorials on how to do this, and you can learn how to recover dinette seats right hereand how to make a slipcover for a jacknife sofa right here. Replace any foam that is destroyed, and replace any old mattresses.
Install New Flooring. Consider installing vinyl plank as flooring for your RV.
It’s inexpensive, light and durable, and it’s easy to install! You can lay it over old vinyl, and you can use a ruler and craft knife to cut it. We love how ours looks, feels and wears!
Add the Final Touches!
Now’s the extra fun part – adding the final accessories to make your RV both functional and beautiful. Add hooks and bars to the walls for added storage (I used wood screws to attach them), add hooks to the bottoms of your cupboards for storage or decorative items, attach art to the wall with wood screws or Command Photo Hanging Strips, make DIY pillow covers in your favourite colours to make your little home feel bright and cozy, and find durable melamine or metal dishware that you can store in your camper for your first trip!
Notes
I’m a self-taught DIYer and not a trained professional, so this step-by-step guide is based on my experience only. However, if you love to do things yourself just like me, I think you’ll find these steps effective if you’re renovating your own RV! Give yourself more time than you think to complete the renovation of your camper. It will be a lot of work, but you’ll be so proud when you’re done!
Recommended Products
As an Amazon Associate and member of other affiliate programs, I earn from qualifying purchases.
-
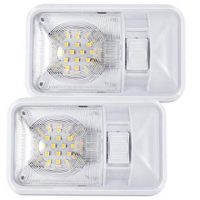 Kohree 12V Led RV Ceiling Dome Light RV Interior Lighting for Trailer Camper with Switch, Single Dome 300LM Each (Pack of 2)
 -
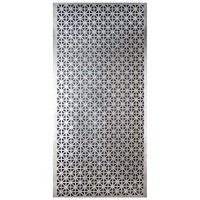 M-D Building Products 57319 Decorative Union Jack Aluminum Sheet
 -
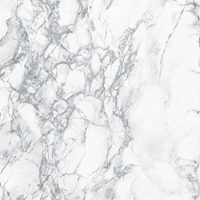 d-c-fix Decorative Self-Adhesive Film, Grey Marble, 17.71" x 78" Roll - 2 pk
 -
 Smart Tiles Peel and Stick Backsplash and Wall Tile Metro Blanco (Pack of 4)
I super love the outcome of your RV! All the details are on point!
Your trailer is very similar to our Nomad which helps immensely. How did you get power for your flat screen on that wall? I don’t see any cords hanging!
How long does an RV makeover usually take?
Christina worked on it over the course of a few months… it’s a lot of work but that’s how she kept the price down 😉
It such an wonderful DIY project. Describe very nicely from A to Z. Thanks for sharing all your throughout with us.
Absolutely this your RV renovation. My husband and I have been talking about getting an old vintage camper and you certainly show how to get it done. Thanks for sharing at #HomeMattersParty
What great results you have. I like the idea of renovating an RV. Make it more like home.
Thank you! It absolutely does feel more home-ey 🙂
What a stunning transformation! That turned out beautifully. Thank you so much for sharing with us at the Summer Fun party. Pinned!
Thanks so much!
You’re very good at it! It’s unbelievable! Good transformation.
What an amazing remodel with lots of great tips! This will be one of my features Monday at the Summer Fun Link Party!
Wow!!!!! This makeover is amazing! The small changes made a HUGE difference and brought this rv into the present. Love it!
You did such a beautiful job on your trailer reno, Christina! So much attention to detail. The marble contact paper counters look amazing. I know how much work it is but I also know how rewarding it is when you’re finished and enjoying it every summer. Your post brought back so many memories from (I’m dating myself here) the late 70s when I updated a trailer from the early 60s. Put a lot of miles and memories on that trailer.
Hi Christina…
Great article! I too have an older RV and I love the tips you have shared here. It looks like your renovation turned out amazing. Hope when I decide to finally do this it will look as nice as your RV.
Thank you,
Bob
Hi Christina, I found an RV that would be perfect for a renovation like this. Im curious as to how much I should budget. It’s in great condition so would be interior changes only.
Thanks!
Christina spent around $1200 but she had a lot of paint at home that she could use so, it just depends on whether you have access to leftover
supplies or if you’re buying everything 🙂
Wow, Christina…. You did a bang-up job on this RV, and on such a great budget! The colors are perfect… love the black that ‘grounds’ the light and airy feel! I saw this over at the Handmade and Otherwise link party and clicked right over! If you have time, we would love for you to join us at Tuesday Turn About! We close tonight at midnight CST, but we open again on Tuesday at 5pm cst! Hope to see you there!
Thanks Julie! I’ll check it out on Tuesday!
Hi Christina,
Thanks for this article.
I love your result in your RV renovation. Just quick question though my work with contact paper in the past is tough to go over corners or edges like countertops. Do you have any tips to help make this area stick better?
Hi Jennifer!
Christina didn’t have any problems, but I’m wondering if it has to do with the brand of contact paper she used? It seemed to be extra sticky. She also really scrubbed down all the edges of the counter before applying the contact paper. Here is the one that she used: https://www.amazon.com/dp/B00Z7VN2PM?ascsubtag=.MjI4Mzg0LTA.a395186e-cf2d-11e9-a23f-25ed6bf51bbf&tag=rewardstyle-20
Hi there! Thanks for this tutorial. I’m looking for a toilet DIY makeover and I guess its not that popular lol
Hi there! I was wondering if your RV had wall paper on the inside before you painted it? If so, did you peel the wall paper off first or paint over it? Thank you 🙂
She primed and painted right over the wallpaper. It was a vinyl sort of material.
Hello,
it’s my first time to commenting anyplace when I read this paragraph i thought i could also create comment due to this good piece of writing.
This is EXCELLENT!! I am in the process of renovating our RV and this is going to be so helpful!! Thank you so much for taking the time to make this video and provide step-by-step instructions. One question, though – where did you get that floral pillow in the photo (behind the guitar)? It is everything to me!
Hi Tina! I’ll pass your kind words on to Christina 🙂 She sewed that pillow from fabric she found at Spoonflower.com
Wow what a beautiful renovation. I am wondering about your dining table. Where did you find yours? I am looking to replace our table and bench dinette with something else.
Gorgeous! I am starting an RV renovation in the next few weeks and using this as inspiration. I am just curious how much paint I should buy? I don’t want to run out but I also don’t want to have a ton left over. Thanks and again, what a beautiful transformation!
Wow, Christina…. You did a bang-up job on this RV, and on such a great budget! The colors are perfect.
Hi,
Love this ! I am actually in the process of DIY my trailer 🙂 Where would I find the bedroom makeover ? Thanks 🙂
I am trying to find the blackout blinds you installed from Ikea, when I click on link does not give them to me ……….can you give me more info please ……..Thanks
What brand/type of fabric did you use to recover your cushions? Trying to find the best cost effective material
I read your post and I really like it, Thanks for sharing useful information.
The white paints that are listed-there are 2 different ones-I assume one is for the walls and the other for the cabinets? Thank you!
Such cute reno! We did an RV renovation in 2018 before we full-timed for 3 years. Lots of work but so worth it to make the tiny space our own! The best part of our tiny home on wheels was changing out the old mattresses for better mattresses that ensured a good night’s sleep in between adventures!